
~
It seems somehow unfeeling to sit in a warm, dry house and post a cheerful crochet pattern on a day when so many people are suffering the effects of Hurricane Sandy. My prayers go out for all who are hurt, without power, stranded, bereaved, or suffering the effects of flooding.
~
What have you been crocheting lately? Here at Micawber Towers, Back Loop Slip Stitch has taken over for the nonce.
It started with an idea for leg warmers (the Micawber ankles get veeery chilly in fall and winter), and morphed into this versatile stitch pattern:
 |
| Ribbonberry |
Back Loop Slip Stitch yields a very stretchy ribbed fabric. Throw in a few bobbly clusters every other row, and amazing things begin to happen in terms of texture and visual interest:

Ribbonberry is completely customisable. One stitch pattern + different yarns and hook sizes + variations in the amount of the ribbing stitches at either edge = all kinds of fun and warm projects.
It makes a lovely cowl (pattern found below):

Or toasty mitts (click here for the post which explains how to make the mitts):

Or even leg warmers (these are a work in progress - pattern tips can be found here):

The Ribbonberry tutorial also features a special seaming method which produces an almost invisible slip stitch seam.
A few words about slip stitch crochet: this is not the kind of crochet you can do while watching TV instead of your hands. It takes a bit of attention, and some faithful row-counting. Slip stitch projects grow slowly - but the results are well worth it. If you've never tried slip stitch crochet (or have tried and given up in despair), give it a shot. Start with a chunky yarn and a large hook, make a swatch or two, and see how fun and addictive it can be.
And now to the important stuff....
Project Size: As big or small as you like!
Cowl sample is 6-3/4" wide by about 20-1/2" around
Mitt sample is 5-1/2" long
Leg warmer is 12" long, custom width
Yarn Requirements:
Any yarn can be used; quantity needed depends on project size and yarn weight. Here's how much my projects took:
Cowl ~ About 110 yards of chunky yarn. (You could also use a double strand of medium weight yarn to achieve a chunky effect. A cowl made from lighter weight yarn will use more.)
Mitts ~ About 50-60 yards of medium-weight yarn per mitt (very approximate)
Leg warmers ~ 100-150 yards per leg, depending on length and circumference
Yarns I Used:
Cowl ~ Lion Brand Baby's First (Weight Category 5, or Chunky), colour Fairy Tale
Mitts ~ NaturallyCaron Country (Weight Category 4, or Worsted), colour Spruce
Leg warmers ~ Stitch Nation Bamboo Ewe (Weight Category 4, or Worsted), colour Grape, from a frogged project
How Did the Yarns Behave?
Lion Brand Baby's First (pink), though soft to the touch, makes a firm fabric. It's a bit stiff for the cowl, but I think it will soften up in time; however, if I make another chunky cowl, I will choose a softer yarn. The yarn tends to split if frogged and re-worked.
NaturallyCaron Country (teal) is a superb yarn for the price, with great stitch definition and a lovely drape.
Stitch Nation Bamboo Ewe (purple), a wool/bamboo blend, has a lovely hand but can stretch horribly when wet-blocked. I'm frogging a previous project that stretched out of shape, and using the yarn for the leg warmers, hoping that they'll keep their shape (since the yarn is already relaxed, so to speak).
Hook Size:
Use a hook size that is comfortable for you and gives a relaxed stitch that is easy to get your hook into. Start with a larger hook than recommended for your yarn; swatching will help you to determine the best hook size. If your stitches are loose and sloppy after several rows, go down a hook size. If you struggle to get your hook into the loop while making a stitch, go up a hook size.
Hooks I used:
Cowl ~ Size N/13, 9mm
Mitts ~ Size J/10, 6mm
Leg Warmers ~ Size J/10, 6mm
Notions:
Not applicable.
All crochet terminology is American.

Ribbonberry Chunky Cowl Pattern
(Click here for the post which tells how to make mitts or leg warmers.)
Super Important Tips: Keep your stitches LOOSE! Resist the urge to tug on the yarn. With every slip stitch, insert the hook through the indicated stitch and keep sliding it through until the thickest part of the hook is under the loop - then pull it back and make the slip stitch. If you're a tight crocheter, make a conscious effort to pull up each loop a little taller than usual.
Special Stitch Abbreviations:
Yo-sc (Yarn over-single crochet): yarn over, and make single crochet as usual, leaving 2 loops on hook.
Yo-wsc (Yarn over-Wide single crochet): used when there is an extra loop on the hook. Yarn over, insert hook in indicated stitch, pull up loop, yarn over, pull through 3 loops, leaving 2 loops on hook. (This is pretty much the same as a half-double crochet, except that you're starting and ending with an extra loop on the hook.)
Wsc (Wide single crochet): used when there is an extra loop on the hook. Insert hook in indicated stitch, pull up loop, yarn over, pull through all 3 loops on hook.
Pattern Notes:
~Ribbonberry is made using an easy 4-row repeat. Rows 1 and 3 are "berry" rows, made up of berry bumps and slip stitch "valleys"; rows 2 and 4 are slip stitch only "ribbon" rows.
~Berries will look very puffy when you make them, but will flatten out as more rows are added.
~The ch-1 in the berry tends to tighten up; be careful not to skip over it when stitching the following plain slip stitch rows.
~Berry rows will always be worked towards your starting yarn tail; plain slip stitch rows will always be worked in the other direction.
Pattern Stitch:
A test swatch is strongly recommended. (Knotless ch 15 for a test swatch and make at least 8 rows of pattern stitch, changing hook size if necessary to find the best fit.)
To make a knotless chain, wrap yarn from left to right (or right to left if you're a left-handed crocheter), across front of hook and around back, bringing tail back over working yarn and towards you. Grasp the place where the strands cross, and gently start chaining.
For project, knotless chain (number of ribbing stitches x 2) + (multiple of 4 for berries/vallies) + 1 for turning. Turn.
My cowl's top and bottom ribbing is 3 stitches wide, with 4 berry/valley motifs between the ribbing, so I chained 23: (3 x 2 for ribbing) + (4 x 4 for motifs) + 1 for turning.
All stitches are made in the back loop unless otherwise indicated.
Row 1 (RS): Sl st 3. *Make berry: sc in next st, ch 1; yo-sc in front leg of sc just made; yo-wsc in same space (3 lps left on hook). Sk 1 st, wsc in next st, sc in next st. Berry made. Sl st 4. Valley made.* Repeat from * to * across until 3 st remain in row. (If you chained for an odd number of berry/valley motifs, finish with berry, leaving 3 st remaining in row.) Sl st 3, ch 1, turn. (A video demonstration of the berry stitch can be found in the tutorial below.)
Row 2 (WS): Sl st across.
Row 3: Sl st 3. *Sl st 4. Make berry as above over next 4 st.* Repeat from * to * across until 3 st remain in row. (If you chained for an odd number of berry/valley motifs, finish with sl st 4, leaving 3 st remaining in row.) Sl st 3, ch 1, turn.
Row 4: Same as Row 2.
Repeat Rows 1-4 until cowl is desired length, ending with Row 3. Ch 1, but do not turn.
Mrs. Micawber's Nearly Invisible Slip Stitch Seam: Butt edges together. Remove hook from working lp. With RS facing, insert hook from front to back, under 2 strands of starting ch st edge lp. Place working lp back on hook; pull lp through. *Sl st in next st of final row, remove hook from working lp, insert front to back through single strand of next starting ch st, replace working lp on hook, pull through.* Repeat from * to * until seam complete, being careful not to miss the last stitch on each edge. (A very short video demonstration of this seaming method can be found in the tutorial below.) Cut yarn and tie off; weave in ends. Block if desired.
 |
| How easy was that? :) |
Ribbonberry Cowl Photo Tutorial with Instructions in Plain English
Be sure to read through the Super Important Tips, the Special Stitch Abbreviations, and the Pattern Notes above. There will be a test at the end of this post. (Just kidding!)
I'm going to assume you're using the same number of stitches I did; however, feel free to make your cowl wider or narrower. (If you do, the math is up to you.)
Don't Forget: All stitches are made in the back loop unless otherwise indicated!
Knotless chain (number of ribbing stitches x 2) + (desired multiple of 4 for berries/vallies) + 1 for turning. TURN.
To make a knotless chain, wrap yarn from left to right (or right to left if you're a left-handed crocheter), across front of hook and around back, bringing tail back over working yarn and towards you. Grasp the place where the strands cross, and gently start chaining. (Don't tug on the yarn end or you'll turn your first chain into a knot.)
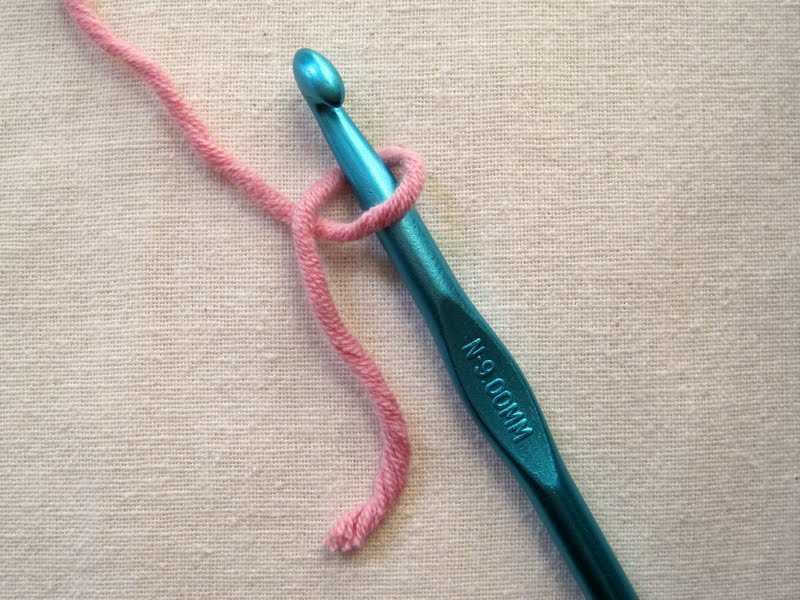
My cowl's top and bottom ribbing is 3 stitches wide, with 4 berry/valley motifs between the ribbed edges, so I chained 23: (3 x 2 for ribbing) + (4 x 4 for motifs) + 1 for turning.
(For a wider cowl, you could chain 26, which would give you 5 motifs between the ribbed edges.)
Remember: The last stitch is your turning stitch, and the first stitch of Row 1 will be made in the back loop of the NEXT stitch.
If you're wondering how to recognise the back loops, take a look at your chain. It should look like a row of little Vs. The front loop is the one closest to you; the back loop is the farther one. I've marked the first several back loops in my chain with dots in the photo below:

Let's make some ribbing and berries!
Row 1 (Right Side):
Starting in the second stitch from the hook, slip stitch 3:

Now it's time to make a berry. Each berry stretches across 4 stitches of the row below.
Berry
In the next stitch, single crochet, then chain 1. Find the front "leg" of your single crochet:

Yarn over-single crochet in front leg of single crochet...
(What? You didn't read the Special Stitch section? Here's a short review: yarn over, then make a single crochet as usual. You will have 2 loops left on your hook.)


...Now yarn over-wide single crochet in same space (insert hook, pull up loop, yarn over, pull through 3 loops, leaving 2 loops on hook:

Skip 1 stitch, then wide single crochet in the NEXT stitch (insert hook, pull up a loop, yarn over, pull through all 3 loops on hook):

And finally, single crochet in the next stitch:

Your berry is done!
By special request, here is a (slightly fuzzy) video demonstration of the Berry stitch:
After making your berry, slip stitch 4:

And congratulations - you've pretty much conquered the pattern. Each berry makes a bump or hill that stretches over 4 stitches, and is followed by a "valley" of 4 slip stitches.
 |
| Berry hills and slip stitch valleys |
Keep making berries and valleys across until you have just 3 stitches left in the row. (My cowl has an even number of berry motifs, so each berry row has 2 berries and 2 valleys. If you're making a wider cowl with an odd number of motifs, your first berry row will have 3 berries and 2 valleys, ending with a berry, and leaving 3 stitches remaining in the row.)
Here we are with just 3 stitches left (and no knot! I do like a knotless starting chain):

Slip stitch 3, chain 1, TURN. 22 stitches in row.
First row done! The rest will just fly.
Row 2 (Wrong side):
Slip stitch across. That's it for Row 2!
Tips for Row 2:
~ Remember to skip the turning chain. When you turn at the end of the row, don't let the yarn wrap all the way around; turn in such a way that the yarn stays behind the work.

~Holding the work vertically while you stitch can make it easier to see the back loops. (If you hold your work vertically, you can insert your hook sideways, rather than front to back.)

When you get to the end of Row 2, be careful not to miss the last stitch. (You've been counting your stitches, right? There should be 22, if you're making the same size cowl I did.)

Troubleshooting Row 2: If you're short a stitch, that means you skipped one. Slowly frog the row back until you find the one you missed. If you don't see it, frog the entire row and count the stitches to make sure there really are 22 stitches to begin with. If not, the mistake is in the previous row and you'll have to frog back and fix it.
On to Row 3! (Which is pretty much the same as Row 1, except that after the ribbing stitches a valley will come first.)
Row 3:
Slip stitch 3 for the starting ribbing,
then slip stitch 4 more to make the first valley.
(As you can see, the valley of Row 3 goes over the top of the berry in Row 1. This is how the nice wavy pattern is made.)

Make a berry over the next 4 stitches:

Keep making valleys and berries across until you have 3 stitches left in the row. (If you chained for an odd number of berry/valley motifs, you will finish with a valley, leaving 3 stitches remaining in row.)
Slip stitch 3 for end ribbing, chain 1, and TURN.
Row 4: Same as Row 2. (Slip stitch across.)
Repeat Rows 1-4 until cowl is desired length, ending with Row 3.
The cowl will grow quickly, especially if you're using a chunky yarn. Pretty soon you may feel confident enough to try reading while crocheting...

...but take it from me, it doesn't work. With slip stitch crochet, you can look at your project - or you can look at something else. Not both. If you look at something else, mistakes get made. (This concludes today's sermon. All rise for the benediction. Or remain seated for seaming.)
Ready to finish the cowl? Remember, you ended with a Row 3 (which is a berry row). Your next row will be the final ribbon row that ties the two ends together.

At the end of your final Row 3, chain 1, but do not turn work.
Mrs. Micawber's Nearly Invisible Slip Stitch Seam:
Butt edges of cowl together. Remove hook from working loop.

With right side facing you, insert hook from front to back of starting chain stitch. Be sure to insert hook under both strands:

Notice that the starting row is edged with single loops (these are the front loops of the starting chain). In the photo above they are marked with dots.
Here's the hook, inserted into the starting chain stitch.

Now pick up the working loop with the hook...

...and gently pull it through the starting chain.

Now slip stitch in the NEXT stitch of the final berry row,
drop the loop from the hook,
and insert hook from front to back through a single strand of the NEXT stitch of the starting chain.

Hook inserted. (The working loop is up there flapping in the breeze.)

Now follow the instructions in the photos:


Here is how your seam should look after the first few stitches:
 |
| Nearly Invisible! |
If it all sounds horridly complicated (it's really not), here's a short (and silent) video which may help:
Repeat these steps down the seam (slip stitch in next stitch of final Row 3, drop working loop, insert hook through next stitch of starting chain row, put working loop back on hook, draw through.) Be careful not to miss the last stitch on each edge.
And here it is: a cowl with gorgeous texture and a virtually invisible seam!

Cut yarn and tie off; weave in ends. Block if desired. Try on your cowl and snap a happy photo of yourself. (A note on self-portraiture: for every ONE decent shot, there are about 45 out-of-focus or wrongly lit ones.)

Notice how nicely the ribbed edge stretches and conforms to your shoulders. If your cowl is snug like mine, you can even fold it for a turtleneck effect. (About a mile back in the post, there's a picture of me wearing it like this.)
You may do whatever you like with the items you make from this pattern, but you may not sell the pattern. If you do sell items made from this pattern, please credit the designer.

If you have any questions, or find any mistakes in the pattern, please let me know using the comment box below. You can also contact me in Ravelry as MrsMicawber.
Thanks for viewing, and happy slip stitch crocheting!
~ ~ ~ ~ ~ ~ ~ ~ ~ ~ ~ ~


