The techniques in this series were developed for I-cord made with a hook, but many of them
can be adapted to I-cords made by other methods.
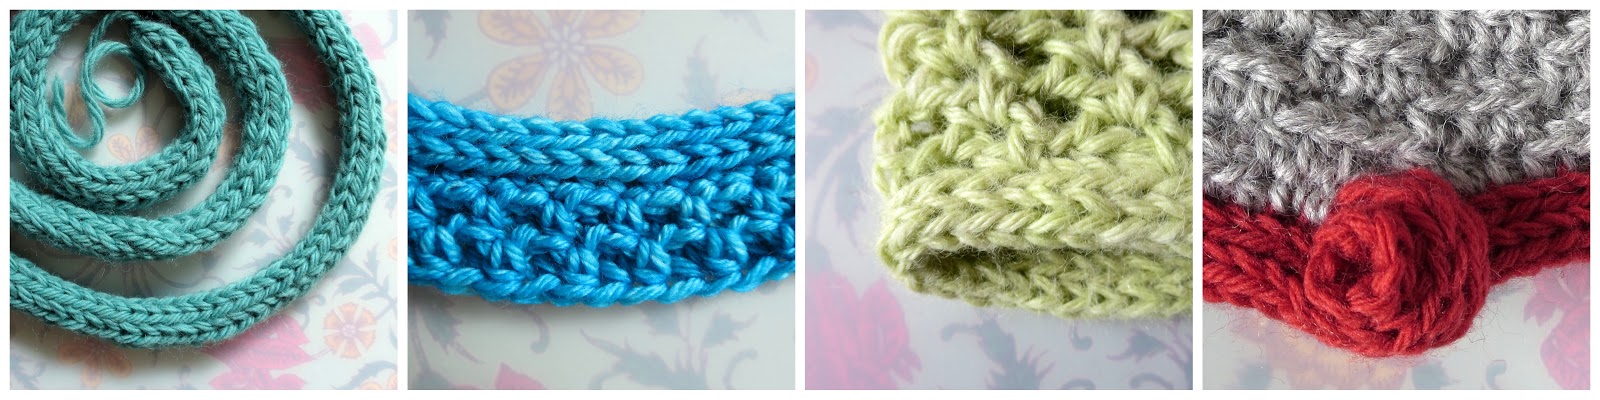
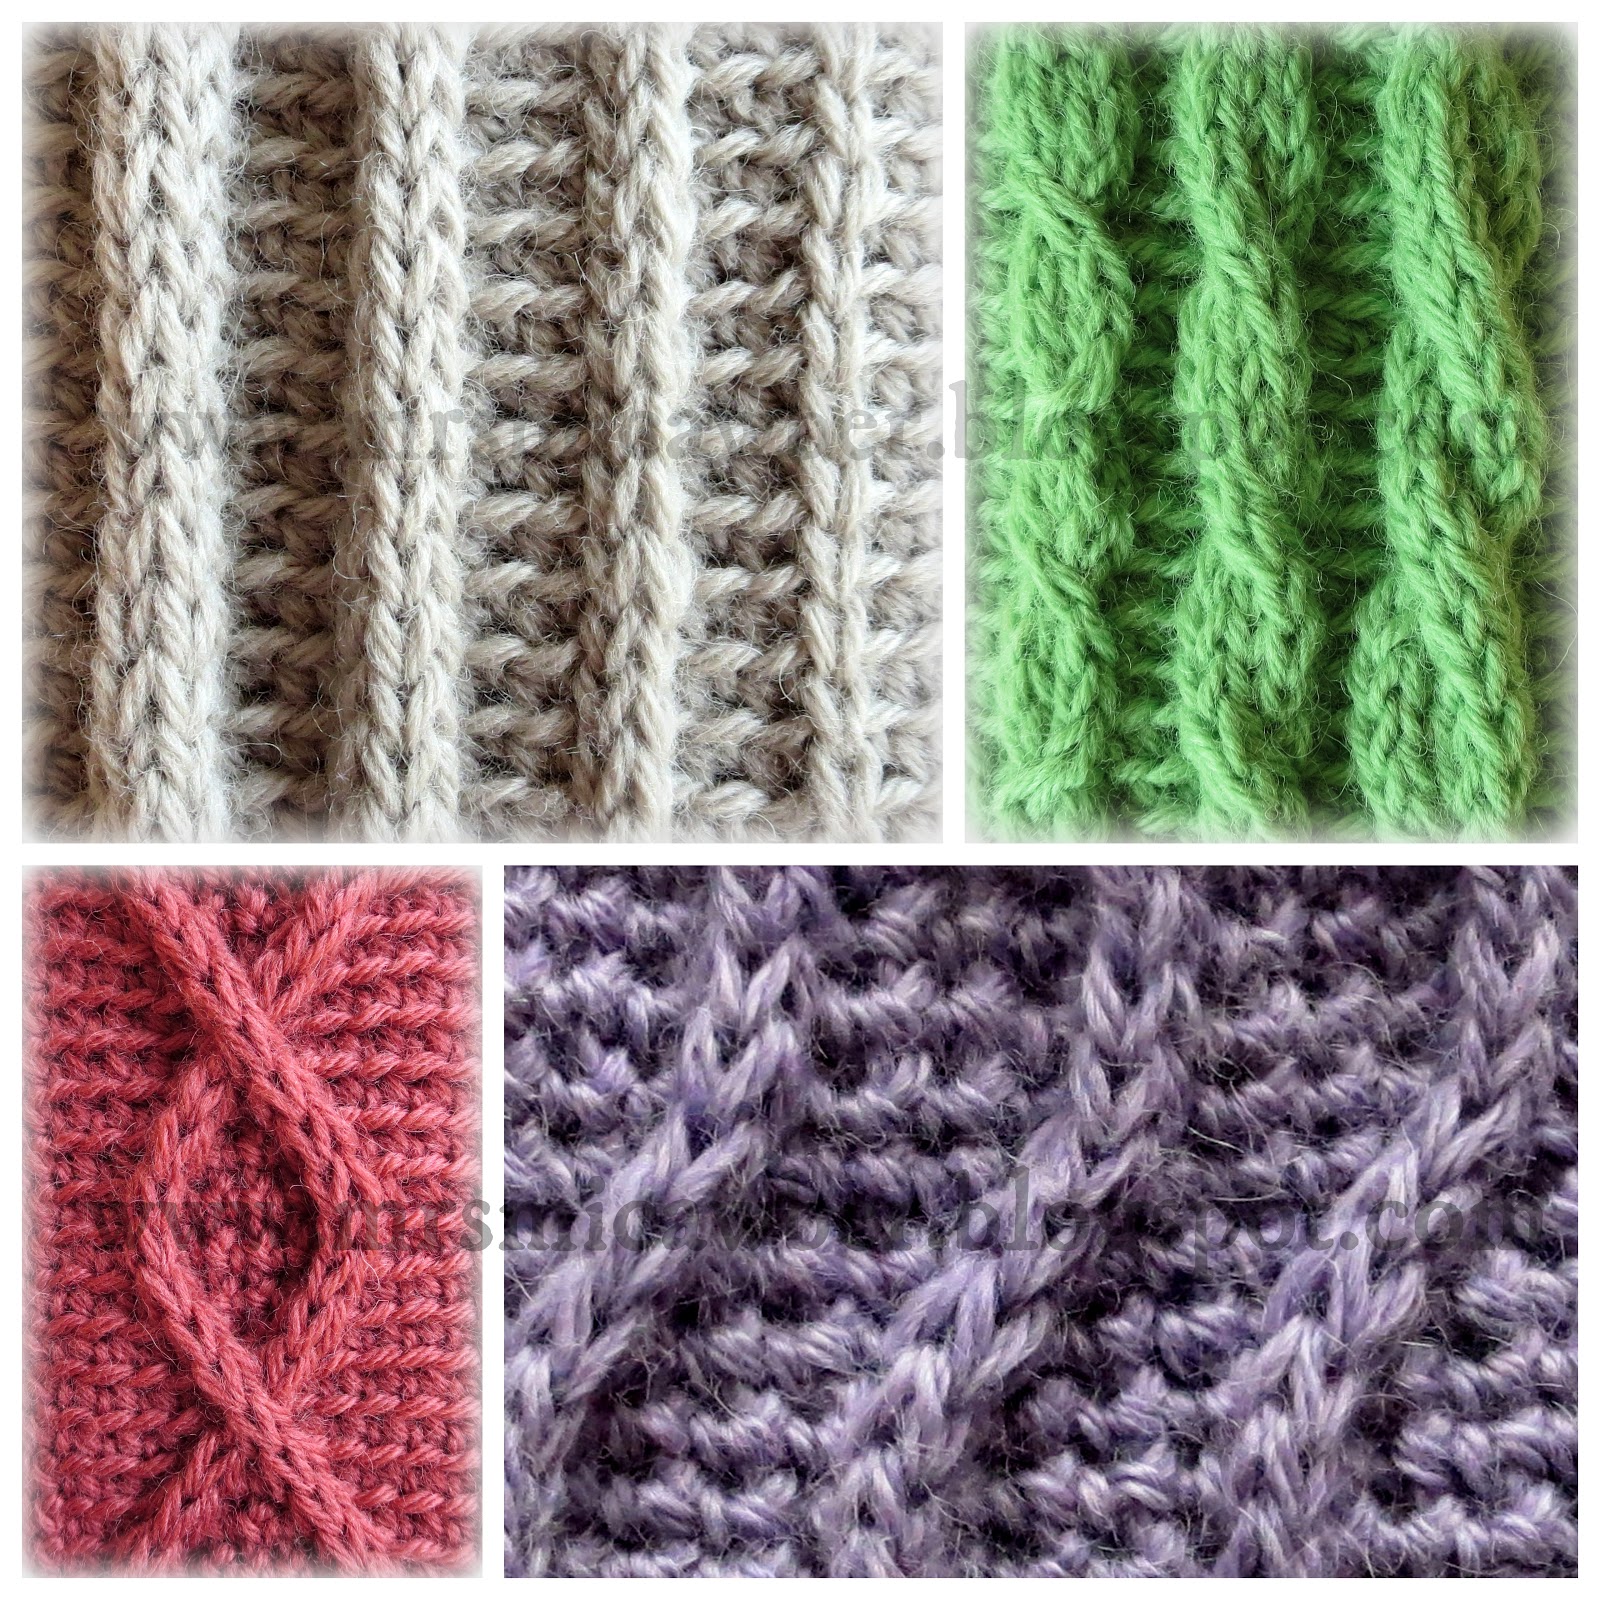
Consider the humble I-cord: it's soft and stretchy, with good recovery; flexible, weave-able, knot-able; makes great surface embellishment; and, when used as an edging, can be subtle or bold depending on your color choice.
I-cord as edging has long been used by knitters, but crocheters too can take advantage of its stretchy softness.
There are almost as many ways to make I-cord as there are applications for it: you can use two knitting needles (double-ended or straight), two crochet hooks, a needle and a hook, a single hook, a Knitting Nancy/French Knitter, an I-cord mill, or even just your fingers. (See end of post for links to examples.)
Being a crocheter with minimalist tendencies, I like to make I-cord with a single hook. I've started using I-cord edging in some of my crochet patterns, and along the way I’ve worked out some variations on the basic technique that I’d like to share with you here.
In this series, we’ll learn:
- Easy, innovative ways to make better I-cord with a crochet hook
- Starting and ending variations, including closed ends, open ends, and a self-buttoning version
- How to graft I-cord ends together for a continuous loop
- How to use I-cord as foundation for crochet, including the best place to insert hook
- How to add I-cord edging to crochet
- Hook and gauge recommendations for combining I-cord and crochet
Better Basic I-Cord with a Hook Phototutorial
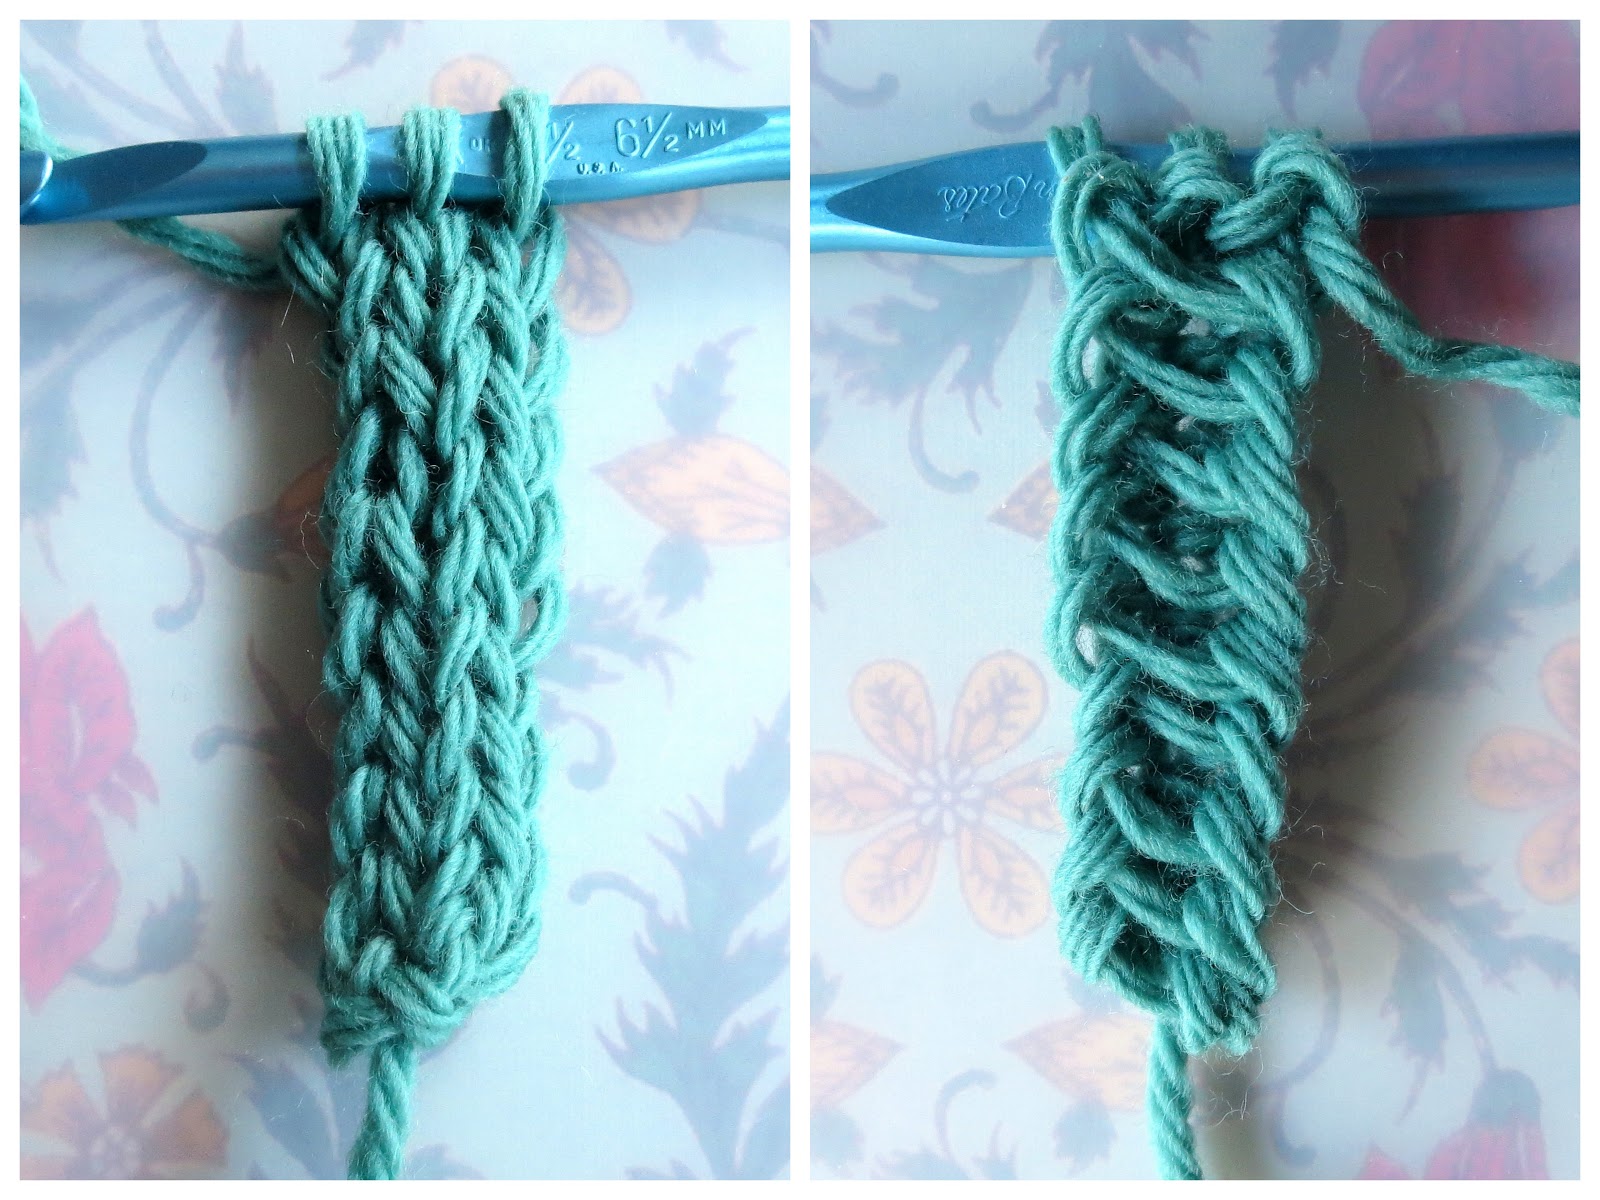
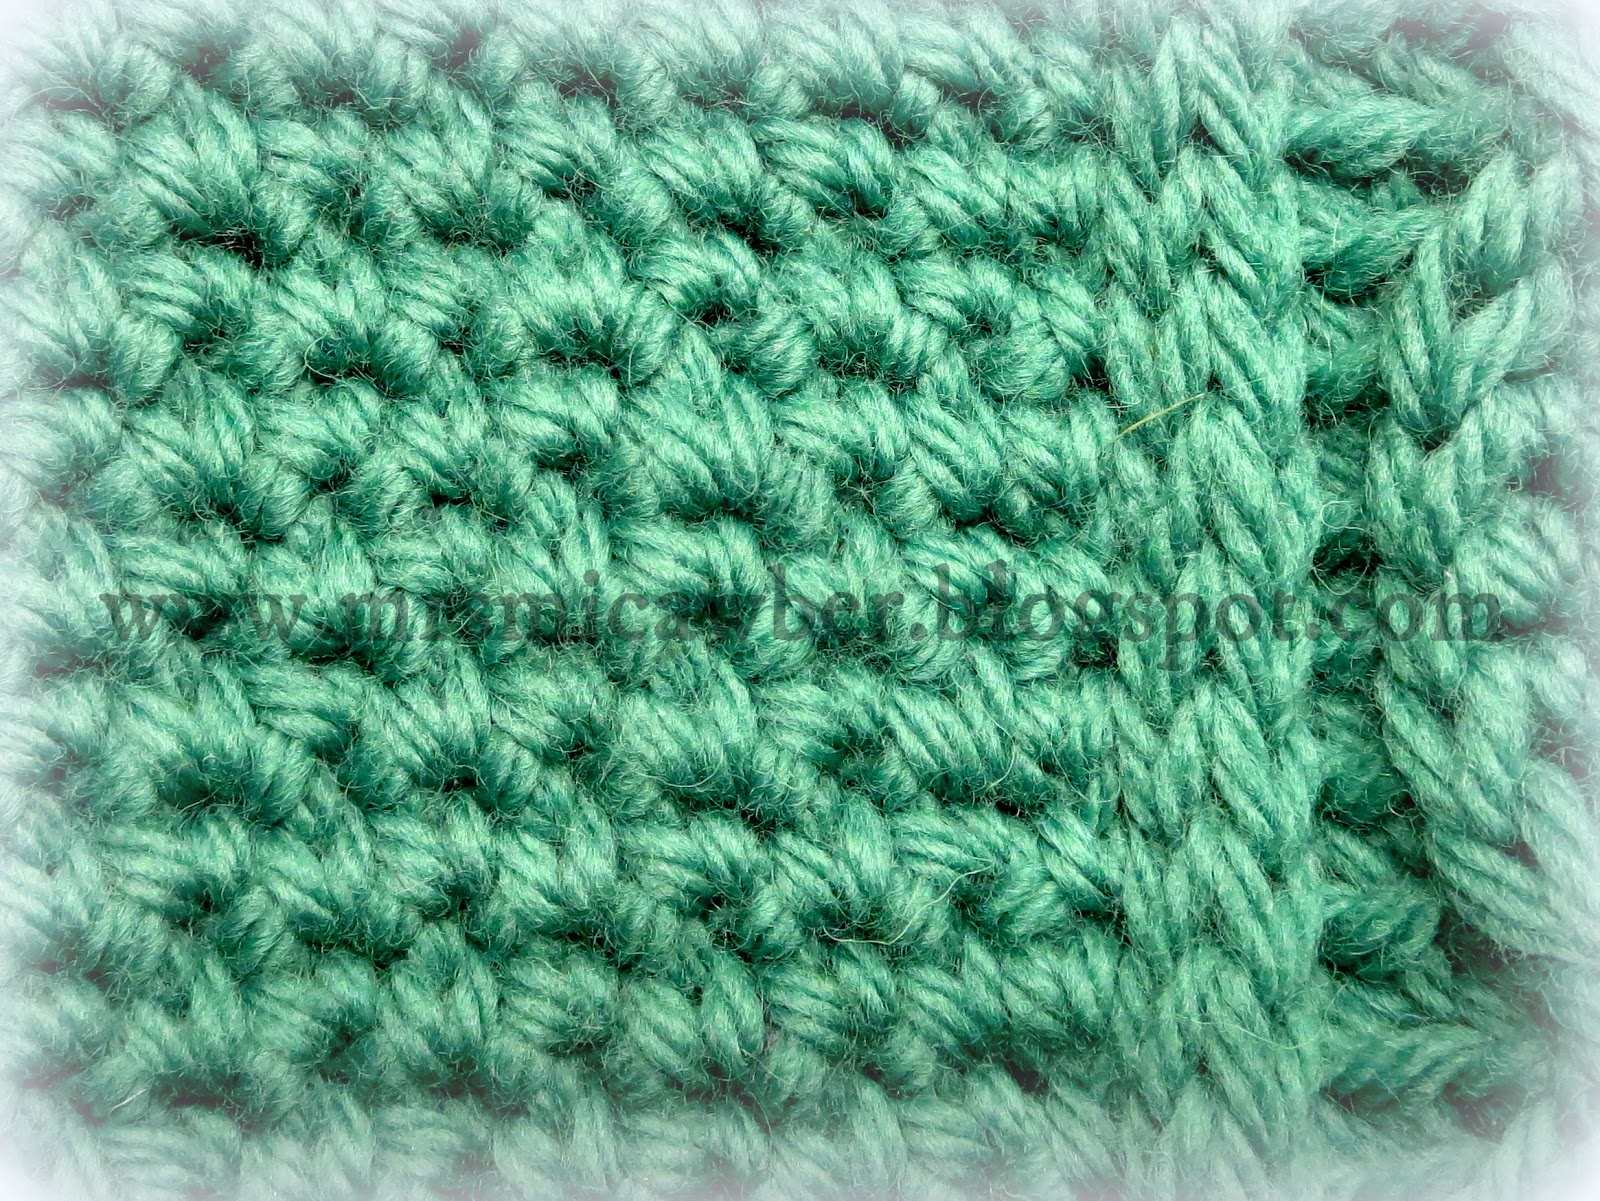
Take a look at these samples, both made with worsted weight yarn and a size H hook. Each sample is 4 stitches around and 10 rows long:
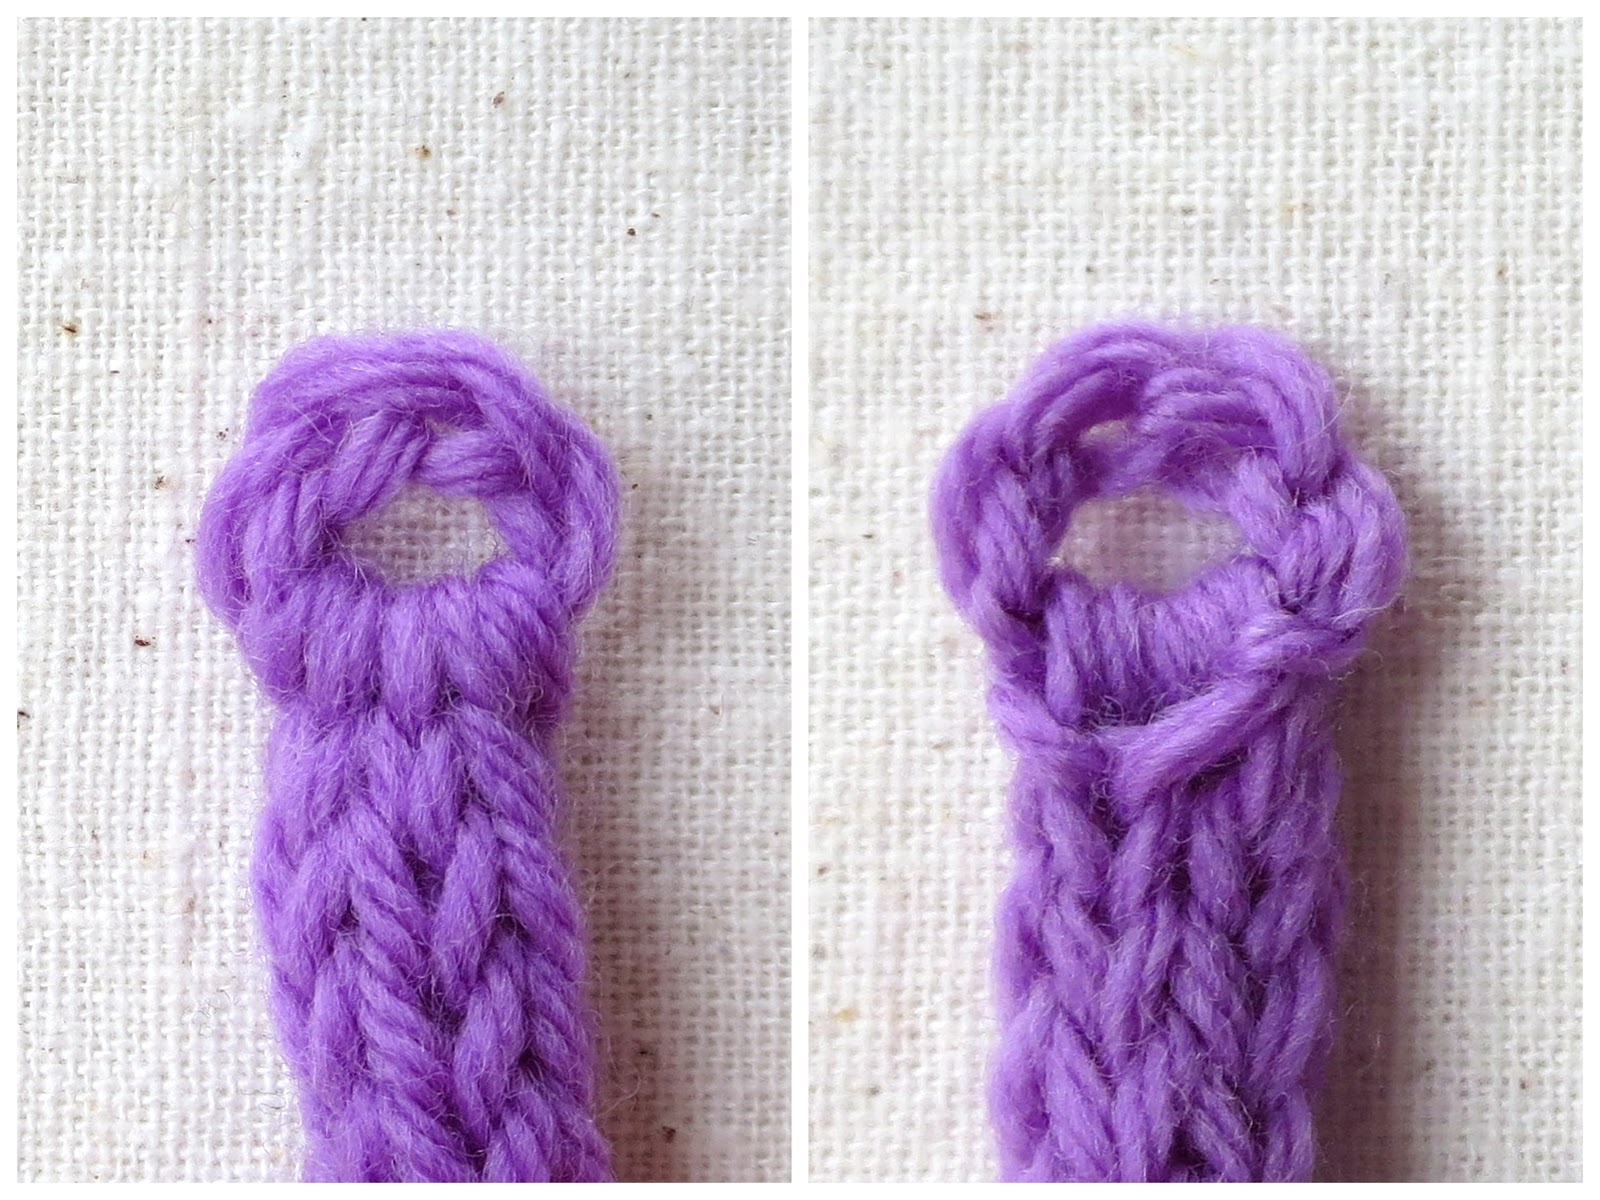
The lefthand sample in each photo above is decent basic I-cord, worked according to directions you can find online (just google “how to crochet I cord”). It's a little gappy at the start, a little messy at the end, and the tension is loose but fairly even.
The righthand sample is what I call Better Basic I-cord. It features:
- Better Beginning - longtail cast on for a smooth, rounded tip
- Better Body - “afterthought” column of stitches for firm, even tension
- Better Bind Off - worked one loop at a time for a softy rounded end
Can you make good I-cord without these techniques? Of course! But if you've tried to make I-cord with a hook, and been unhappy with the results, these techniques might make all the difference.
Use any or all of the Better Basic I-cord techniques when making:
- I-cord intended as decorative ties
- I-cord that will be grafted into a tube
- I-cord that will be subject to repeated stress
- I-cord foundation or finishing rows for crochet
Let’s make some I-cord!
~
What you’ll need:
Yarn (non-slippery is best, worsted weight or larger)
Hook
Optional: Extra hook two or three sizes smaller
Optional: Stitch marker
Instructions are written for right-handed crocheters.
Knotless Longtail Cast On
Instructions are for a 4-stitch I-cord. To make a larger or smaller cord, cast on more or fewer loops, with a minimum of 3. If making larger cord, add one extra inch to the tail for each extra loop. (For 2-stitch I-cord, see
this post.)
To start, wrap a 6”-8” yarn tail around your hook from front to back to front again, so the tail drapes over the running yarn in front. The two yarn strands should form a loose “V”, with the yarn tail towards you. (You can make a slipknot if preferred – just make sure that the short yarn tail is at the front.)
Tension working yarn as preferred over left fingers.
1. Hold the loop on the hook with a right-hand finger or thumb (see photos below).
2. Insert your left forefinger and thumb between the V, keeping the yarn tail in front. With the other fingers of that hand, grasp the dangling yarn tail. Spread your forefinger and thumb apart, and pull the hook slightly downwards to create tension on the V. Keep the running yarn looped over your forefinger, and the yarn tail looped over your thumb.
3. With hook, reach under the yarn tail in front of your thumb.
4. Raise the hook to form a loop.
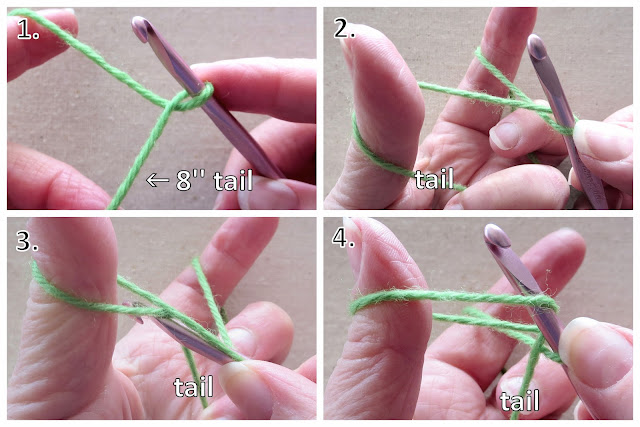 |
| Knotless Longtail Cast On |
5. With hook, reach back, and scoop up the strand at the front of your forefinger.
6. Pull up a loop with this strand.
7. Remove thumb from thumb loop.
8. Pull on both strands, one at a time, to tighten the loop on the hook.
Repeat Steps 1-8 until you have 4 loops on your hook (or desired number).
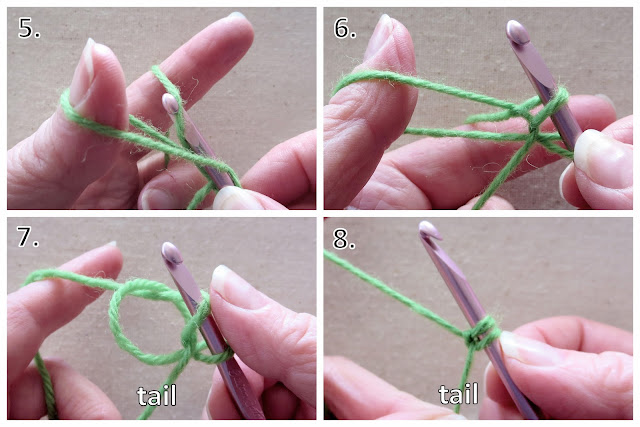 |
| Knotless Longtail Cast On |
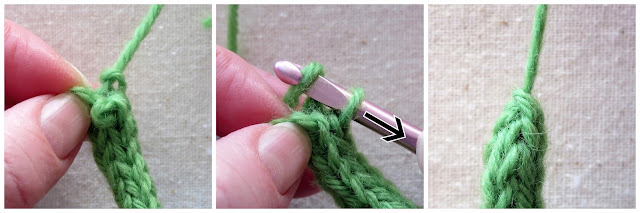
Working the Second Row
9. Tug the yarn tail to wrap it tightly around the base of the last loop (see photos below).
10. Without turning work, gently pinch the base of the loops. Remove the hook.
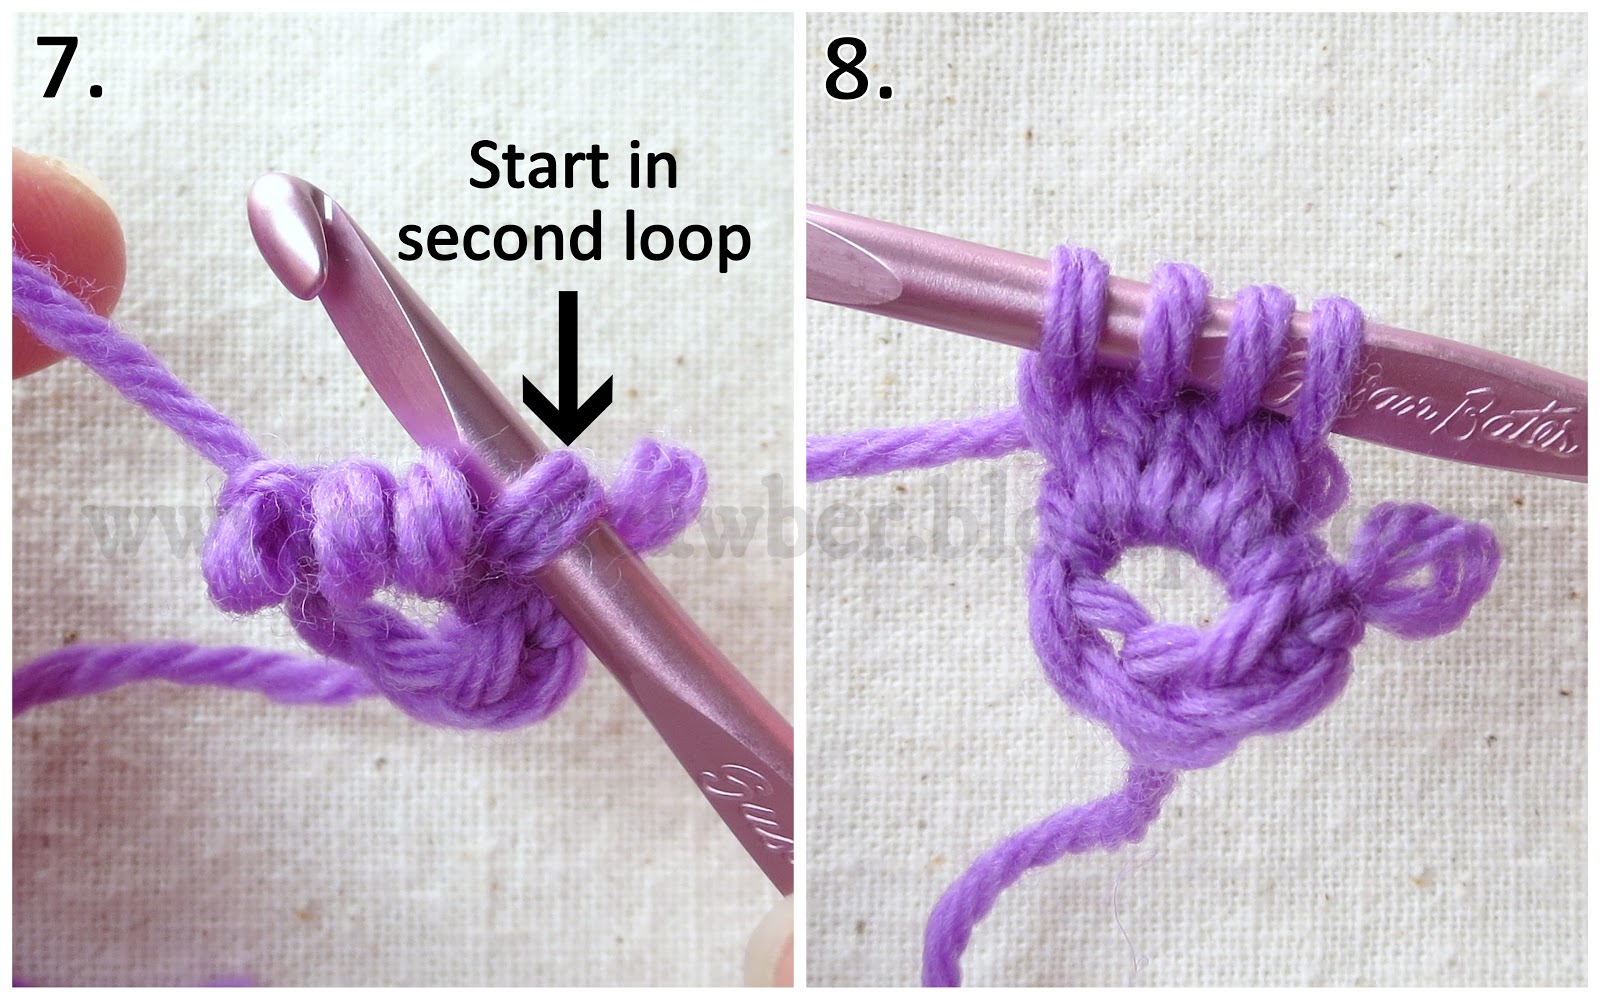
11. Insert hook into the
second loop from the right, gently yarn over and ...
12. Pull up a loop. (The running yarn will pass behind the loops.)
Try not to put tension on the yarn or the other loops; it’s okay to work loosely.
To finish the row: Insert hook into the next loop, yarn over and pull up a loop.
Insert hook into the leftmost loop, yarn over and pull up a loop (you can let go of all the base loops now).
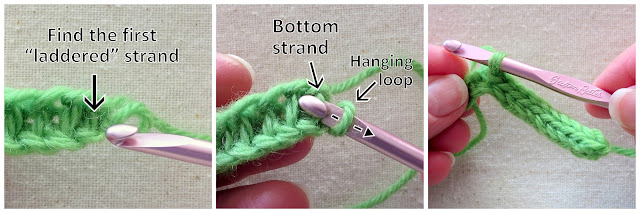
Your work should look like the photo below, with 3 loops on the hook, and 1 loop hanging off to the right. (
Ignore the hanging loop for now. You’ll come back to it later.)
 |
| See that hanging loop? Ignore it for now. |
Working the Body
*Remove hook from the 2 left loops (1 loop now on hook; see photo below). If desired, gently pinch the base of the loops to keep them from twisting or pulling loose.
Gently yarn over and pull up a loop.
Insert hook into next loop, yarn over and pull up a loop. Repeat to end of row.**
 |
| Starting the next row |
Repeat from * to ** until you have 10-12 rows, or to desired length. Keep your tension relaxed, and don’t worry if the loops look a little sloppy.
Your cord should now look like the photo at left below. To temporarily secure the live loops, loosely draw the working yarn through all the loops, letting it hang down at both sides (or place the live loops on a stitch marker).
 |
Body of cord complete (left);
placing live loops on temporary hold (right). |
The Afterthought Column
What we have now is a loosely-tensioned 3-stitch I-cord, tidy on the front, laddered on the back, and with a spare loop hanging off the starting tip. Let’s turn it into a firm and tidy 4-stitch I-cord!
You may switch to a smaller hook (if desired) for this step.
Go back to the starting tip of your cord and identify the bottom laddered strand passing behind the first row of loops (see photos below). Look carefully; it can sometimes be hard to spot.
Insert hook from bottom to top through the loop you left hanging.
Insert hook under bottommost loose strand, pull strand through loop on hook.
*Insert hook under next strand, pull through loop on hook.
Repeat from *, working up the cord, until all the loose strands have been hooked up:
 |
| Working the (planned) afterthought column |
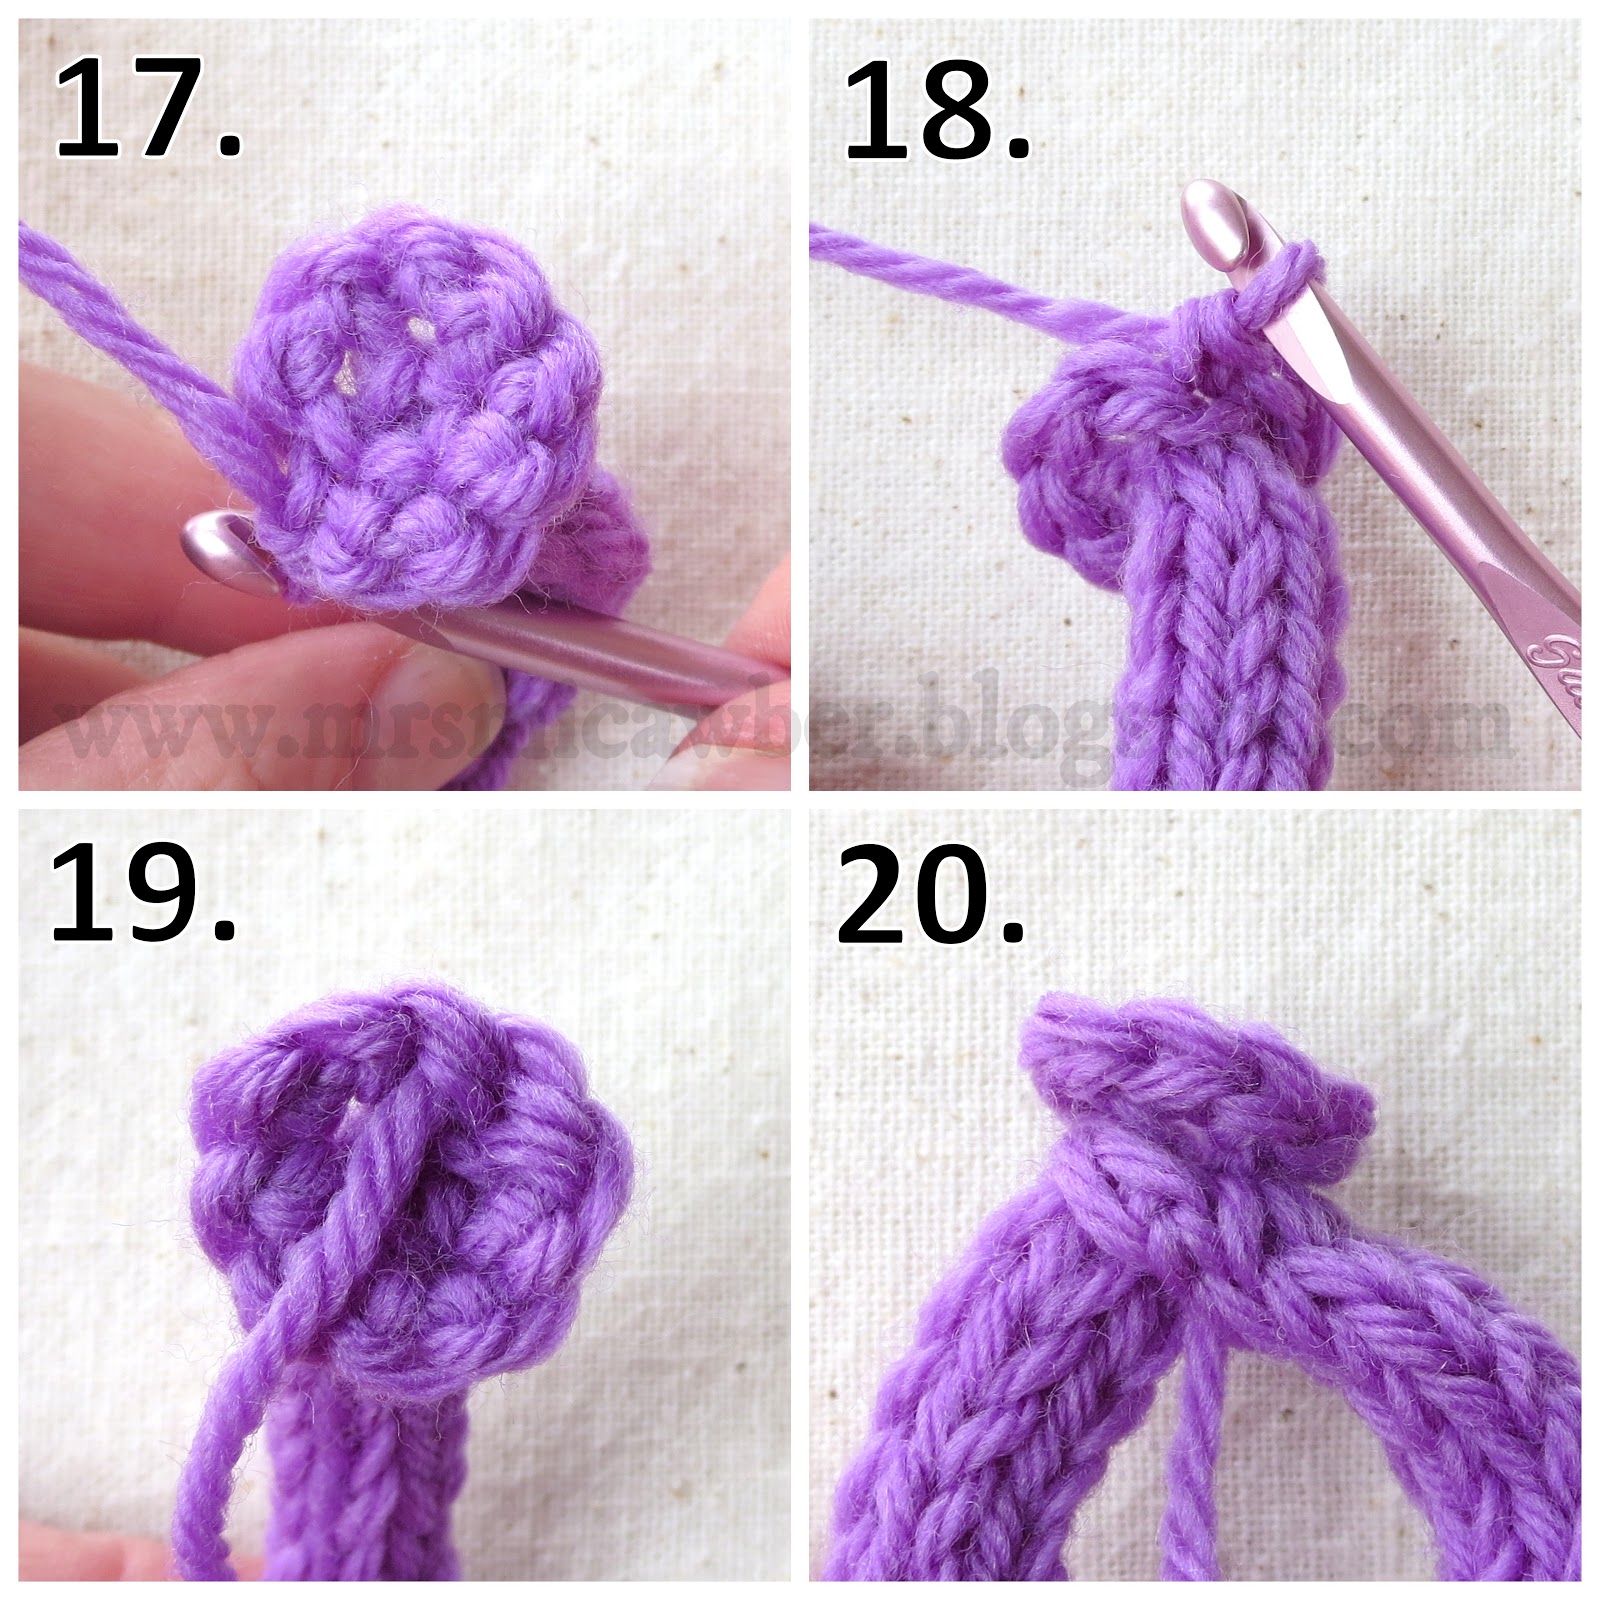
Binding Off
Remove the stitch marker or yarn loop to release the live loops at end of cord.
Cut yarn, leaving a 4” tail.
Gently draw the yarn tail up and out of the loop it’s exiting (photos below).
*Insert hook in next loop to the left, draw yarn tail up and all the way through.
Repeat from * until all loops have been bound off.
Tug the tail to settle the loops rogether.
 |
| Binding off one loop at a time |
Now tug firmly on both ends of your I-cord to even up the stitches. To smooth it further, run it through your fingers in both directions.
To weave in ends, bury them in the cord.
More Tips for Better Basic I-Cord
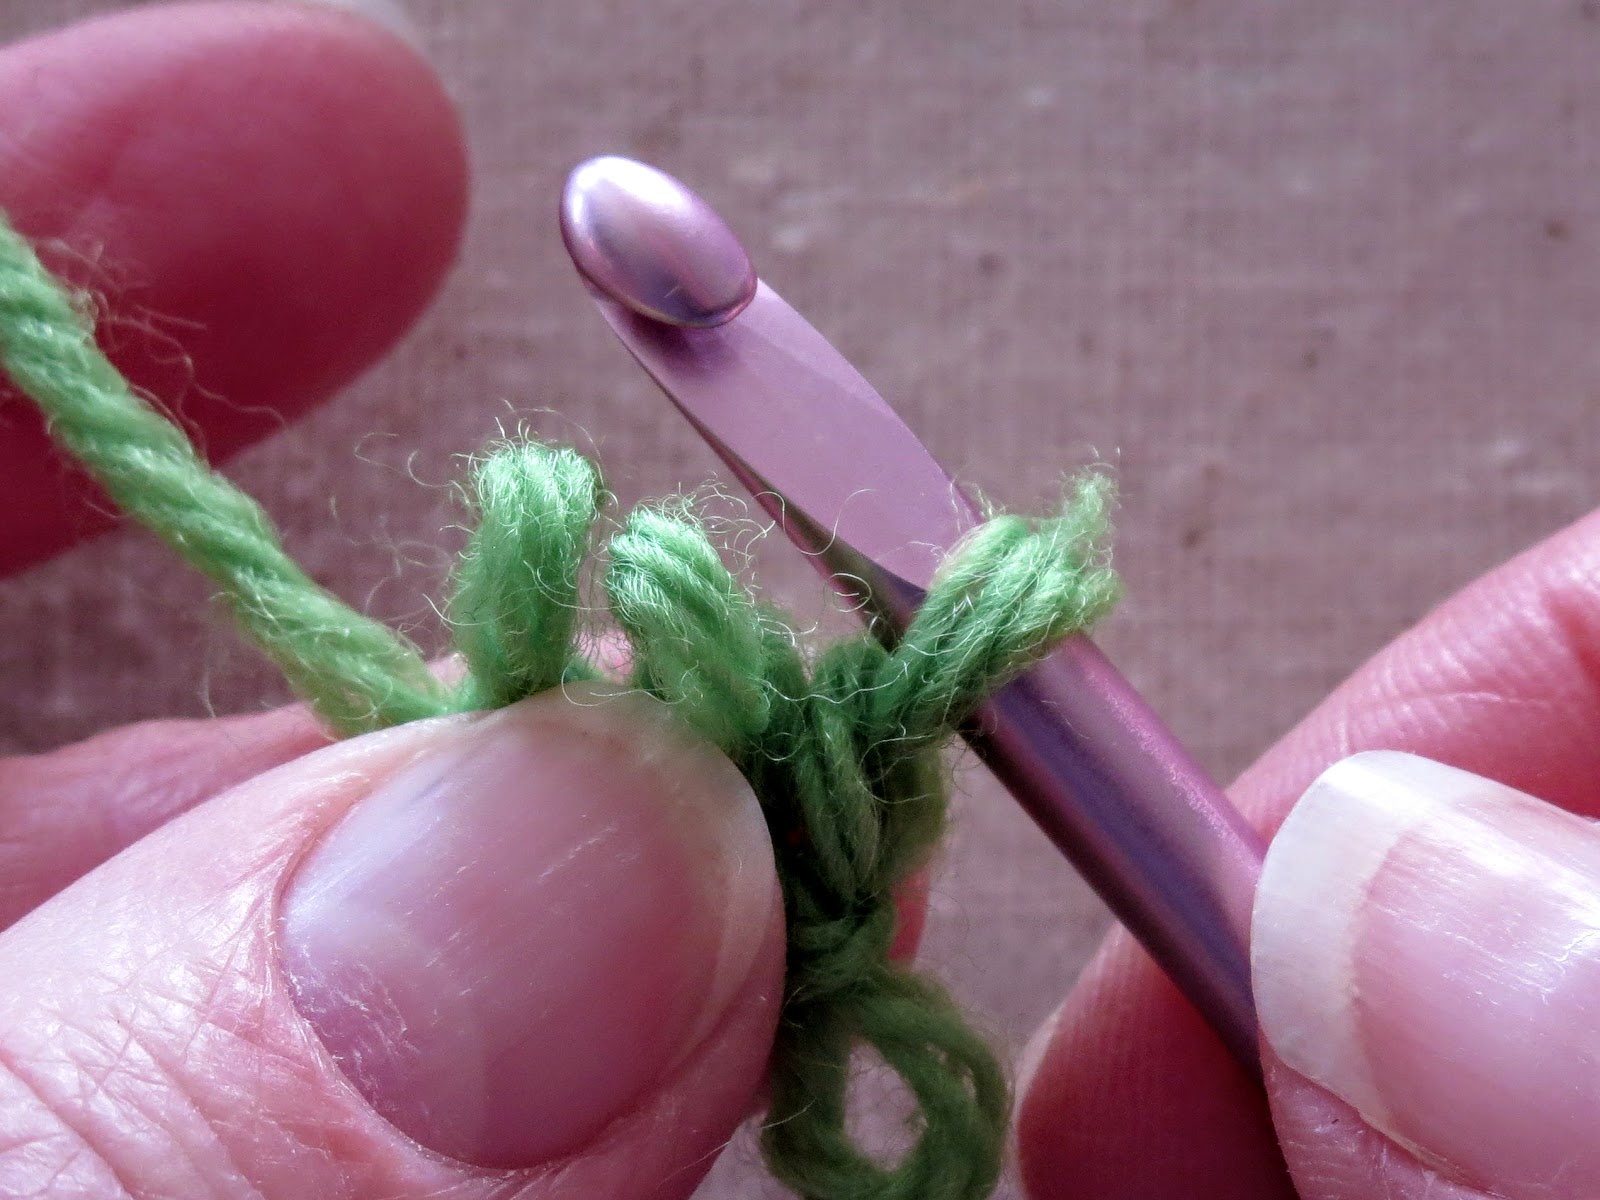
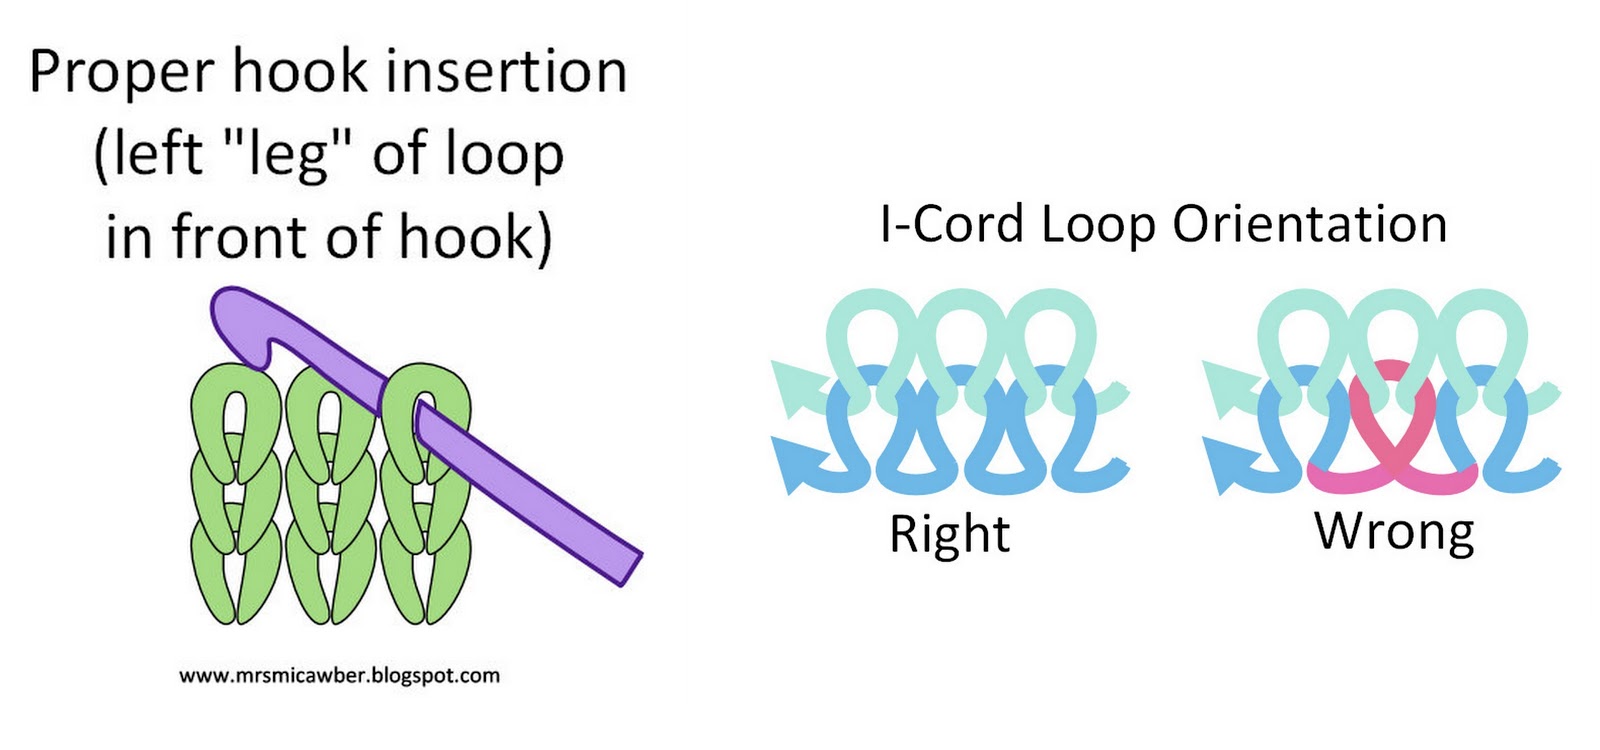
To avoid twisted stitches, be careful to insert your hook properly into each loop, keeping the left "leg" forward.
If you do find a twisted loop somewhere along your I-cord, you can either let it ride; frog the whole cord back to that row and re-work; or fix it after the fact. To fix after the fact, release only that column of loops back to the mistake, pick up the loop again (the right way), then hook up the released column of stitches just as you did the afterthought column.
When hooking up the afterthought column, be careful not to skip a strand or insert hook into the back wall of the cord by mistake. Either of these will result in a puckered cord.
To identify which strand is the next one, follow the yarn that exits the edge loop above the row you just hooked up. You may find it helpful to insert another hook under the strands, as I did here:
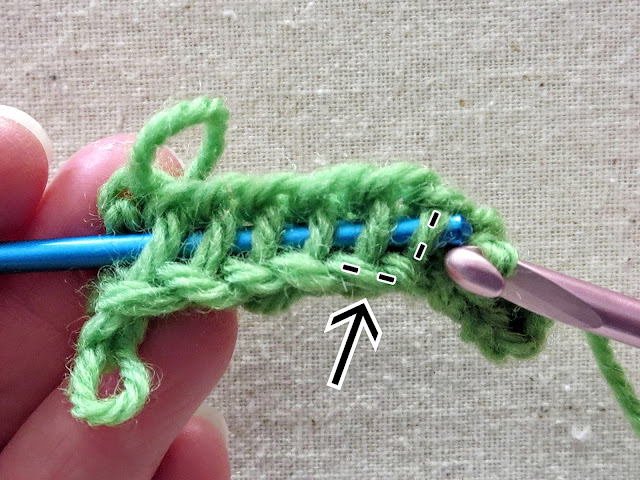 |
| Identifying the next strand |
If making a long I-cord, warm up first with some waste yarn.
My I-cord always gets a little tighter after the first few inches, as my hands warm up and remember how best to hold the loops.
As with any new technique, practice is the key to comfort and success. So practice, practice, practice!
~
Whew! If you’ve read this far, you deserve a cup of tea. Or possibly something stronger. :)
If all these techniques together seem overwhelming, work on just one at a time. When you’re comfortable with that technique, add another. Before you know it, you’ll be cranking out I-cord that's firm, beautiful, and smooth from end to end.
In Part 2, we’ll move on to variations: open-ended I-cord and self-buttoning I-cord.
You may do whatever you like with any items you make using this tutorial, but you may not distribute the tutorial, its text, or images, without permission. (Links are always welcome.)
Thanks for reading, and happy I-cording!
~ ~ ~ ~ ~ ~ ~ ~ ~ ~ ~ ~
Some Examples of various I-cord methods
With double-ended knitting needles: http://www.stitchdiva.com/tutorials/knitting/i-cord
With straight knitting needles: http://www.sapphiresnpurls.com/2011/12/i-cord-on-straight-needles-single.html
With a needle and a hook: https://www.youtube.com/watch?v=KCl8vJpKaPg
With a single hook: https://www.planetjune.com/blog/how-to-crochet-an-i-cord/
With fingers: https://makezine.com/2009/07/02/finger_knittin_good/
With Knitting Nancy/French Knitter: http://www.waynesthisandthat.com/knittingnancys.html
With I-cord mill: http://techknitting.blogspot.com/2010/01/i-cord-from-mill.html
~ ~ ~ ~ ~ ~ ~ ~ ~ ~ ~ ~