I'm pleased to announce that I have recently published not one, but two patterns. And - wait for it - one of them is knit. (Gasps resound from crocheting readers around the world.)
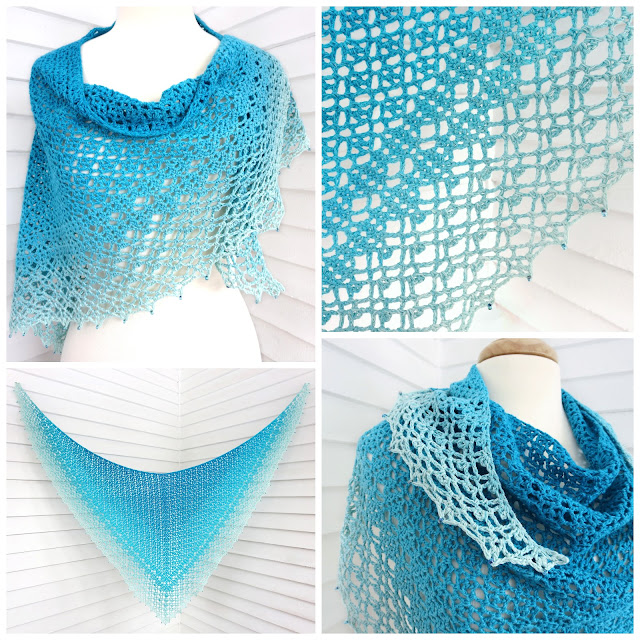
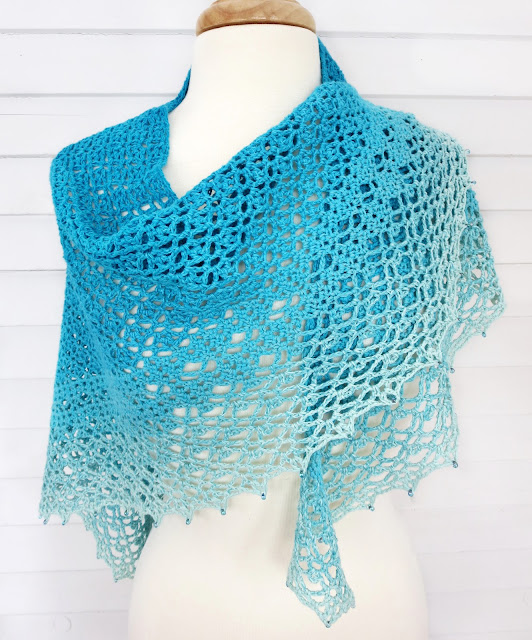
Let's start with the crochet pattern. This is Crystallon, a lacy shawl inspired by thoughts of crystallized water (Crystallon means "frozen drop" in Greek):
Crystallon uses only chain, single crochet, and double crochet. My sample measures 55" across by 25" deep, and took 142 gm (about 621 yards) of sportweight yarn.
The yarn is Hobbii Cotton Kings Sultan (color Apatite), a stranded gradient yarn consisting of four threads that change color one at a time, every hundred yards or so. This yarn is unplied, and takes a bit of getting used to, but it blocks beautifully and is a very affordable option for gradient-yarn lovers.
Crystallon includes charts and full written instructions, with options for a beaded or picot edge. Find the pattern here in my Ravelry store, and enjoy a 25% discount until February 20 with code ICY at checkout.
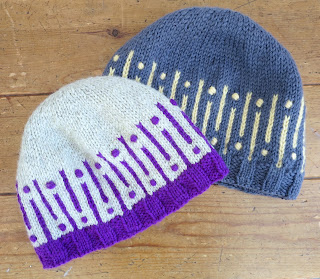
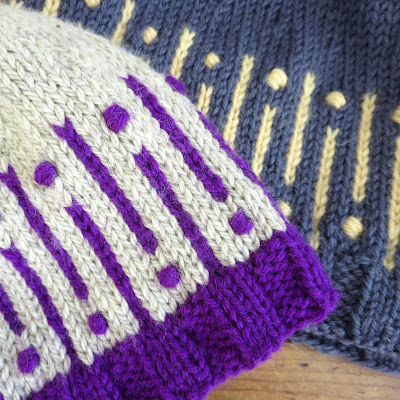
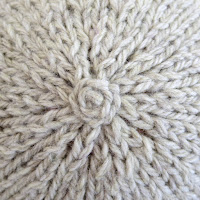
iHat knits up quickly in worsted weight wool, and features simple stranded colorwork, subtle decreases, a quirky spiral crown closure, and contrast color nupps made with a crochet hook.
The nupps can be worked as-you-go (videotutorial here), or after the hat is complete. Having tried both methods, I found the afterthought nupps easier to make, with more consistent results. Your mileage may vary.
Afterthought nupps on the left, as-you-go on the right
The grey/yellow hat was worked in Knit Picks Wool of the Andes Worsted (colors Mist and Creme Brulee); the sand/purple hat was worked in Shepherd's Wool Worsted (color Beaches) and Wool of the Andes Worsted (color Columbine). All the yarns were lovely to handle, and blocked well.
iHat includes charts, full written instructions, and illustrated tutorials for two nupp methods. Find the pattern here in my Ravelry store, and get a 25% discount until February 20 with code MIHAT at checkout.
Thanks for viewing, and happy crocheting. And knitting!
Today we'll finish up the series by learning how to use I-cord as edging for crochet.
I-Cord as Edging
I-cord edging is soft, flexible, and elastic. It wraps around the fabric edge, so it looks good from both sides while offering protection from over-stretching or abrasion. Its clean lines offer a crisp visual contrast to crochet's somewhat busy texture.
I-Cord Edging as Intermediate Rows/Rounds
I-cord edging can double as a foundation for further rows of crochet, as seen in the cross-section photo below (from a cowl pattern to be included in my upcoming cable book).
You might be wondering: why use I-cord in the middle of a project, when the same look can be achieved with other stitches such as slip stitch or back bar hdc? In this project, the I-cord edging provided necessary structure, and helped counteract the fabric's tendency to curl.
So how is I-cord edging made? Let's find out! (Note: there's more than one way to make I-cord edging; I've chosen to demonstrate the one that works best for me. See Technical Q & A below for a link to another method.)
Videotutorial
Phototutorial with Instructions in Plain English
This tutorial is for a 4-stitch cord, but you can adjust that number to suit your preferences. A minimum of 3 loops is recommended. (For a "cheater" 2-loop I-cord edging, see end of post.)
Instructions are written for right-handed crocheters.
What you’ll need:
A piece of crochet - can be solid, lacy, or both
Yarn for edging
Hook
Yarn needle for weaving in
Stitch holder (can be a bobby pin or just a scrap of yarn)
Optional: Extra hook two or three sizes smaller (for hooking up Afterthought Column)
Link to tutorial for technique used in this post: Working the I-cord Body (scroll down in post for tips on working I-cord with a hook)
Starting the Edging
1. (RS) With right side facing, attach new yarn with slip stitch in any stitch of your project.
2. Chain the desired number of I-cord loops (I chained 4).
3 - 4. Starting in the second chain from the hook, insert hook in back loop of chain, yarn over and pull up a loop. Repeat in the next 2 chains - 4 loops now on hook. (Note: if you're making a different size of I-cord, you'll have a different number of loops on the hook.)
TURN.
5 - 6. (WS) With wrong side of project facing, insert hook into next crochet stitch, yarn over and pull up a loop - 5 loops now on hook.
7. Remove hook from loops. Place rightmost loop on a holder and forget about it for now.
Next Row
8. Being careful not to twist loops, insert hook into rightmost free loop, yarn over and pull up a loop.
Repeat in next loop. If you're making a 4-loop I-cord, you should now have 2 loops on your hook, and 2 empty loops remaining.
9 - 10. Insert your hook into both remaining loops(right loop first, left loop second), yarn over and pull up a loop.
11. Insert hook into next crochet stitch, yarn over and pull up a loop - 4 loops now on hook.
Tips:
Always check that each loop is properly oriented before inserting the hook.
Gently pinching the base of the row can help keep loops facing forward.
Following Rows
*Remove hook from 3 leftmost loops, leaving only the rightmost loop on the hook. Yarn over and pull up a loop, insert hook in next loop, yarn over and pull up a loop, insert hook into both remaining loops together, yarn over and pull up a loop, insert hook into next crochet stitch, yarn over and pull up a loop (4 loops now on hook). Repeat from *.
Note: Each time you work these 4 loops, you're making and attaching a new row of I-cord to the project. The first 3 loops are the actual I-cord loops; the 4th loop is what I call an "attachment loop". (More on this in Technical Q & A below.)
Tip: Keep a relaxed stitch tension when working I-cord rows. Here's what your I-cord should look like on the back (which is the RS of the project):
Don't tighten the loose loops; we'll need them later.
Working Into or Over Spaces
When making I-cord edging, there are two ways to deal with spaces or corners in your crochet.
12 - 13. You can attach multiple I-cord rows in the same space or stitch. Photo 13 below shows 3 rows of I-cord worked into the corner space.
14. You can work detached I-cord for as many rows as you like, then re-attach to the work on the other side of the space.
To work detached rows, do not pull up a loop in the next stitch or space. With one less loop on the hook, work standard I-cord rows (yarn over and pull up a loop in each loop from right to left, remove hook from all but rightmost loop, repeat) to desired length. When you're ready to re-attach to the crochet, insert your hook into the desired stitch or space, yarn over and pull up a loop. Photo 14 below shows a few rows of detached I-cord that have not yet been re-attached to the project.
Tips:
When working into or around spaces or corners, work the same number of I-cord rows as you would crochet stitches into that space. For example, in the triangular sample below, I worked 4 rows of I-cord into or over each corner.
You can combine the two methods (attached and detached) in any stitch or space.
Either method can be used to increase stitch count, add circumference to a fabric edge, or create special effects (e.g. decorative detached I-cord loops along an edge).
To tighten up a fabric edge, simply skip a stitch or stitches before pulling up the next attachment loop.
Ending the Edging: Afterthought Column
Not pictured:When you have pulled up the final attachment loop in the last empty crochet stitch, remove hook and place all loops on a holder or scrap of yarn. (These loops will be called "live" loops.)
15-16. Take original reserved loop (from Step 7) off its holder. Insert hook from bottom to top through slip stitch used to attach edging yarn, place reserved loop on hook, pull reserved loop through slip stitch.
17. With RS of project facing you, insert hook under first loose strand; pull strand through loop on hook. *Insert hook under next loose strand, pull through loop on hook. Repeat from * around the project.
18. If you worked any detached I-cord at the corners, the "loose" strand may have tightened up and be hard to find. See second note below.
Tips:
Be careful to hook up 1 strand for each row of I-cord. (If you miss a row, your edging will pucker.)
Each row of I-cord will have two strands under it, forming a V that resembles the legs of a single crochet. Make sure you pick up the strand that is attached to the rightmost I-cord loop. (To check, tug on the strand as you pick it up. The I-cord loop nearest you should tighten up.)
19. When you have hooked up the last loose strand, place the loop on the holder with the other live loops. Cut working yarn, leaving a 6" tail. Thread the tail on a yarn needle.
Seaming the Ends
Before starting the seam, identify the stitches you will be attaching to (I call them "target stitches"): look for the first row of recognizable I-cord loops just above the I-cord starting chain.
Note: You should have 1 more live loop than you do target stitches.
To begin the seam, insert needle from back to front through the rightmost loop on the holder.
Pass needle behind the 2 legs of the target stitch.
Insert needle from front to back through the originating loop; tighten gently. First duplicate stitch made.
Repeat this step, working across the row, until you have 2 live loops left on the holder, and 1 target stitch left in the target row.
Keeping leftmost loop behind, insert needle from back to front through both remaining live loops, pass needle behind 2 legs of the last target stitch, insert needle front to back through the 2 loops.
Seam is now complete.
Before weaving in the ends, tighten or loosen the seam loops as needed to match surrounding stitch size. If tightening, work from right to left (or beginning to end) of the seam. If loosening, work from left to right (or end to beginning).
Weave in ends and admire your nifty I-cord edging!
Technical Q & A
Why is the hook inserted into 2 loops at once on every row?
To maintain the stitch count. Each time you pull up an attachment loop from the project, you're adding a loop; inserting the hook into 2 loops at a time acts as a decrease to get you back down to the desired number of loops. (Confused? Read on.)
The tutorial shows you picking up 4 loops for every I-cord row, but then you hooked up an extra column of loops after the fact. Doesn't that make it a 5-stitch I-cord?
No; it's still a 4-stitch I-cord. As mentioned (far) above, the last loop picked up in every row is what I call an "attachment loop". It doesn't count as an I-cord loop; instead it acts as the "legs" of what will essentially become a single crochet attaching the I-cord to the project. What I've initially worked in this tutorial is a loose, attached 3-stitch I-cord; hooking up the afterthought column adds the 4th I-cord loop to every row. (It's kind of mind-blowing, for me at least, but if you count the visible I-cord loops after hooking up the afterthought column, you'll find that there are only 4 columns of loops.)
You mentioned that there's another way to make I-cord edging? Yes; there are two basic methods for making attached I-cord, and I've shown you my adaptation of one of them. The other basic method is worked RS facing; it eliminates the decrease, and instead inserts the hook through the last I-cord loop and the next crochet stitch at the same time. You can find an example of it here.
The other way seems more straightforward; why do you prefer your method? I found that working the I-cord loosely from the WS, then hooking up an afterthought column on the RS, gave me a smoother, stretchier result, with no crochet stitches visible between I-cord loops. I'd encourage you to try both methods, and see what works best for you.
~ ~ ~
But wait, there's more!
Cheater 2-Stitch I-Cord Edging
This minimal I-cord edging gives an interesting double-chain edge to any flat piece of crochet. It's especially appropriate for pieces that will later be joined by seaming or other methods.
With RS facing, using attached yarn or project yarn, loosely chain 1.
Starting in the next stitch, work 1 round of very loose single crochet. Place working loop on holder. Do not turn. Tip: The easiest way to work loose stitches is to pull up a very TALL first loop at the base of the stitch.
Flipping top edge of work towards you so you can see the back of the stitches, insert hook from left to right into back bump of chain stitch, then rotate hook to face in the proper direction. This will form a twisted loop on the hook (do not twist any other loops but this one.)
*Insert hook under nearest "leg" of next sc (2 loops now on hook), pull second loop through first. Repeat from *, being careful not to miss the final sc. Place final afterthought column loop on holder.
If working in the round, join ends with a double invisible join (remove holder from working loop, join with invisible join to first sc of round; bring yarn tail from back to front through final afterthought loop, remove holder, join with invisible join to twisted loop).
~ ~ ~
Whew!
This post (and series) has taken months to finish; sometimes I thought it would never be done. Anyone who has read this far probably feels the same. :D
If I-cord fascinates you as it does me, you might enjoy the following links:
Here's a little teaser for my upcoming I-cord series....
I-cord made with knitting needles or a crochet hook often looks like this:
Tidy front, laddered back
The standard treatment for laddered I-cord is to tug firmly at
both ends to even up the stitches. Let's see how that works:
After tugging: stitches are even, but tension is poor
Is there a way to make firmer I-cord without using a special gadget? Yes. You can try working more tightly. You can switch to smaller needles or hook.
Or you can use this simple trick:
Starting at the bottom, hook up the ladder-like strands, one at a time, into an extra column of stitches.
Bingo!
Firmer I-cord
Mind the Gap: Using this trick creates a hole at the starting end of the I-cord. Stay tuned for a full tutorial that will show you how to bridge the gap.
Imagine a yarn den, where women loll in comfortable chairs, eyes fixed dreamily on the needles or hooks moving rhythmically in their hands. Fibers of all kinds spill from their laps, and trail exotic or homely lengths across the floor. Quiet attendants, soft of voice and foot, offer freshly-wound cakes of yarn to those whose stock is depleted. The air is redolent of lanolin and coffee, punctuated by flowery whiffs of tea. In the rough world outside, there are dishes to be washed, bills to be paid, floors to be scrubbed - but no one who frequents the yarn den minds such mundane tasks. All that matter here are stitch, gauge, and project. To the yarn addict, the world is indeed well lost for yarn.
What opium was to the Victorian era, what alcohol or medication is to our own, yarn is to me.
Yarn - or, to be precise, working with yarn - is my creative outlet, my treat at the end of a long day, my mental relaxation. It's the way I pass time in waiting rooms and airports, and my therapy in times of stress. What could be more soothing than crocheting a granny square or working stockinette in the round? Watching stitch after stitch slide off the needles or hook with comfortable regularity, though the world about me be crumbling - this is peace and sanity.
Of course every addiction has its downside. Yarn is so absorbing and forgiving, so quiet and kind. It's easy to spend more time with it than I ought, while neglecting more important things such as husband, grocery-shopping and cooking. When the design fit is on, I can (and do) spend hours on end playing happily with the same few yards of the stuff, lost to all around me as I struggle to perfect a stitch pattern or refine a technique.
"Addiction" may, in fact, be the wrong word for how I feel about yarn and yarn crafts; "obsession" is probably more accurate. Either way, there's a bright side: unlike many of the addictions that plague society, making things with yarn is actually good for our health*. And, as my sister says, yarn is cheaper than therapy.
Those of us who love yarn - and love working with it - know that every time we knit or crochet something, we add a little beauty to the world; we wrap loved ones and needy people in warmth; we give away a small piece of ourselves. So this is one addiction (or obsession) that I won't be too worried about. (But I do need to strive for moderation in this, as in all things.)
Speaking of knitting and crochet, here are some recent projects of mine:
1. A Triumph-ant Hat for Mr. M, featuring the modified logo of his favourite motorcycle brand:
The grey yarn is a sportweight, heavenly-soft 100% alpaca from a local farm; the red is Cascade Yarns Heritage Sock. The colourwork band is worked in stranded knitting, with duplicate stitching used for the "swoosh" that runs from the R to the H. It's lined with a foldover hem for extra warmth.
2. In progress: a new crochet edging, designed specifically for National Crochet Month:
Stay tuned for the free pattern - I'll be posting it sometime in the next week, with instructions for using it to trim a simple fabric scarf. This pattern will also be featured on the March 17th episode of Underground Crafter's (Inter)National Crochet Month podcast series.
~
Wishing a happy National Crochet Month to all my crocheting friends - and happy National Craft Month to us all!
A mini-blizzard blew through yesterday, first pelting us with several inches of icy white stuff, then dripping hours' worth of freezing rain that pocked and scoured off much of the snow that just fallen. Sometime during the night, the rain turned back into snow, and we woke to a fresh snowfall this morning.
The media hype leading up to this event was rather overblown (ha! weather pun!); words of panic and fear flew about more thickly than did the snow at the height of the storm. I do love Wisconsin in the wintertime. :)
~
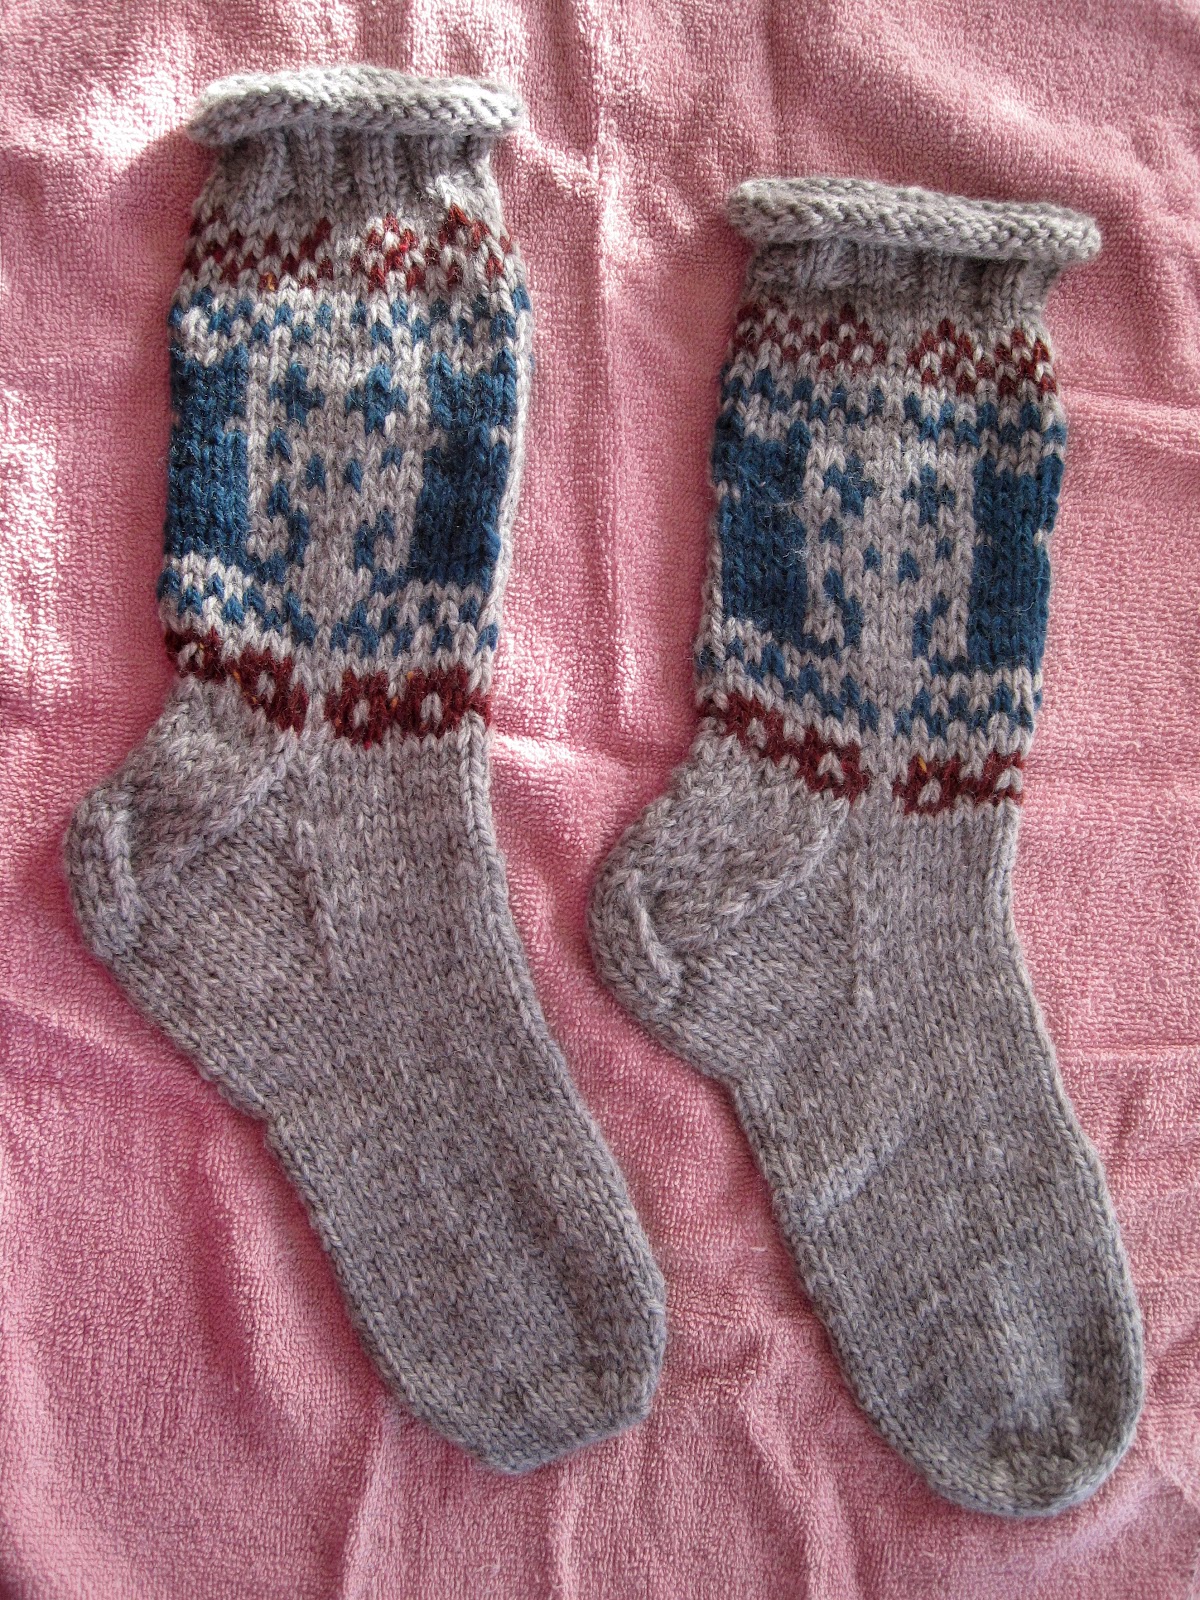
In other news, the Socks of Doom, having languished on a side table while I knit a pair of mittens with the leftover yarn, are ready and eager to be mailed.
Doom? Us?
It feels as though I've been working on these two projects (socks and mittens) for a small lifetime, though it's only been about six or seven weeks of Sundays. Stranded colourwork, I find, requires a quiet atmosphere and long stretches of free time; if I try to squeeze it in between other jobs, the knitting suffers. (Not that knitting ever goes smoothly for me, even at the best of times....)
Unlike the Socks, the mittens came together fairly easily. To honour the giftee and her Norwegian heritage, I'm naming them Nikki's Nordic Mittens.
Nikki's Nordic Mittens are based on the Generic Norwegian Mitten Pattern by Adrian Bizilia. I used 3x3 rib for the cuffs, then did 2 rows of purl stitch for texture before starting the colourwork pattern. The mitten back is done in a combination of motifs found online (I googled "Fair Isle motifs"); the palm is a diamond pattern, slightly widened to fit a multiple of 5 stitches.
I think I like the palms even better than the backs....
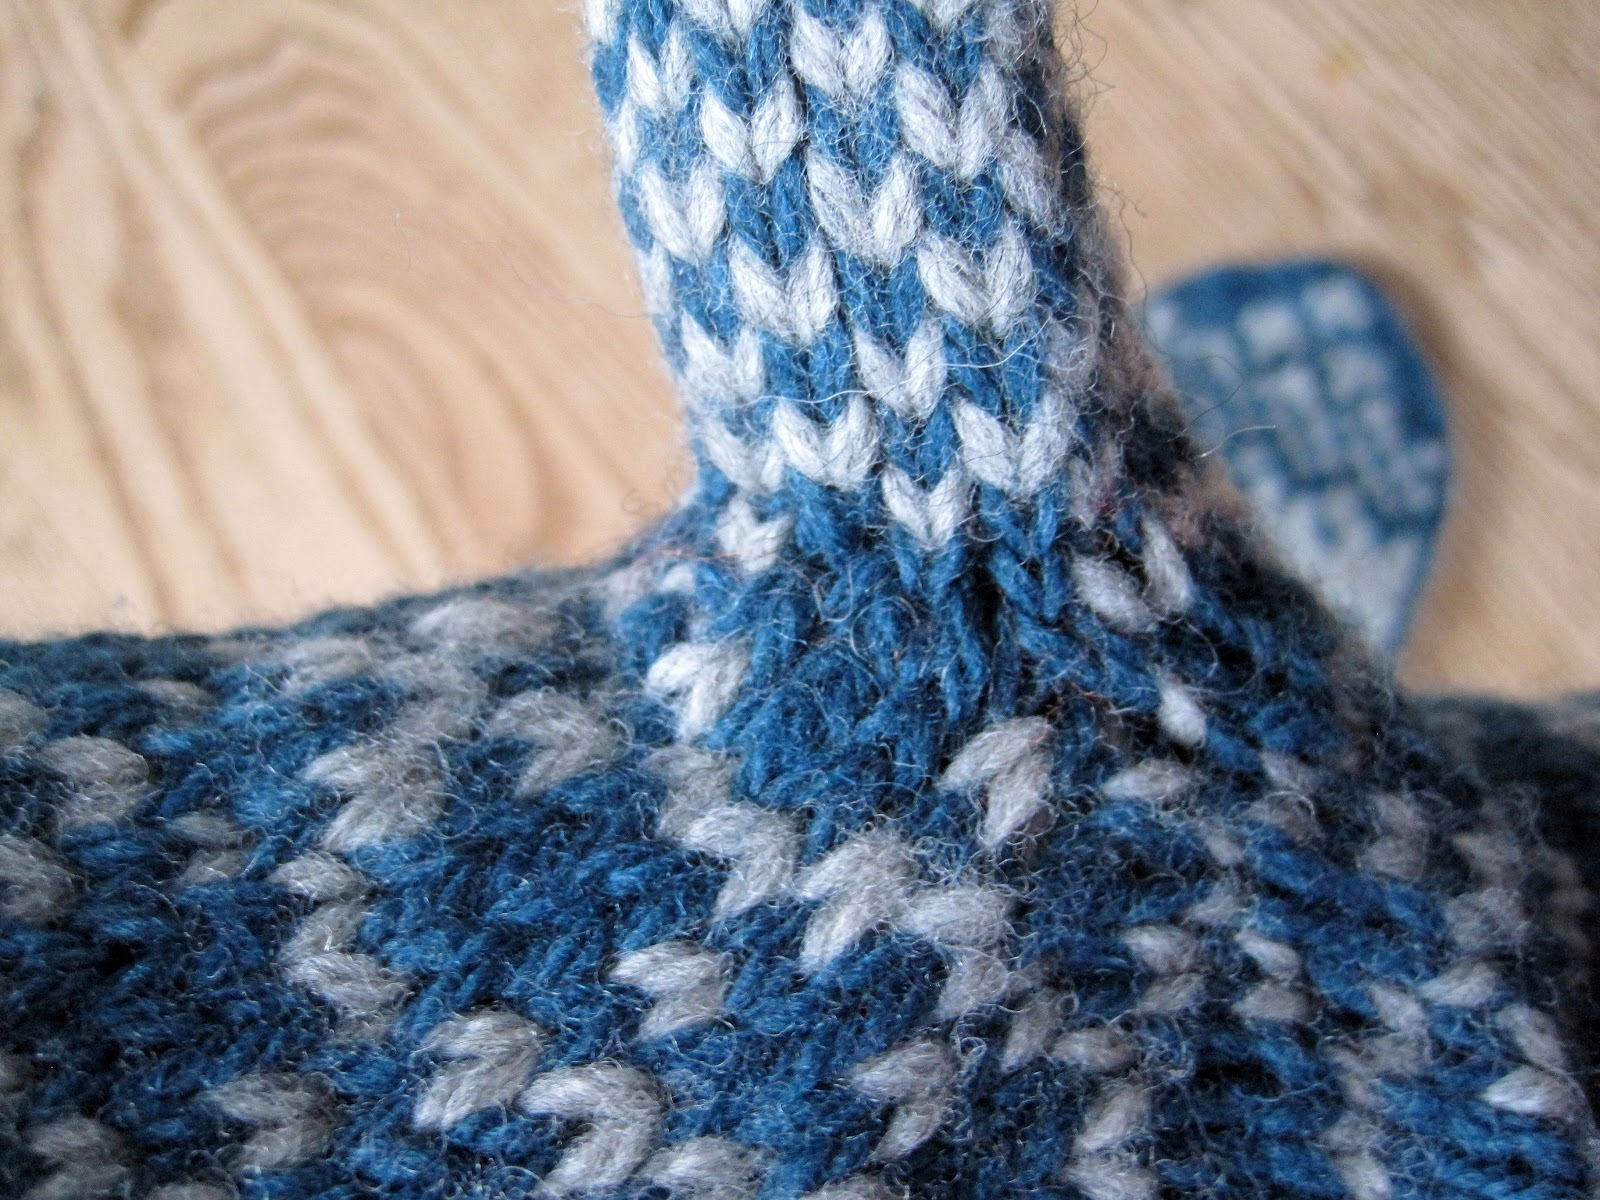
The afterthought thumbs were a new technique for me - a bit scary, but thanks to this post by A Kitten Knits and this post by Mary Jane Mucklestone they worked out beautifully (especially after some duplicate stitching at the corners to take care of the seemingly-inevitable gaps caused by picking up stitches).
Real stitch or duplicate stitch? Only the knitter knows....
For the sake of simplicity, I worked the thumbs as tubes (rather than flat and peaked like the mitten fronts and backs). It took a bit of thought to come up with decreases that would preserve the checkerboard pattern; I finally settled on paired ssk and k2g decreases which I worked on the underside of the thumb. There's probably a better way to hide decreases in very small pieces of stranded colourwork - if you know it, do please tell in the comments!
Checkerboard decreases (which sounds like the name of a 70s soft-rock song)
I wasn't sure how to bind off the colourwork at the mitten tips, so I just tied off the grey side bands, using the yarn tail to link the top two stitches, then worked a little blue bridge of Kitchener over the grey:
Bonus picture of mitten innards:
Knowing my own limitations, I chose worsted-weight yarn for these projects (rather along the lines of giving oversized crayons to the toddler who's just learning to write); even at that scale they posed quite a challenge. I really admire knitters who work stranded colourwork in finer-gauge yarns.
The Socks of Doom and Nikki's Nordic Mittens
Every so often I get bit by the knitting bug ... but I think the fever has now worked itself out. I'm ready to get back to crochet!
Here at last is the harrowing conclusion to our stirring saga of Will over Wool,
in which Mrs. M - who had never yet completed a Second Sock -
undertook to knit a Pair of Gift Socks.
~ ~ ~
At the end of Part 2, our heroine was sitting pretty, with Sock One complete and Sock Two nearly so. Just a foot and a toe - a few hours' work - and her Tale of Woe would become a Song of Victory.
Swift and steady - more or less - was the knitting of Sock Two's foot. Our heroine's stitch tension (never her strong suit) was dramatically improved by the practice of "knitting ahead", or working an extra few stitches at the end of each dpn, thus minimising the chance of unsightly ladders.
We will gloss over the 3 accidentally-slipped stitches she found about 15 rows after slipping them, and the many attempts it took to: a) drop the right stitches, in the right order, down to the mistake; b) fix the mistake; c) pick all the dropped stitches back up again. Frogging and re-knitting the 15 rows would probably have been quicker; but our heroine regarded it as a Learning Experience. Nothing daunted, she knitted on, and found herself at last on the brink of Toe Number Two.
Toe Number Two! Magic words to one who had never yet finished a Second Sock. How excitedly did she work the decrease rounds! With what modest yet growing confidence did she Kitchener her way across the opening! How joyfully did she lay the socks toe-to-toe across her lap, admiring their pleasing symmetry!
Never again would she bear the shame of Second Sock Syndrome. She could hold her head high among the knitters of the world; she had Completed a Pair of Socks.
(Pause while knitting readers remember with nostalgia their own sense of accomplishment on first finishing a P. of S.)
But the ordeal was not yet over. You will, I am sure, sympathise with our heroine when I tell you that she waited several days before blocking the socks. She told herself she needed to research the best sock-blocking method - but the truth is she was afraid. What if something went wrong? What if the Socks stretched hopelessly out of shape? What if they (gasp) felted?
(Lest my readers be alarmed, let me hasten to assure you that the Socks did not felt. Fate had yet a blow in store for our heroine, but it was not so cruel as that.)
Common knitting wisdom dictates the following method for blocking wool socks: saturate the socks in tepid water (with or without a few drops of cleaning agent), being careful not to agitate them. Without wringing or twisting, squeeze out as much water as possible. Then roll them in a towel and squeeze (or step on) the rolled-up towel to extract still more water. Socks may then be shaped and allowed to dry.
Our heroine has never liked swishing small items in a sinkful of water - too drippy and messy when it comes to hauling them out. So after a bit of thought, she devised her own sock-wetting method, as follows:
1. Stack the socks, roll them up lengthwise, and put them in the bottom of a large plastic cup (a quart-size yoghurt container works well). Add water to cover:
2. Give the socks some time to soak up the water. When they're saturated, pour off the excess. Now insert another cup of the same size, and press it firmly against the wet socks. (Do this over a sink while holding the cups sideways or upside down, so the water can run off.) The second cup acts as a plunger to help squeeze out the moisture.
3. Remove socks from cup and admire their cake-like appearance.
Now for the clean towel, the rolling, squeezing and stepping...
...then the grand unveiling, and the laying-out of the socks on another towel to dry.
Our heroine was thrilled with how well the Socks looked after blocking; the transformation was almost miraculous. Most of the blips had evened out; the bumpy heel-turns were now smooth and tidy; the colourwork looked crisp and clean.
She gazed with affection at the damp socks, product of many hours' labour. But the affection soon turned to horror....
Toe Number Two pointed the wrong way. She had decreased in the wrong places.
They say that when a man is drowning, his entire life flashes before his eyes. Here are a few of the thoughts (rather bitter, I'm sorry to say) and images (strangely movie-related) that passed through our heroine's head as she gazed on the misshapen sock:
a) Aaaugh! Aaugh! Aaaaaugh! b) ("That is the sound of ultimate suffering.") c) If I were Tolkien, I'd have written a book called The Lord of the Socks. Instead of a Ring, Frodo would stagger through Middle-Earth dragging a set of dpns, working on a sock that could never be finished. His only hope would be to find the Yarn Shop of Fire and throw the @#*% thing in. d) These are the Socks of Doom. How can I possibly mail them? Surely the plane will crash, or some dire mishap befall the poor postal employee who tries to deliver them.
and finally, when she had calmed down a bit...
e) What a great ending for the blog post.
(Our heroine was more of a philosopher than she realised. As a knitter she sighed and clutched her head, but as a writer she took consolation in the creative opportunity. Every cloud has a silver lining, they say.)
Lest our story take on the length of a novel, let us cut to the chase:
Our heroine knew she could never mail a sock with a cock-eyed toe. It didn't look right, it wouldn't fit right, and it certainly wouldn't wear well. Toe seams should run from side to side across the toes - not from the top of the foot to the bottom.
So she swallowed her bitter disappointment, called Patience to her aid once more, and waited for the socks to dry. Then, a sadder-but-wiser knitter, she frogged and re-worked the misshapen toe (not forgetting to first wet and weight the ravelled yarn to straighten out its kinks). And I'm happy to report that she had just enough yarn left to weave in at the end.
Thus ends our woolly saga. A Tale of Woe indeed, with only glimmers of triumph here and there - but rich in learning opportunities (or so our heroine consoles herself).
Sock Two is once more on the drying rack; in a few days, she hopes, she will be able to get this project out of the house and out of her life mail the Socks to their intended recipient.
Meanwhile, she's started on a pair of mittens to use up the leftover yarn....
(Thunder crashes offstage....)
~ ~ ~
I could never have made these Socks without frequently tapping into the wealth of knowledge shared by a generous online knitting community. The following sites were especially helpful:
By Gum By Golly - how to keep yarn from twisting when working stranded colourwork Paper Tiger - on colour dominance in stranded knitting Techknitting - Kitchener stitch, blocking, help for wonky ribbing and all things knitting My Jewel Thief Knits - useful foot size chart Knitty - wonderful basic sock tutorials