Showing posts with label Tutorial. Show all posts

Friday, April 8, 2011

Primrose Path Scarf, Step 1: Flowers

Look at these darling primroses.  Don't they just sing of spring?

Photo courtesy of Portland Nursery.com

Since it's much too early to plant flowers here, I decided to make a scarf which would satisfy my craving for a bit of spring colour.  Some wonderful blogger (and I wish I could remember who or where I saw this so I could give her credit!) said she loved crocheting with embroidery thread because you could get such gorgeous colours in small amounts for a very reasonable price.  Hmmm...beautiful colours...modest cost...almost as satisfying as buying real flowers.

So I stopped by Joann Fabrics and picked up some pale green Spa yarn by Naturally Caron, and a handful of flowery-toned hanks of DMC floss.  The Spa yarn, ignoring my desire for bright colours, immediately insisted on being made into the Bean Blossom Scarf.  But once that was done, I was free to pursue my Primrose Path and begin designing the flower pattern, which follows.


Sunday, March 27, 2011

Bean Blossom Scarf

After a winter of heavy sweaters, dark colours, and darker days, it's fun to pick up some pastel yarn and look ahead to warmer weather.

Here's a little scarf I dreamed up yesterday. Its twisting chains remind me of green beans clustered on the vine, and the flowers interspersed are of course the bean blossoms. (It also reminded me of asparagus roots, but that doesn't make such a nice pattern name.)


This pattern is super-easy, super-quick, and offers lots of potential for variations. As usual, the charted pattern comes first (very hastily sketched), then the shorthand instructions, then the tutorial with instructions in plain English.  Use any yarn you like with the appropriate-sized hook.  My scarf was made with Naturally Caron Spa and hook size I.

Beginning ring and loops

Join loops with sc, make new ring.

Showing one side border and one end done.

Shorthand Instructions:
Ch 6. Join with sl st to form ring.
Ch 1, sc in ring. *Ch 20, sc in ring (2 times). Ch 11. Join with sc in top of ch-20 loops to form cluster.
Ch 3. DC in joining sc to form ring. Ch 1, TURN, sc 1.
Repeat from * until scarf is as long as you like.
To make end ring, ch 6 and join with sl st to sc.
**Ch 11. SC 2, ch 4, sc 2, ch 4, sc 2 in next ring.
Repeat from ** up to ring just before other end of scarf. Ch 11.
In end ring, SC 2, ch 4 (5 times) in end ring. SC 2.
Repeat from ** up other side of scarf until you reach the end ring. SC 2/ch 4 as with first end ring (5 times), ending with sc 2.
Attach with sl st to sc at base. Weave in ends. Wear!

Starting Ring
Chain 6. Join with slip stitch to form ring.  Chain 1 and make single crochet in ring:
 
Strands and Rings
Chain 20, loop back down, and join to ring with single crochet:
 
Chain 20 again, loop back, join to ring with single crochet (look like bunny ears, don't they? I think I'll call them that):

Chain 11:

Join bunny ears with a single crochet. (Put hook through top of the 2 bunny ears just made, yarn over, and pull through. You should now have 2 loops on your hook. Yarn over again, and pull through both loops on hook.)


Chain 3, and make a double crochet in the single crochet you just made to form a new ring:
 

Chain 1, TURN, and make single crochet in ring:

Now you're ready to chain 20 and make your next set of strands (or bunny ears).  See how quick it is?  Keep making strands and rings until the scarf is as long as you like.


Ending Ring
For the final ring, chain 6 and join with slip stitch in single crochet at base of ring.  Now you're ready to go back around and make the side strands and blossoms.


Side strands and Blossoms
Chain 11:

Join to next ring: single crochet 2/chain 4, single crochet 2/chain 4, single crochet 2:

You may have to scooch the stitches over to the right to make them all fit.

The ring should look like this, with 2 petals sticking out:


Repeat the above step, all the way down one side of the scarf, ending with chain 11 at the the starting ring.  To make the end blossom, single crochet 2/chain 4 around the ring until you have 5 petals, ending with 2 single crochets.  It should look like this:

Now you're ready to go back up the other side of the scarf.  Follow the
"Side Strands and Blossoms" steps above...

...until you get to the ending ring.  Make another end blossom, join with slip stitch, and you're done!

Hide those yarn ends, fling your new bean blossom scarf around your neck (or the nearest vase), and head outside to make the most of spring.


Ideas for Variations:

~Make 2 or 3 scarves and join them at the blossom sections.  I hope to post an example of this soon.

~Lengthen or shorten the chain strands.  Just make sure you use an even number of chains for the long loops, and half that number + 1 for the side chains.

~Make the flower rings longer/taller, and add more petals.

~Make crocheted flowers to stick through the blossom holes, turning the petals into leaves.

~Make several scarves in different colours and wear them together.

You may do whatever you like with items you make from this pattern, but you may not sell the pattern. (Thanks to Snowcatcher for that handy phrase.  Crocheters and cyclists everywhere should check out her stunningly beautiful blog.)

Saturday, March 19, 2011

Queen Anne's Lace Crochet Scarf Tutorial (with pattern modifications)


This is a great scarf pattern (thank you, 1craftyboy, and all you Ravellers out there who have made it and shared it). It works up quickly and beautifully in all kinds of yarns.  The only thing I don't like:


The ends don't match. That vaguely flower-shaped one on the left is the beginning of the scarf. The graceful scallop on the right is the end. It's not a big deal, but if you're adding a border to the scarf, then the disparity really gets obvious.  Wouldn't it be nice if both ends looked the same, like this?

Modified pattern with matching ends.

I thought so too. So here's the modified pattern, with tutorial. (Please excuse the lighting variations.  I really thought I had it down.)  Happy crocheting!

Scarf Tutorial

But first, a word from our blogger:  Why, oh why, don't crochet magazines and websites CHART more patterns? When I see those endless paragraphs full of "dc in sc, *3 hdc, sk 3 st, sl st in 4th st, repeat from * to end of row, ending with triple salchow in v-st", MY EYES GLAZE OVER AND MY BRAIN SHUTS DOWN!

How much nicer to have a little picture that shows you exactly what to do. Like this:

Mrs. Micawber's Modified Queen Anne's Lace Scarf

(Note to chart followers:  2 small mistakes have been found in the chart.  See photos 11 and 15 below, and the instructions just above them, for the correct information.  Mea culpa, and thank you, Lisa.)

Now that I've got that off my chest, here's the tutorial.  The only abbreviation used here is "dc" for double crochet.  Otherwise this tutorial is written in plain English. 

The First Shell:
Chain 5. Double crochet in first chain:

(1)

Chain 3 (counts as first double crochet), TURN, then make 13 more double crochets in ring:

(2)

Chain 1 and TURN. *Single crochet in 1st dc. Chain 4. Single crochet again in same dc.* Repeat this process in 2nd dc.

Single crochet in 3rd dc. *Chain 4, then single crochet in next 2 dc.* Repeat until you get to 13th dc.

In 13th  and 14th dc (which is really the chain-3 that started the shell), make loops as in 1st and 2nd dcs (single crochet, chain 4, single crochet again in same dc.)

You should now have a shell with 9 loops,like this:

(3)

Congratulations!  Shell 1 is now complete.  On we go to:

The Second Shell
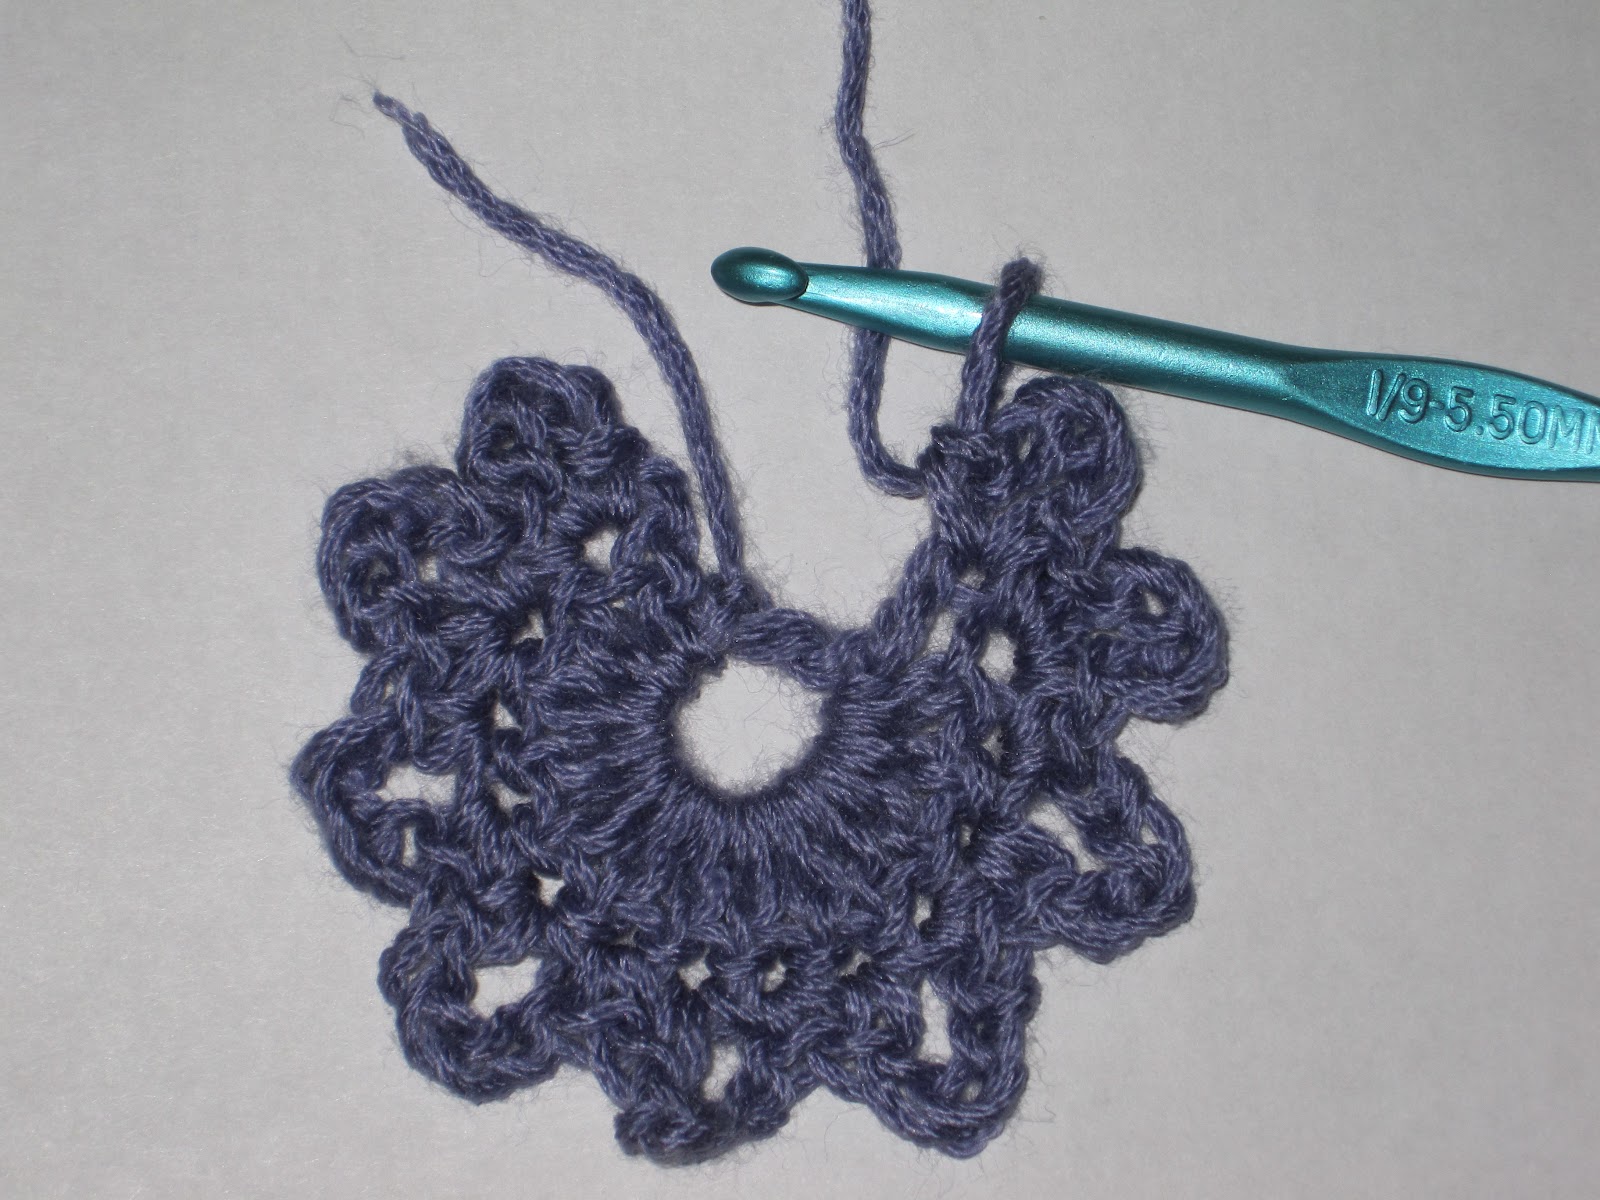
Chain 4, TURN, and attach with slip stitch to the last loop you just made.  Now you have the "ring" for the next shell (it's that little loop sticking out to the right):

(4)

Chain 3 (to equal first double crochet), and TURN.  Now the "ring" is on the left:

(5)

Make 13 double crochets in "ring":

(6)

Insert hook in bottom chain of Shell 1's first chain-3:

(7)

Yarn over and pull through (or in crochet lingo, slip stitch):

(8)

Chain 2, then insert hook in base of other side of Shell 1.  Yarn over and pull through:
(9)

Chain 2 and TURN.  Single crochet in first dc of shell just made:

(10)

Chain 3. (Note to chart followers:  the chart says chain 2 here.  The chart is wrong.  Sorry about that!)  Remove hook from loop.  With loop on left side of work, insert hook from front to back into the top of Shell 1 end dc:

(11)

Put hook back through loop. Yarn over and draw yarn through both loops on hook:

(12)

Chain 3 and single crochet in 1st dc of Shell 2...

(13)

Right next to the single crochet you already made there:

(14)

Now you're ready to add the loops and finish Shell 2.  *Single crochet in next dc, chain 4, single crochet again in same dc.*  Repeat in next dc.  You should have 11 dcs left in your shell (one of them is the starting chain-3) at this point.

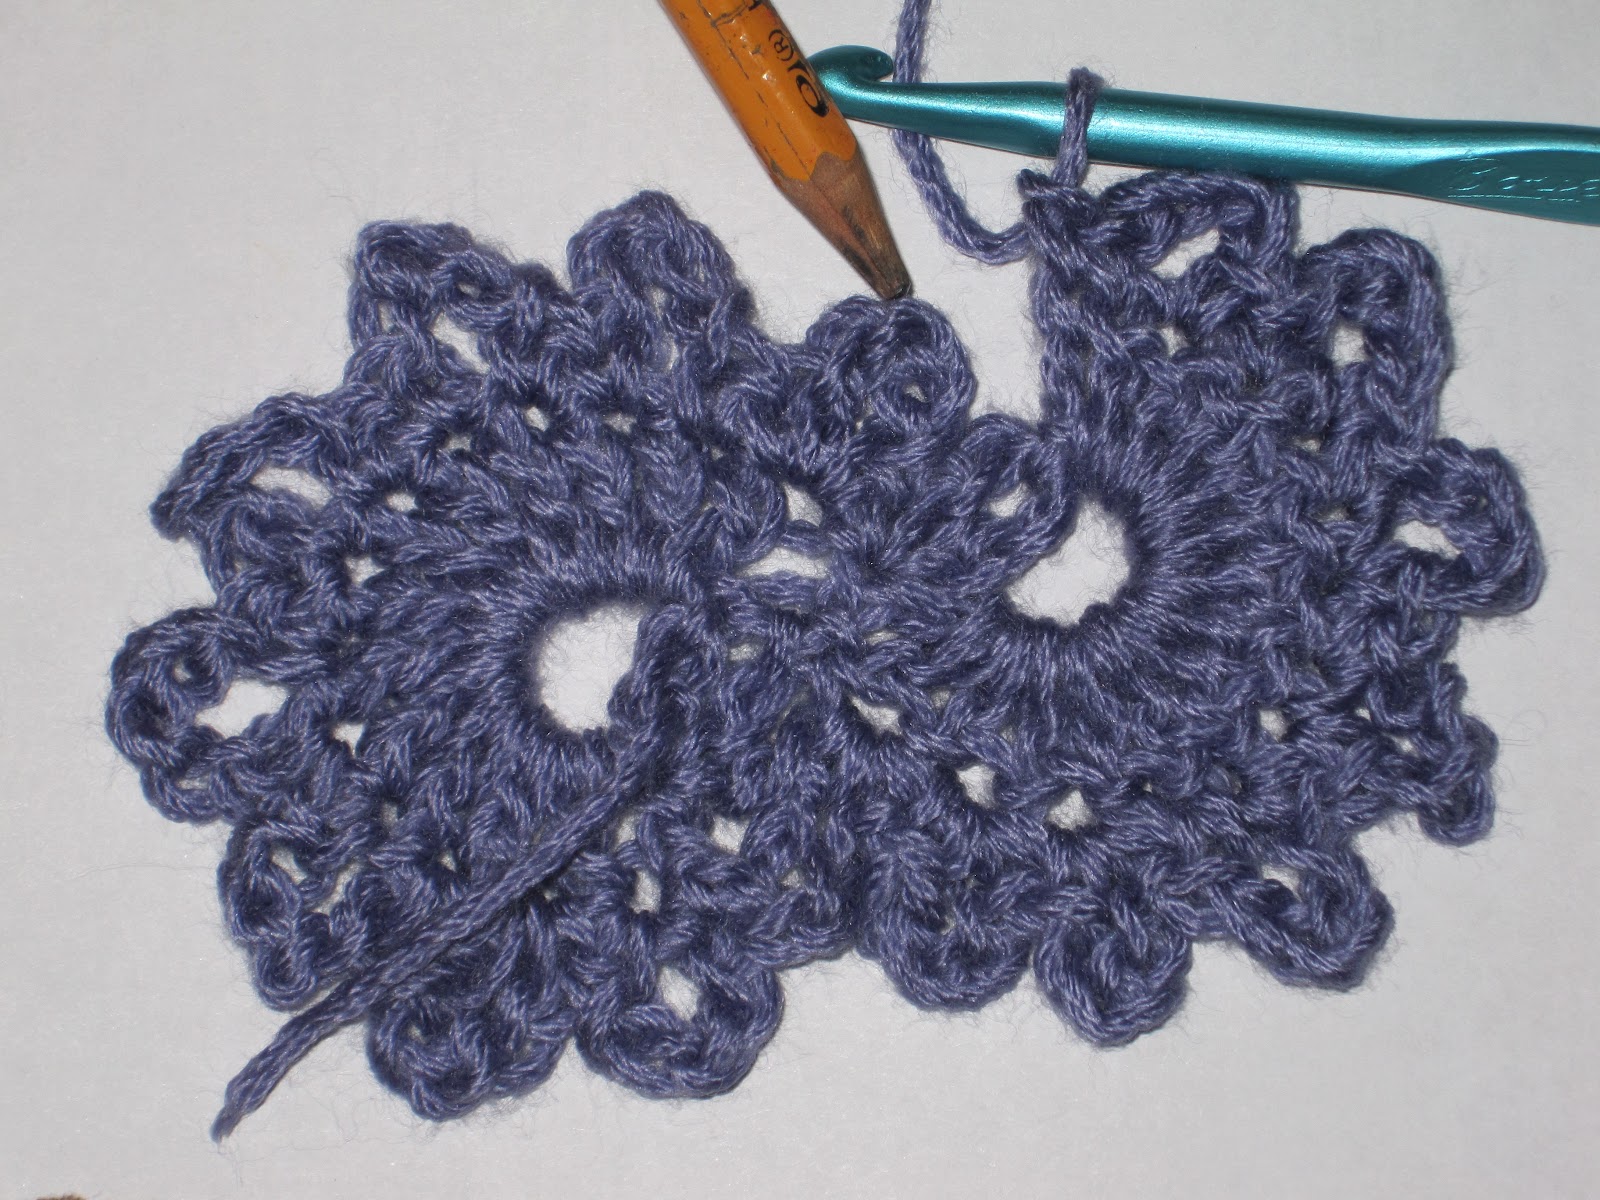
Single crochet in next dc. *Chain 4, single crochet in next 2 dcs*.  Repeat to end of shell, ending with 2 single crochets.  Now you have a shell with 7 loops.  See where the pencil is pointing?  Slip stitch in that loop (Note to chart followers: the slip stitch on the charted pattern points to the 3rd loop.  The chart is wrong.  Slip stitch in the 2nd loop, as pictured here):

(15)

Congratulations!  Shell 2 is done:

(16)

The awkward part is over.  From here on in, it's plain sailing...

Shells 3 and beyond:
Chain 4.  See that loop the pencil is pointing to?

(17)

TURN and slip stitch in that loop.  Now you've made the "ring" for the next shell.

(18)

Chain 3 (counts as first dc), TURN, then make 13 double crochets in the "ring" you just made.  Slip stitch in that next open loop.

(19)

Chain 1, TURN, and single crochet in next 2 dcs.  *Chain 4, then single crochet in next 2 dcs.*  Repeat until end of shell, always ending with 2 single crochets.  Slip stitch in the next open loop of the PREVIOUS shell (again with the pencil!), and you've completed another shell.

(20)

Now you're ready to chain 4, TURN, and slip stitch in the last loop you made - which is of course the first step of making the next shell.  It's kind of addictive - I always want to make just one more shell before I put it down, and in next to no time, the scarf is 5 feet long.

Two reminders for this pattern: 1) TURN at the end of every pass, and 2) new shells are always attached to PREVIOUS shells at both ends.

Hope you find this helpful, and again, happy crocheting!

P.S.  Here's another great key to crochet chart symbols.

~ ~ ~ ~ ~ ~ ~ ~ ~ ~ ~ ~