Showing posts with label Crochet-Along. Show all posts

Tuesday, December 16, 2014

Limpet Mitts Roundup

Howdy, strangers!

I feel as though I haven't posted anything in a long, long time ... though really it's only been about a week. Work, Christmas preparations, a four-day headache, and the Aged P have taken up most of that time. The weather has been highly unpropitious for outdoor exercise, but excellent for sitting around crocheting while honey caramelcorn bakes in the kitchen. I can see a few extra pounds in my very near future.

In other news, the Limpet Mitts CAL has been a great success. I get such a kick out of the fact that someone, anyone, wants to make a pattern I've designed - it never loses its thrill. So you may imagine with what fond pride I present ... (drumroll please) ... the Limpet Mitts Roundup!

Limpets On Ravelry

1. A lovely pale-gold pair by Hanne-Lore, made from her own onion-skin-dyed yarn:


What a beautiful shade (and very on-trend). Hanne-Lore worked into the Forward Loop Chains of the thumb to create a matching border there.

2. A really striking mitt by aliothsan:


I love the colourwork in these mitts - that contrasting yarn really makes the limpets pop.

3. An elegant silvery-grey pair by cannej:


Cannej also added a pretty border to her thumbs. A lovely detail.

4. A lacy, shimmery mitt by thebeader:


I like the open look of these mitts, and the soft shade of grey.

Limpets in Blogland

5. A warm and cheery red mitt by Teresa:


Teresa and I had great fun emailing back and forth about the progress of her mitt. Though we very often went off-topic, she obviously conquered the pattern. Bravo Teresa!

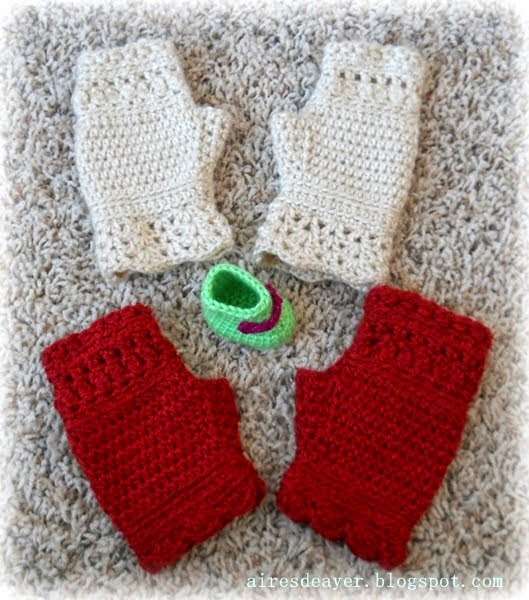
6. THREE pairs of mitts by Gisela of Un Poquito de Todo (what a great blog name). Soft cream-colour for herself:


And two darling pairs for her daughter, in cream and toasty red:


Notice the creative cuffs - I especially like the lacy v-stitch  on the cream pair.

7. A dainty ivory pair by Anja in Slovenia:


These pretty little mitts make me think of sunny weather and garden parties, with ladies in fluttery dresses and flowery hats.

8. A cosy grey pair by Mere of Mereknits:


Mere tweaked her pattern a bit to get just the fit she wanted around the thumb, adding a bit of extra texture in the process. And just look at her beautiful limpets:


~ ~ ~

Many thanks to all who've participated in the CAL thus far, and to the ladies above for giving me permission to post their photos. I love it when people take one of my patterns and run with it, so I've really enjoyed seeing the individual touches these gals have added to their mitts.

If you're working on a pair of Limpet Mitts, and would like to share your photos with an admiring world, shoot me an email (address in profile at right) or a message in Ravelry (where I'm MrsMicawber). I'd love to see your version and add it to a future post.

~ ~ ~

So, who's ready for Christmas?

(not me!)

~ ~ ~ ~ ~ ~ ~ ~ ~ ~ ~ ~

Saturday, November 22, 2014

Limpet Mitts Free Pattern and CAL, Part 2 ~ Thumb Gusset, Body, and Wrist Edging


Welcome to Part 2 of the Limpet Mitts Crochet-Along! Here's where we we left off last week:


This is the pretty top cuff to our mitt. Today we'll tackle the thumb gusset, body, and wrist trim, and discuss how to customise mitt size.

If you missed the last two posts, you can find them here:
Limpet Mitts, the Warmup (don't skip this post - it contains valuable pattern tips)
Limpet Mitts, Part 1 ~ the Top Cuff

Erratum from Part 1, the Top Cuff: The pattern instructions and phototutorial for Round 5 contained an error. (The video tutorial was the correct version). Instructions should read: "Hdc in first hdc, ch 1, skip chain, make limpet....) Many thanks to aliothsan on Ravelry for noticing the mistake!

All crochet terms are American.

Video and photo tutorials can be found below the pattern.


Abbreviations and Special Terms Used:

RS - Right side
Ch - Chain
Sc - single crochet
Hdc - half double crochet
Sc2together, or Normal Decrease - Insert hook in indicated stitch, yarn over and pull up a loop, insert hook in next stitch, yarn over and pull up a loop, yarn over and draw through all loops on hook.
Special Decrease - An sc2together combined with an extra hdc in either the first or second stitch of the decrease. Not a true decrease at all, but it gives the decorative look of the decrease while maintaining stitch count.
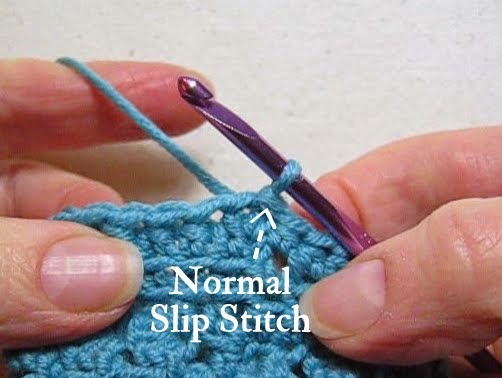
Slipped Slip Join - drop working loop from hook; keeping yarn behind work, insert hook from wrong side to right side through top two strands of first stitch of row; pull working loop through and tighten until join disappears. Chain as instructed to begin new round. (See Pattern Part 1 for photos and video tutorial.)
Forlpch - Forward Loop Chain (see Warmup Post for photo and video tutorial)
Ending Picot, or Forlp Chain/Hdc Ending Picot - Forward Loop Chain 1, yarn over, insert hook into back bump of Forlpch and pull up a loop, insert hook into indicated stitch, yarn over and IMMEDIATELY pull through all loops on hook.

Limpet Mitts Pattern with Tips in Mostly Plain English, Part 2

~ Body of mitt will be worked in spiral rounds; wrist edging uses joined rounds.
~ Work RS facing at all times.

Round 9 (RS): Make thumb loop: Forward Loop Chain 10 (11,12,13 OR custom length that comfortably fits around the base of your thumb), slip stitch in same stitch (where previous round was joined), being careful not to twist Forlpch. Sc in next stitch, then hdc in each stitch around, finishing in the last hdc before slip stitch. Be careful not to stitch into the slip stitch. Do not turn, on this or any other round.

Note on Stitch Counts: Stitch count will vary widely based on cuff size and thumb size, so body stitch counts are not given. I recommend just counting the thumb stitches. (The body will decrease naturally with the thumb.)

Round 10: Skip slip stitch. Inserting hook into top 2 strands of first Forward Loop Chain, hdc in first Forlpch (place marker or scrap of yarn in hdc just made), then hdc in each Forlpch around thumb loop = 10 (11,12,13 OR custom number) hdcs. Skipping next slip stitch, hdc in sc (place marker or scrap of yarn in hdc just made). Hdc in each hdc around body, ending in stitch before marker.

Note on the Special Decreases you're about to make: Special Decrease A is made in the 1st and 2nd stitch of the thumb loop. Special Decrease B is made in the 1st and 2nd stitch of the body. Both decreases will start in the marked stitches.

Round 11 (Special Decrease round): Make Special Decrease A: Starting in marked stitch (first thumb stitch), sc2together, then hdc in same stitch (the second stitch of decrease). Hdc in each stitch around thumb, ending in last stitch before marker. In next marked stitch, make Special Decrease B: hdc in marked stitch, then, starting in same stitch, sc2together. You should now have 10 (11,12,13 OR custom number) hdcs between the sc2togethers. Place markers if desired in each sc2together. Hdc in the next stitch and in each stitch around, finishing in the last hdc before the sc2together.

Note: On following rounds, all decreases will be Normal Decreases (sc2together) and will start in the decrease stitch(es) of the previous round. Thumb stitch count will decrease by 1 stitch each round.

Round 12 (normal decrease round): Make normal decrease: Starting in decrease stitch of previous round, sc2together. Hdc in next stitch and in each stitch around thumb, finishing in last stitch before sc2together = 9 (10,11,12 OR custom number -1) thumb hdcs between decreases. Starting in next decrease stitch, sc2together. Hdc in the next stitch and in each stitch around, finishing in the last hdc before decrease.

If using markers in decreases, move them up with each round.

Following Rounds (normal decrease rounds): Repeat Round 12 until you finish a round with 3 hdcs between decrease stitches, OR to desired length of mitt (see Customising the Size below). Round should end just before thumb area containing the 3 hdcs.

Tip: The following rows will add about 1" to your Mitt, so plan accordingly.

Last Body Round: Do not decrease, but work 1 full round of plain hdc, ending 1 stitch into thumb area. Sc in next stitch, join to next stitch with Slipped Slip Join (see Special Stitches, above). Hook and working loop should now be in center of thumb area.

Wrist Edging Round 1, back loop only: Do not turn, chain 1 (does not count as stitch.) Starting in same stitch, working in the back loop only, single crochet around. Join last sc to first sc with Slipped Slip Join. (You may want to start counting stitches now, to keep the next 2 rounds even.)

Wrist Edging Round 2, back loop only: Do not turn, chain 2 (does not count as stitch). Starting in same stitch, working in the back loop only, hdc around. Join last hdc to first hdc with Slipped Slip Join.

Wrist Edging Round 3, back loop only: Repeat Wrist Edging Round 1. You're almost done! :)

Final Picot Edging, back loop only: Make first edging picot as follows: *Forlpch 1, yarn over, insert hook into back ridge of Forlpch, pull up a loop* (picot started); insert hook into back loop of same sc (the sc you joined to), yarn over and immediately draw through all loops on hook (picot attached). To make second picot, repeat from * to *, insert hook in next sc, yarn over and draw through all loops on hook. Start third picot as others, but skip an sc before attaching.
Continue making picots and attaching in pattern around: start picot, attach to next stitch, start picot, skip a stitch and attach. (Or we could say: attach picots 2 in a row, then skip a stitch before attaching the next 2 in a row. See video or photos below if this doesn't make sense.)
Attach final picot in final sc (it's okay if the attaching pattern gets a little messed up by this). Chain 1, cut yarn several inches away from project, and gently pull yarn tail up and out of stitch.

Join bottom and top edges with Invisible Join (click here for tutorial), then weave in ends, and try on your beautiful new Limpet Mitt. (Or, if it's a gift, picture the delight of the recipient.) :)


Customising the Size

While working the Normal Decrease Rounds, try on your mitt every few rounds. If the body is decreasing too rapidly and mitt is becoming too snug, you can:
  • Work Special Decrease Round(s) as needed to maintain the stitch count/circumference and slow the decrease, OR
  • Simply stop decreasing and work plain hdc rounds to the wrist.
If you reach the end of the decreases, but the mitt is still too short, work plain hdc rounds until bottom edge just touches your wrist, ending 1 stitch into thumb area. Then work the Wrist Edging.

Video Tutorial


Phototutorial

See Pattern above for tips and detailed notes.

Round 9: To make thumb loop, Forward Loop chain to desired length, slip stitch in same stitch.


Try on the loop:


Sc in next stitch, then hdc around:


Ending Round 9 and beginning Round 10:
1. Hdc in last hdc from row below. Skip the slip stitch, and hdc in the top two strands of the first Forlpch.
2. Place a marker in the hdc you just made.
3. Hdc around the thumb loop (inserting hook into top strands of Forlpchs). Skip the slip stitch, then hdc in the first body stitch (which is the sc from the previous round.)
4. Place a marker in the hdc you just made.


Finishing Round 10: Hdc around until you reach the first marker.

Round 11, Special Decrease Round: Starting in marked stitch, make Special Decrease A:
sc2together, then hdc in the same stitch as the second half of the decrease.

Special Decrease A, beginning of thumb

Hdc around thumb to next marker, then make Special Decrease B: Remove marker and hdc in marked stitch. Then, sc2together, starting in SAME stitch where you made the hdc.

Special Decrease B, end of thumb

Hdc in the next stitch and in each stitch around.... but feel free to stop and try on your mitt first!


Finishing Round 11: Okay, back to our hdcs. Hdc around until you reach Special Decrease A.

Starting the Normal Decrease Rounds:

A Normal Decrease is just an sc2together, started in the top two strands of the decrease below.


Tip: If you're having trouble recognising the decreases, place a stitch marker in each one after you make it, and move the markers up with each row.

Recognising the Decreases - place marker if necessary

Note: With every Normal Decrease Round, the thumb count will decrease by 1 stitch.

Rounds 12 and Following, Normal Decrease Rounds:
Make a Normal Decrease starting in the first decrease from Round 11,
then hdc around the thumb,
then make another Normal Decrease starting in the decrease at the other side of the thumb.
Hdc around body until you get back to the first decrease.

Keep repeating Round 12, making decreases on top of the previous decreases, until you have completed a round with just 3 hdcs between the decreases, OR to desired size (see Customising the Size above):


When your mitt is the size and length you want - remember that the Wrist Edging will add about 1" to the length - work a round of plain hdc with no decreases, ending just before the thumb area:


Finishing the Body:
Make your last Hdc just inside the thumb area,
sc 1,
join to next stitch with Slipped Slip Join (see Special Stitches above). Do not turn.


Wrist Edging Round 1, back loop only: chain 1 (does not count as stitch). Starting in same stitch, sc in back loops around. Join with Slipped Slip Join and chain 2.


Wrist Edging Round 2, back loop only: hdc in back loop around, join with Slipped Slip Join. (No photo of this round!

Wrist Edging Round 3, back loop only: Repeat Wrist Edging Round 1, join with Slipped Slip Join.

Wrist Edging Rounds 2 and 3

Final Picot Edging (woo hoo!)

The Edging Picots are similar to the Starting Picots from Part 1, BUT they need to be anchored to the row below. To make the first Edging Picot:

1. Make a Forward Loop Chain;
2. Yarn over, insert hook into back bump of Forlpch, and pull up a loop;
3. Insert hook into back loop of same sc (the sc you joined to);
4. Yarn over and IMMEDIATELY pull through all the loops on the hook.


Very Important: Do not pull up an extra loop after Step 3! If you do, your edging will not be as stretchy as it should.

Start another Picot (Forlp ch 1, yarn over, insert hook into back bump of forlpch and pull up a loop), then attach it to the next sc.
Start the third Picot, but when you attach this one, skip an sc.

Follow this pattern around the edge: start picot, attach to next stitch, start picot, skip a stitch and attach. (Or we could say: attach picots 2 in a row, then skip a stitch before attaching the next 2 in a row. It was hard to write clear directions for this section - if you can think of a better way to say it, please leave me a comment and I'll gladly amend the text!) :)


If you're wondering why we don't attach a Picot to every stitch, it's because each Picot is almost 2 stitches wide - so attaching one in every stitch would be too many.

Here's our Mitt, several Picots in:


When you reach the end of the round, make a final picot in the last sc. (You will have either 1 or 2 spaces left at the end of the round. If you have 2 spaces, just skip the first and make the final picot in the last space.)

If you like, try on your mitt now to make sure you're happy with it, then....

Chain 1, cut your yarn several inches away from the mitt, and pull yarn up and out of stitch.


Join bottom and top edges with Invisible Join (click here for tutorial), then weave in ends.


Now all you have to do is make another one!


Ideas for Variations:
  • Use the top cuff pattern as a pretty hat band
  • Design your own top cuff and follow the body instructions for decreasing
  • Add a ruffle at the bottom (instead of the ending picot round) - just *chain 3, 4, or 5, slip stitch in next st, and repeat from * around.
  • Make a Very Basic Mitt by starting with picot band, stitching plain hdc rows to desired cuff length, making body as in pattern, then finishing with the wrist edging of your choice.
Thanks so much for joining in the CAL - and do please send me a photo of your Mitts when completed. I'd love to post them here on the blog. (You can find my email in the Profile at right, or contact me in Ravelry as MrsMicawber.)

If you find any errors in the pattern (it happens regularly) or have any questions, please feel free to contact me through the comments below, via email, or in Ravelry.

You may do whatever you like with the items you make from this pattern, but you may not sell the pattern or reproduce its text without permission. Links are always welcome.

Happy crocheting!

~ ~ ~ ~ ~ ~ ~ ~ ~ ~ ~ ~

Saturday, November 15, 2014

Limpet Mitts Free Pattern and CAL, Part 1 ~ the Top Cuff

Welcome back to the Limpet Mitts CAL!

In the last post, we gathered our supplies and practiced making Forward Loop Chains and Limpets.

Now that we've completed these preliminary flourishes, let's get started on our Mitts.

All crochet terminology is American.


Limpet Mitts Pattern

The Limpet Mitts are worked top-down. Project starts flat, is joined after Row 2, then worked in the round for the remainder of the pattern. Thumb gusset is worked in one with the body of the mitt, decreasing gradually towards the wrist. (Thumb gussets and body will be worked in Part 2.)

Size: 6½", 7¼", 8", 8¾" palm circumference x 5½"-7½" length OR custom size (see Pattern Row 1 for instructions on custom sizing the circumference)

Yarn Requirements: approximately 100-125 yards DK/light worsted weight (#3) yarn (more for very large mitts)

Yarn I Used: Plymouth Yarn Select DK Merino Superwash, 1017 Cilantro and 1131 Turquoise

About the Yarn: Plymouth DK Merino Superwash is a heavier DK - I would call it a light worsted. It's very sproingy, though being an S-twist it can get splitty as the motion of crochet causes it to untwist. But the yarn is very forgiving and can stand up to repeated frogging. It gives beautiful stitch definition and a cushiony fabric.

Hook: US G6/4.00mm, or size that gives best stitch quality

Gauge: 5 stitches and 4 rows = 1" in half-double crochet (Note: if you're making mitts for yourself, gauge is not important - you can try them on as you go)

Notions: Darning needle; 2 stitch markers (optional)


Abbreviations and Special Terms Used:

RS - Right side
WS - wrong side
Ch - Chain
Sc - single crochet
Hdc - half double crochet
Forward Loop - a cast-on loop borrowed from knitting which is the first step of every Forward Loop Chain and Limpet. (See the Limpet Mitts Warmup post for photo and video tutorial.)
Forward Loop Chain - cast on 1 Forward Loop, yarn over, and draw through both loops on hook. (See the Limpet Mitts Warmup post for photo and video tutorial.)
Forward Loop Hdc Picot - Forward Loop Chain 1, then yarn over, insert hook into back ridge, yarn over and pull up a loop, yarn over and draw through all loops on hook. (See also photos and video below.)
Limpet - cast on 5 Forward Loops, insert hook into indicated stitch, yarn over and pull up a loop, yarn over and draw through all loops on hook. (See also photos and video below.) Limpets are worked on WS rows only. Always followed by "locking" stitch.
Slipped Slip* Join - drop working loop from hook; keeping yarn behind work, insert hook from wrong side to right side through top two strands of first stitch of row; pull working loop through and tighten until join disappears. Chain as instructed to begin new round.

Limpet Mitts Pattern in Mostly Plain English, Part 1 ~ The Cuff

(Video and Phototutorials follow the pattern.)

Row 1 (RS): Make Forward Loop Hdc Picot: *Forward Loop Chain 1, hdc in back bump without turning work (picot made). Repeat from *until you have 17 (19, 21, 23) clusters, OR a strip long enough, when stretched slightly, to fit around the base of your fingers.

Note on custom sizing: The picot row sets the stitch count for the rest of the cuff. Use this chart to calculate your stitch count for the rest of the cuff rows:

If Row 1 has 15 picots, Rows 2-8 should have 29 stitches.
16 picots ... 31 stitches
17 picots ... 33 stitches
18 picots ... 35 stitches
19 picots ... 37 stitches
20 picots ... 39 stitches
21 picots ... 41 stitches
22 picots ... 43 stitches
23 picots ... 45 stitches
24 picots ... 47 stitches

Row 2 (RS): Do not turn. Rotating work to right (or to left if you're a lefty), chain 1 (does not count as stitch), sc in "hole" made by back bump, *chain 1, sc in next "hole". Repeat from * across = 33 (37,41,45 OR custom number) stitches. Note: Make sure you are stitching into the "bottom" of the picot stitches. Your scs should be made in the same "holes" that the hdcs were made in.

Bring ends together to form a ring, RS facing outwards. Join with Slipped Slip Join (see Special Terms above; photos below) to first stitch of Row 2. Be careful not to twist work. Mitt will be worked in rounds from here on.

Round 3, back loop only (RS): Do not turn; chain 1 (does not count as stitch.) Starting in same stitch, working in the back loop only, single crochet around = 33 (37,41,45 OR custom number) stitches. Join last sc to first sc with Slipped Slip Join.

Round 4, back loop only (RS): Do not turn; chain 2 (does not count as stitch). Starting in same stitch and working in the back loop only, *hdc, chain 1, skip 1 stitch. Repeat from * around, ending with hdc = 33 (37,41,45 OR custom number) stitches. Join to first hdc with Slipped Slip Join.

Round 5 (WS): Turn, chain 2. (This will be the only WS round.) Hdc in first hdc, ch 1, skip chain, *make Limpet in next hdc, chain 1 to lock limpet, skip 1. Repeat from * until 1 hdc remains in row below. Hdc in final hdc. Turn work so RS is facing you. Inserting hook from WS to RS, join final hdc to first hdc with Slipped Slip Join (join will be worked in opposite direction to previous joins.)

Note: Round 5 edited 11/28/14. Many thanks to aliothsan on Ravelry for noticing the pattern error!

Round 6 (RS): Turn, chain 2. Hdc in hdc, hdc in "hole" (chain st), chain 1. *Skip limpet, hdc in next "hole", chain 1. Repeat from * around until you have 3 stitches left in the row below (a limpet, a chain, and an hdc); skip limpet, hdc in each of the last 2 stitches. (Round starts and ends with 2 hdc in a row.) Join to first hdc with Slipped Slip Join.

Note: Mitt will be worked RS facing from here to end.

Round 7, back loop only: Repeat Round 3.

Round 8, back loop only: Chain 2. Starting in the same stitch, working in the back loop only, hdc in each stitch around. Join to first hdc with standard slip stitch = 33 (37,41,45 OR custom number) stitches.

And whew! The trickiest part is over - the rest will be fairly plain sailing. Tune in on Saturday for Part 2, when we'll finish our mitts.

P.S. Isn't it pretty so far? :)

Video Tutorial


Photo Summary (see Pattern above for detailed row instructions)

Row 1, Right Side: Make Forward Loop Hdc Picots until edging is desired length. (You can follow the suggested pattern sizes above OR customise by adding/subtracting picots.)

If you're making a custom size, please see the chart in the Note on Custom Sizing in Pattern Row 1 above - it will tell you your stitch count for the rest of the cuff rows.

Forward Loop Chain 1, hdc in back ridge. Repeat.


Row 2, Right Side: Do not turn. Chain 1 (does not count as stitch), then work back across the strip of picots, making a single crochet in each "hole" and chaining 1 between. End with a single crochet in the final hole.

 Note: Make sure you are stitching into the "bottom" of the picot stitches. Your scs should be made in the same "holes" that the hdcs were made in.
Row 2

Making the Slipped Slip Join: Remove hook and pull up a tall loop. Bring ends together to form a ring, RS facing outwards. Join with Slipped Slip Join to first stitch of Row 2. Mitt will be worked in rounds from here on.

Joining at end of Row 2

The Slipped Slip Join

Round 3, back loop only: Do not turn; chain 1 (does not count as stitch). Single crochet around in the back loop only. Join to first sc with Slipped Slip Join.

Round 3

Round 4, Right Side, back loop only: Do not turn. Chain 2 (does not count as stitch). Starting in the same stitch, (hdc, chain 1, skip 1) around in the back loop only, ending with hdc. Join to first hdc with Slipped Slip Join.

Round 4

Note on Round 5: Edited 11/28/14 to correct error. (The video tutorial did not need correcting.)

Round 5, Wrong Side: Turn, chain 2. This will be the only WS round. Hdc in first hdc, ch 1, skip chain. *Make Limpet in next hdc, chain 1 to lock limpet, skip a stitch. (The stitch you are skipping is the chain stitch in the row below.) Repeat from * until 1 hdc remains in row below, then hdc in final hdc.

Round 5

After you make a few limpets, turn the work around and admire them:

Kinda cute, aren't they?

Here we are at the end of the row, with the final hdc just made:

End of Round 5

Because we're working a WS row, our Join will have to be made a little differently.

Turn work so RS is facing you. Inserting hook from WS to RS, join final hdc to first hdc with Slipped Slip Join. (Join will be worked in opposite direction to previous joins.)

Joining Round 5

Whew! Congratulations on finishing the trickiest round of the cuff. Wipe the sweat from your brow and take a moment to try on your mitt and admire the pretty limpets. Get a fresh grip on your hook, and prepare to zip right through the next 3 rounds.

(I have a lovely photo of myself trying on the cuff at this stage - the limpets are beautiful but Round 3 is completely missing! That photo shall not be posted.) :)

Round 6, Right Side: Turn, chain 2. Mitt will be worked in the right side from here to the end.
Hdc in first hdc, hdc in the "hole" right before the limpet, then chain 1.

*Skip limpet, hdc in next "hole", chain 1. Repeat from * around until you have 3 stitches left in the row below:  a limpet, a chain, and an hdc. Skip the limpet and hdc in both stitches to end.

Start of Round 6

Round 6

End of Round 6

Remember, Round 6 starts with 2 hdc and ends with 2 hdc. If you get to the end and your stitch count is off, it may be that you started or ended in the wrong stitch, or forgot to skip a stitch somewhere.

Note: Mitt will be worked RS facing from here to end.

Round 7, back loop only: Same as Round 3: don't turn, chain 1, sc in back loop around, join with Slipped slip Join.

Round 7

And now we come to ... the Final Round! Of the cuff, that is. :)

Round 8, back loop only: Chain 2. Starting in the same stitch, working in the back loop only, hdc in each stitch around. Join to first hdc with standard slip stitch.

Round 8


And that's it for Part 1. How do you like your mitt so far? I think it's rather pretty:


If you're joining in the CAL, I'd love to see how your mitts progress. Send me a photo via email (see Profile at right for address), or reach me in Ravelry as MrsMicawber. And if you have any questions about the pattern, please don't hesitate to ask.

See you next Saturday, when we'll finish our Limpet Mitts. Until then, happy crocheting!

~ ~ ~

*I don't know if "Slipped Slip" is the official name for this join, but that's what Vashti Braha calls it. And what's good enough for Vashti is enough for me! :)

~ ~ ~ ~ ~ ~ ~ ~ ~ ~ ~ ~