Showing posts with label Free pattern. Show all posts

Thursday, May 16, 2024

Solid State Dishcloth: a Free Crochet Pattern

Imagine a kitchen drawer full of pretty crochet dishcloths. You open the drawer and choose one, pausing to admire the fancy stitch pattern. You plunge it into soapy water and wring it out, and then reality strikes: the fancy dishcloth is now a shapeless blob, with rows of holes between the stitches. Nothing but a trip through the dryer will shrink it back into shape.

Why do so many crochet dishcloths lose their shape, or develop gaping holes? The fault, dear reader, is partly in the yarn; cotton has no recovery. But the real culprit is crochet itself.

Crochet stitches under vertical tension will naturally tighten at the base and loosen at the top. This leads to gaps between rows, and flared or misshapen edges. You can try to get around it by using shorter stitches, but even single crochet dishcloths can develop holes at the top of each row. You can try working your stitches more tightly, but that may hurt your hands. You can try special techniques like waistcoat stitch, or working two rows below, but you may end up with a dishcloth so thick it never really dries between uses. What's a crocheter to do?

This crocheter decided to design a dishcloth that simply can't stretch into gaping holes. After making many samples, and testing them for months in my own kitchen, I happily present the Solid State Dishcloth.

The Solid State Dishcloth uses a special variation of single crochet that keeps tension evenly distributed - not only within each stitch, but also between each row. Wet or dry, this dishcloth will not develop gaping holes. It also features a flexible I-cord foundation, perfectly straight sides, and a tidy slip stitch edging that helps prevent flared or distorted edges.

Here's one of my Solid State Dishcloths, a few months into the testing period. It's soaking wet, and has just been through a strenuous round of dishwashing and counter-wiping:

Are there gaps? Yes, but they're very small and very consistent. And the cloth has held its shape.

Can a Solid State Dishcloth ever bias, or look less-than-square? A little, when it's soaking wet - just as any sturdy cotton fabric might. But the special stitch structure, along with the edging, minimizes stretching, so it's easy to tweak the cloth back into shape for drying. If your tension is consistent when you crochet it, this dishcloth will keep its shape. 

The Solid State Dishcloth won't be the fanciest dishcloth in your drawer, but it may very well be the sturdiest. To make your own, read on.

~ ~ ~

Solid State Dishcloth Videotutorial (written pattern below)

~ ~ ~

Solid State Dishcloth Pattern in Mostly Plain English

Yarn Requirements: Kitchen cotton yarn, 40-50 gm/60-85 yards

Size: Custom (I have small hands, so my dishcloths are 6" x 7" and use less than 30 gm each; yours can be any size you like)

Yarn I Used: Worsted weight hand-dyed kitchen cotton from my dear friend Snowcatcher

Hook(s): Choose a hook size appropriate for your yarn (you might want to try a smaller hook than usual for the dishcloth body). Optional for edging: extra hook, one size smaller than hook used for body.

Hook Sizes I Used: US G/4.25mm for body; US F/3.75mm for edging

Recommended stitch tension: Relaxed for body; moderate for  foundation row and edging

Notions: 2 stitch markers; yarn needle for weaving in ends

All crochet terminology is American.

~

Abbreviations and Special Terms

Sc: Single crochet
Near/Nearer/Nearest: Close(r) to your hook hand as you work.
Far/Farther/Farthest: Far(ther) from your hook hand as you work.
RS: Right side
WS: Wrong side
Sl st: Slip stitch

Pattern in Mostly Plain English, with Tips and Photos

Dishcloth may be worked over any number of stitches.

Foundation Row: To start the I-cord foundation row, make a knotless longtail cast-on as follows.

1. Wrap a 6” yarn tail across the front of the hook towards your hook hand, behind the hook away from your hook hand, then drop the tail in front of the working/running yarn.
2. Place the forefinger and thumb of your non-hook hand between the tail and the working yarn.
3. Grab the end of the tail with a spare finger of your non-hook hand.
4-5. Lift your thumb so that the tail loops up and over it. The working yarn should be looped over your forefinger. With hook, reach in front of the tail, then up through the loop on your thumb.
6. With hook, reach back and scoop the working yarn from in front of your forefinger.
7. Pull the working yarn through the loop on your thumb.
8. Remove your thumb and tighten the tail.


You should now have 2 loops on your hook that look like this:

Begin making 2-loop I-cord: *Remove your hook from the first loop (the one nearest the tip), and hold this loop's base with your thumb and finger so it can't twist. Yarn over and pull up a loop in the second loop, then re-insert hook into the first loop, yarn over and pull up a loop. (One I-cord row complete.) Repeat from * to desired dishcloth width.

Working the I-cord foundation

Tips for I-cord: Keep tension moderate and consistent. Don't worry if your I-cord looks a bit gappy on the back side; this will go away when you crochet the first row of the dishcloth.

Finishing I-cord foundation: When I-cord is desired length, remove hook from first loop, then re-insert it from back to front. Yarn over and pull through both loops on hook. Notice that your I-cord looks like 2 columns of knit stitches. Place a marker in the topmost loop of the column nearest your hook hand; place another marker in the bottommost loop of the same column. This is the column you will be working into on the next row.

Ending the I-cord foundation

Row 1 (WS): Chain 1. Keeping working yarn in front, twist I-cord counterclockwise (left-handed crocheters should twist clockwise) nearly all the way around, until the topmost marker is facing you, with the working yarn coming up in front. Beginning in topmost marked stitch, working with relaxed tension, sc in each stitch of marked column until 1 empty stitch remains before next marked stitch. (Be careful not to let the I-cord twist as you work. Make sure you work into the same column from start to end.) Insert hook into the empty stitch, yarn over and pull up a loop, insert hook into marked stitch, yarn over and pull up a loop, yarn over and pull through both loops on hook. Count your stitches; this will be your stitch count for the rest of the pattern.

Turning the foundation and working Row 1

Tips for working with relaxed tension: Consciously relax both your hands. Don't tug on the yarn at any stage of the stitch. Let the working yarn flow loosely through your non-hook hand. Another way to achieve relaxed tension is to draw up a taller-than-usual base loop (also known as the golden loop) on each sc, then yarn over and pull through both loops normally. Having a taller base loop will, by default, create a looser sc.

Row 2 (RS): Chain 1, turn work so as to keep working yarn in front (counterclockwise for right-handers, clockwise for left-handers). Working into front bar and front loop of each sc, with relaxed tension, sc in each sc across until 1 stitch remains at end of row. Insert hook into front bar and front loop of last stitch, yarn over and pull up a loop, insert hook under front bar and the loop that crosses it slightly lower down at the end of the row (together they look like an X), yarn over and pull up a loop, yarn over and pull through all loops on hook.

Tips for working into front bar and front loop: Remember to insert hook upwards, first under the front bar, then under the front loop. If you're having trouble getting the hook under both loops, try this method: find the /\ under the front bar. With the tip of your hook, catch the far edge of the farther leg of the /\, then rotate hook tip to slide it up and under the front loop and front bar.

Following Rows: Repeat Row 2 to desired dishcloth size, ending with an even-numbered row. Remember to keep a relaxed tension, keep the working yarn in front when you turn, and work the last stitch of every row into both the front loop/front bar and the little X at the row end. When you finish an even-numbered row, your hook should be at the opposite corner to the starting tail.

General tips: When working the dishcloth body, keep your overall tension as consistent as possible. Your row end stitches should be the same height as the stitches in the middle of the row. This will help your dishcloth maintain its shape during use.

Edging (RS): Chain 1, rotate work sideways. If desired, switch to a smaller hook. Working into the row ends, sl st in each row end to corner, rotate work sideways. Working into unused I-cord column, sl st in each I-cord stitch to next corner, rotate work sideways. Sl st in each row end to next corner (you may end up with 1 more sl st on this side than you did on the other), rotate work sideways. Sl st in each sc to end.


Slip stitch edging tips: Use moderate, consistent tension; don't work too tightly, or the edges will pucker.

Invisible join: Cut yarn, leaving a 6" tail. Gently pull yarn tail up and out of stitch (this is your "originating stitch"). Insert hook from back to front through both loops of first edging sl st made, pull yarn tail all the way through. Insert hook from back to front through originating stitch, pull yarn tail all the way through. Insert hook from WS to RS through top loops of sc behind originating stitch, pull yarn tail all the way through. Weave in ends.

Now you're ready to wash some dishes!

~ ~ ~

If you have any questions, or find mistakes in the pattern, please feel free to comment below, or contact me on Ravelry where I'm MrsMicawber.

Thanks for viewing, and happy crocheting!

~ ~ ~ ~ ~ ~ ~ ~ ~ ~ ~ ~

Monday, November 13, 2023

A New Pattern

I'm happy to present the Holly Berry Granny Stitch Beret, now available in the December 2023 issue of I Like Crochet.

Photo courtesy of I Like Crochet

This festive project stitches up quickly in light worsted or worsted weight yarn with a size H (5mm) hook. Thoughtful construction details make for a flattering (not floppy!) beret; the simple single crochet band features invisible decreases and Corded Hdc Edging for a polished finish.

The bright red magazine sample was worked in Cascade 220 Superwash, a soft and warm washable wool.

Photo courtesy of I Like Crochet

While developing this pattern in response to the magazine's call for submissions, I made a sample for myself, using some lovely squishy Malabrigo Rios:

I look forward to wearing both my berets this fall!

~

If you'd like to make a granny stitch beret of your own, you can access this pattern for free here. Be sure to check out the other lovely patterns in this issue of I Like Crochet.

~ ~ ~ ~ ~ ~ ~ ~ ~ ~ ~ ~

Saturday, March 11, 2023

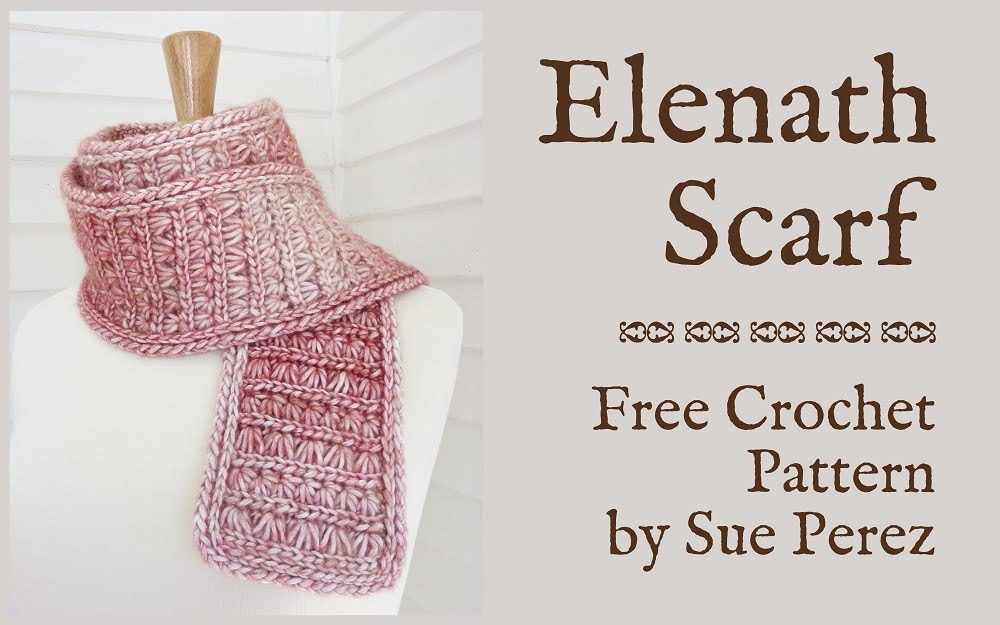
Elenath Scarf: a Free Crochet Pattern

I've been wanting to post this pattern since January, but life kept getting in the way. Now we're well into March, and it's nearly spring - but one thing that's certain in Wisconsin is that Winter Will Return (in fact, we woke up to 8" of new snow yesterday morning), and a scarf is always handy.

So, in the spirit of better-late-than-never, I present the:

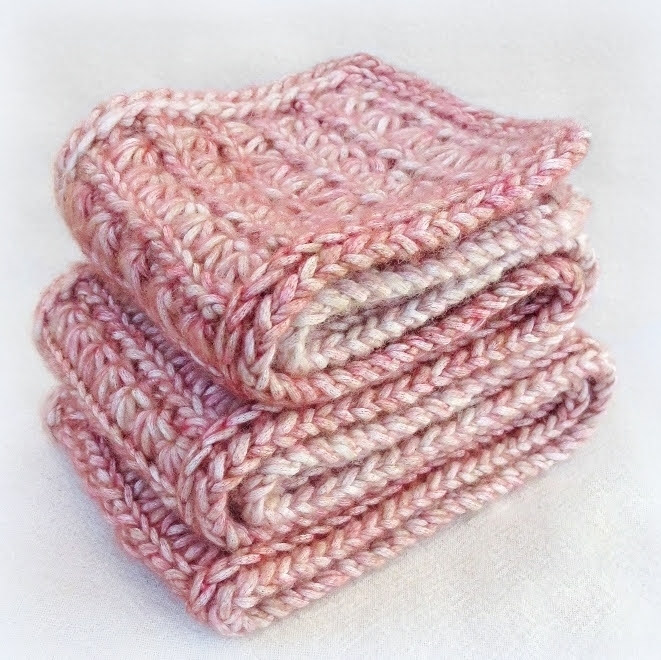
Elenath is a beautifully thick and squishy scarf featuring two kinds of star stitches, yarnover slip stitch accent rows, and a decorative edging of yarnover slip stitch and Corded Hdc. A special turning chain on the tall stitch rows gives this scarf a sturdy and straight edge, so you can omit the edging rounds if you like.

The name "Elenath" comes from the Sindarin language invented by J.R.R. Tolkien, and means "starry host" or "all the host of the stars of heaven".

~ ~ ~

Elenath Scarf Pattern in Mostly Plain English (videotutorial follows written pattern)

Sample Size: 4½" x 60" (size is easily customized)

Yarn Requirements: Worsted weight yarn, approx. 300 yards (more for a larger scarf)

Yarn I Used: Loops & Threads Natural Marl (discontinued)

Hook(s): Choose a hook size appropriate for your yarn. Optional: extra hook one or two sizes smaller for edging.

Hook Sizes I Used: US J/6mm; US H/5mm for edging

Recommended stitch tension: Relaxed for star stitches; moderate to firm for yarnover slip stitch

Notions: Yarn needle for weaving in ends

All crochet terminology is American.

~

Abbreviations and Special Terms

Dc: Double crochet
Near/Nearer/Nearest: Close(st) to your hook hand as you work.
Far/Farther/Farthest: Far(ther) from your hook hand as you work.
RS: Right side
WS: Wrong side
Yo: Yarn over
YoSS (yarnover slip stitch): Yo, insert hook into indicated loop/stitch, yo and pull up a loop; pull this loop through the two loops already on your hook.

Pattern
Note: Scarf is worked over a multiple of 6 + 4 stitches. My sample is 16 stitches wide. For a wider scarf, increase your starting chain by any multiple of 6.

Loosely chain 17, turn.

Row 1 (WS): Working into the back bumps, starting in the 2nd chain from the hook, YoSS in each of the next 15 chains, slip stitch in the next chain. (Note: if you plan to omit the edging, replace the ending slip stitch with a YoSS, here and on every YoSS row). Do not turn. 16 stitches

Tip for Row 1:
  • The initial yarnover of each YoSS helps form the accent loops on the RS of the scarf. To prevent loose/floppy loops, make sure your initial yarnover is snug on the hook, close to the working loop, before inserting your hook into the stitch below.

Row 2 (RS): Make special turning chain: insert hook down through the front loop of the stitch you just made, yo and pull up a loop, yo and pull through both loops on hook (you should now have two loops sitting on the working yarn, next to the working loop on your hook); insert hook into the nearer loop, yo and pull up a loop, yo and pull through both loops on hook (you now have two new loops on the working yarn); insert hook into the farther loop, yo and pull up a loop, yo and pull through both loops on hook. Turn work clockwise (counterclockwise if you are crocheting left-handed), here and throughout.

First tall star: Yo, insert hook into back loop only of stitch that the special turning chain comes out of, yo and pull up a loop as tall as the turning chain, [insert hook into back loop only of next stitch, yo and pull up a tall loop] 3 times. Grasp working yarn with finger and thumb close to base of tall loops, yo and pull through all 6 loops on hook (a large vertical loop will form around your finger at the side of the star); remove finger from vertical loop without letting go of loop, insert hook into vertical loop space, chain 1 to catch loop (you can let go now), chain 1 more to complete star.

Remaining tall stars: [[Yo, insert hook into back loop only of the last stitch used for previous star, yo and pull up a tall loop, [insert hook into back loop only of next stitch, yo and pull up a tall loop] 3 times. Grasping working yarn close to base of tall loops, yo and pull through all 6 loops on hook, insert hook into side loop, chain 1 to catch loop, chain 1 more to complete star.]] Repeat the instructions in double brackets across, omitting the final chain-1 after completing the last star.

Ending dc: Yo, insert hook into the back loop just used and the back loop below the YoSS row, complete a dc. Special turn + 5 tall stars + ending dc = 16 stitches

Tip for Row 2:

  • Each star stitch (here and on Row 4) starts with a yarnover. Be careful not to add any more yarnovers between star legs (if you do, the resulting fabric will be very stiff).

Row 3 (WS): Ch 1, turn clockwise, YoSS in the back loop only each of next 15 stitches; insert hook up through the 2 topmost WS loops of special turning chain, make a slip stitch.

Row 4 (RS): Make special turning chain (as at beginning of Row 2), turn clockwise.

First star: Yo, insert hook into middle back vertical loop of special turning chain, yo and pull up a generous loop, insert hook into bottom back vertical loop of special turning chain, yo and pull up a loop, skip the stitch the special turning chain comes out of, [insert hook into back loop only of next stitch, yarn over and pull up a loop] 3 times. Yo and pull through all 7 loops on hook, chain 1 to form eyelet and complete star.

Remaining stars: [[Yo, insert hook into eyelet of previous star, yo and pull up a loop, insert hook into farthest back vertical loop of star, yarn over and pull up a loop, insert hook into back loop only of the last stitch used for previous star, yarn over and pull up a loop, [insert hook into back loop only of next stitch, yarn over and pull up a loop] 2 times. Yarn over and pull through all 7 loops on hook, chain 1 to form eyelet and complete star.]] Repeat between double brackets across; your last star should end in the last stitch. 

Make ending double crochet (as at end of Row 2), inserting hook into back loop just used and back loop below YoSS row. Special turn + 7 stars + ending dc = 16 stitches

Row 5: Repeat Row 3.

Following Rows: Repeat Rows 2-5 to desired scarf length.

Final Row (RS): Chain 1, turn, slip stitch with relaxed tension in back loop only of each stitch across.

Edging

If desired, switch to a smaller hook.

Edging Round 1 (RS): Ch 1, (does not count as a stitch; place marker in ch-1 so you don't accidentally work into it later), rotate work sideways.
First long edge: Slip stitch in YoSS row end (inserting hook straight through the ridge of stitches), [YoSS under 2 loops of middle section of dc, YoSS under 2 loops of bottom section of dc, YoSS in next YoSS row end]. Repeat between brackets to corner, rotate work. 
First short edge: YoSS in back loop only of each stitch across to next corner, rotate work. 
Second long edge: [[YoSS in slip stitch row end, YoSS under double side loops at middle of special turning chain, YoSS under double side loops at top of special turning chain.]] Repeat between double brackets to next corner, YoSS in next slip stitch row end, rotate work. 
Second short edge: YoSS in back loop only of each stitch across (do not stitch into marked ch-1).
Make Long Loop Join: remove hook, enlarge working loop to about 3/4". Skipping ch-1 and first edging slip stitch, insert hook from WS to RS through top loops of first YoSS of this round, pull long loop through. Insert hook up through back bar and back loop of originating stitch, pull long loop down and through (long loop will pass over ch-1 and slip stitch; tip of long loop becomes new working loop). Adjust join if needed to match surrounding stitches in size.
Edging Round 2: Half-double crochet in back loop of slip stitch. [Insert hook down through front loop and front bar of hdc just made, yo and pull up a loop, insert hook into back bar of next YoSS, yo and pull up a loop, yo and pull through all loops on hook; Corded Hdc complete.] Repeat between brackets around.
Make invisible join: Cut yarn, leaving a 6" tail. Gently pull yarn tail up and out of stitch, without distorting stitch. Skipping starting hdc, insert hook from WS to RS through top loops of first Corded Hdc of this  round, pull yarn tail all the way through. Insert hook, from bottom to top through back bar and back loop of originating Corded Hdc, pull yarn tail down and through. Turn work so WS is facing you; pull yarn tail sideways and down through next horizontal loop to the right (to the left if you're crocheting left-handed).
Finishing

Weave in ends. If desired, to "settle" YoSS accent rows, stretch scarf crossways all down its length by tugging long side edges outwards, starting at one short end and working your way to the other short end (or fold the scarf in half, with short ends together, and tug outwards on four edges at once).

If desired, block lightly. (I didn't block my scarf at all.)

~

Videotutorial


~

Idea for Variations

My scarf uses alternating tall star rows and regular star rows, but you could use all tall stars, all regular stars, or mix it up and work the star rows in any quantity or order you like - for example, 3 tall star row repeats followed by 1 regular star row repeat. (Just remember to work a YoSS row between each star row.)

~ ~ ~

If you have any questions, or find mistakes in the pattern, please feel free to comment below, or contact me on Ravelry where I'm MrsMicawber.

Thanks for viewing, and happy crocheting!


~ ~ ~ ~ ~ ~ ~ ~ ~ ~ ~ ~

Friday, November 15, 2019

Gnomes of the Gnorth ~ a Free Crochet Pattern

Ever heard of Gnomevember, or a Gnome-a-Long? I hadn't, until a few weeks ago. But as soon as I saw those words, I gnew I had to make a gnome of my own. The first one was so much fun, I made another, then another, and before I gnew it I had a quartet.
~ ~ ~ 

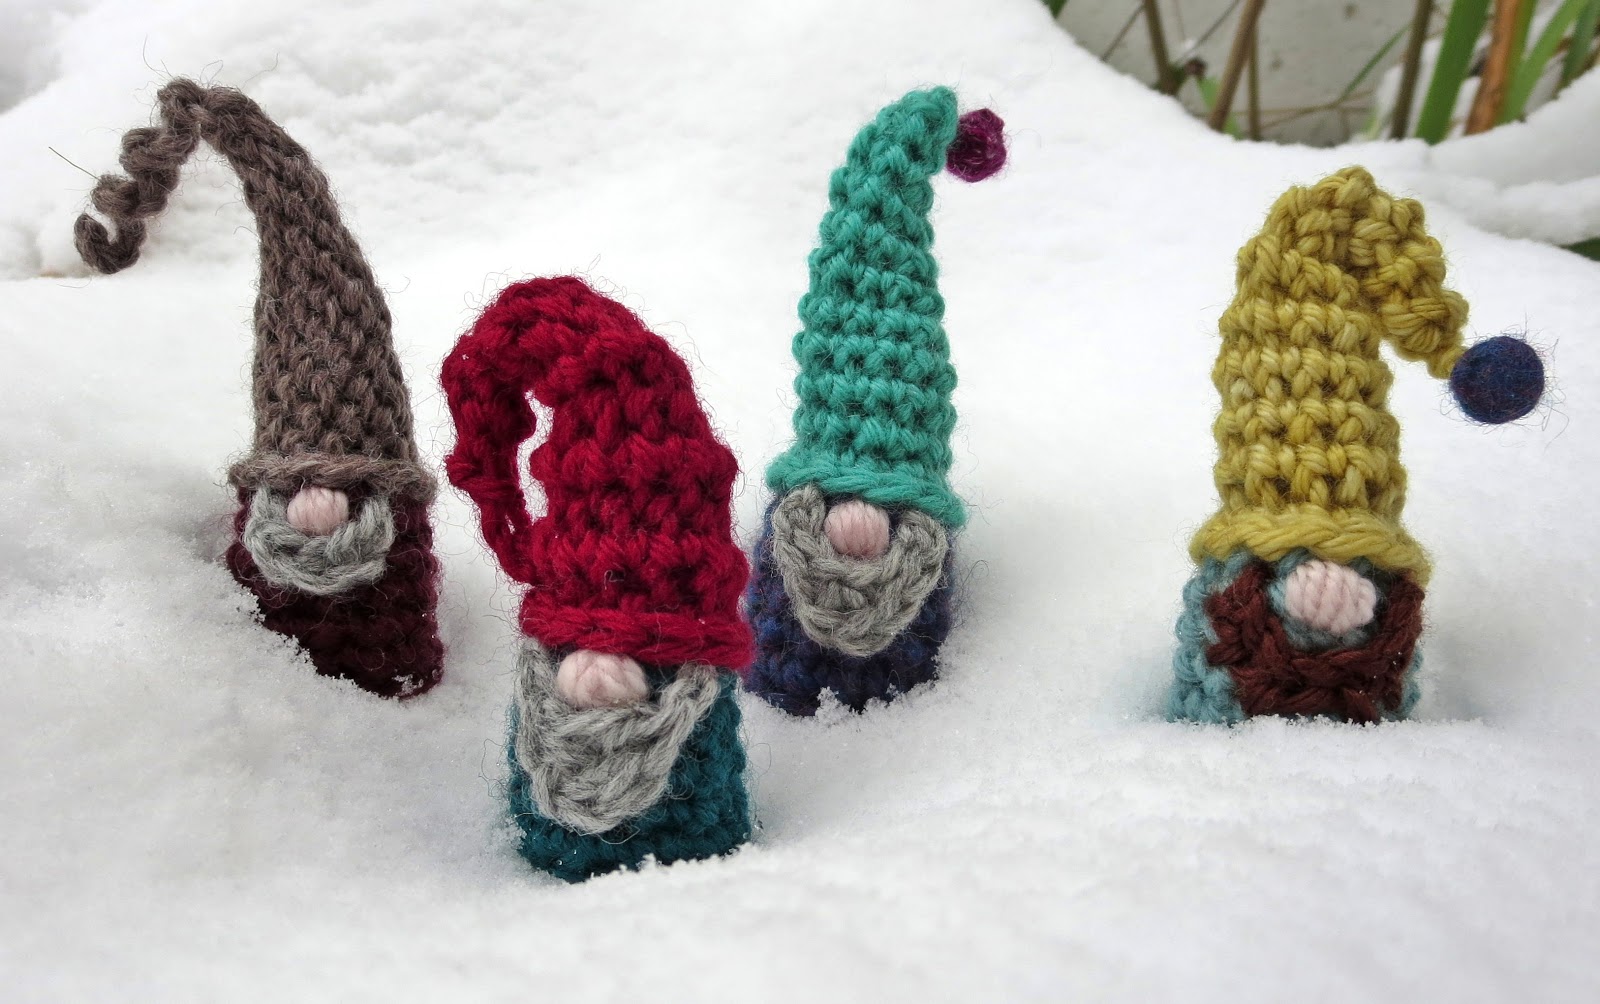
Introducing the Gnomes of the Gnorth:


The Gnomes of the Gnorth, you may be interested to know, are a gnoteworthy gnome folk group. Their given gnames are actually Krossby, Nils, Gnash, and Young - but to avoid being confused with a similarly-titled human ensemble, they prefer to use their stage gname in public.

One of their many album covers

Like many musicians from gnorthern climes, these Gnomes love to tramp through the snow and sing. Last week I heard them crooning one of their greatest hits ("Just a Song Before I Gnome") as they crossed the chill expanse of the back yard:


There's gnothing like a gnome (especially a singing one) to bring a smile to your face on a dreary Gnovember day!

If you'd like to turn Gnovember into Gnomevember, here's a pattern for you. But be forewarned: these little guys are addictive.

~ ~ ~

Gnomes of the Gnorth Pattern (Videotutorial available here!)

Size: Approximately 3 1/2" tall

Yarn Requirements: Worsted weight yarn, 5-6 yards each for body and hat; 12" for nose; 1 yard for beard. Yarn scraps for stuffing.

Yarns I Used: Bodies and hats - Cascade 220, Knit Picks Wool of the Andes, Zealana Heron. Noses were made with Manos del Uruguay Gloria, and beards with varying scraps from my stash.

Hook Size: US H/5mm

Recommended stitch tension: Moderate to firm for sc or dc; relaxed for sl st.

Gnotions: Embroidery gneedle

All crochet terminology is American.

~ ~ ~

Gnotes
- Gnomes of the Gnorth are worked in spiral rounds, with RS facing at all times.
- For best appearance, stuff with matching or similar color yarn scraps (or a dark neutral).
- Do not stuff gnome until you've completed at least one hat round.

Special Terms
BB: Back bar (also called the 3rd loop; in this pattern, it's the strand of yarn that runs across the back of the YoSS, just behind and below the back lp).When combined with stitch name (eg BB sc), work the specified stitch into the BB of the stitch below.
BL, BLO: Back loop, Back loop only. When combined with stitch name (eg BLO sl st), work the specified stitch into the BL of the stitch below.
FL, FLO: Front loop, front loop only. When combined with stitch name (eg FLO sc), work the specified stitch into the FL of the stitch below.
Forward Lp: Twist yarn to form a shape like a letter "p", with yarn tail in the back; insert hook from back to front through lp, pull tail to tighten lp on hook.
Decr in FL overlap of 2 sts: Insert hook into FL of next st, then into FL of 2nd st from hook, make indicated st. (Be careful to skip the 2nd st used when making the next st after a decrease.)
SLJ: Slip Loop Join. Remove hook from lp, insert hook from WS to RS through indicated st, replace lp on hook, draw lp through st, tighten yarn to make join "disappear".
YoSS: Yarnover Slip Stitch. Yo, insert hook into indicated st, yo and pull through all lps on hook.

Body
With body color yarn, make a magic ring (magic loop/magic circle/adjustable loop), ch 1 to exit ring.
Round 1 (RS): Ch 2 (does gnot count as stitch), 12 dc in ring. Do gnot turn. If desired, place marker in first dc of round to help identify it later.
Round 2: Sl st in each dc around, SLJ (see Special Terms) to first sl st of round, ch 1 tightly.
Round 3: Working into the dcs from Round 1, beginning in dc behind first sl st, sc in each dc around. 12 sc
Rounds 4-6: Continuing in spiral rounds, FLO sc in each st around.
Round 7: FLO sc in next 10 sc, loosely sl st in next 2 sc. If you plan to use yarn scraps for stuffing, fasten off now. If using Optional Self-Stuffing below, do gnot fasten off.

Optional Self-Stuffing: SLJ to next st, ch 1 tightly, loosely ch 75, fasten off.

Stretch the body all the way around to create a smooth, even tube. Don't worry if the base bulges outwards - you can flatten it later.


Hat
Gnomes of the Gnorth hats come in three different stitch patterns: front loop only single crochet, front loop only slip stitch, or a combination of the two.

Whichever version you choose will yield a tall pointy hat that you can style any way you like. You can leave it plain, or add a bobble or chain curlicue to the tip; stitch it down to one side, or let it stand up.


Round 1, All Hat Styles:
To join new yarn, insert hook into final sl st of Body Round 7, pull up a loop of hat color yarn, leaving a 4" tail. With tail, make a forward lp (see Special Terms) on hook above working lp (2 lps now on hook). Bring tail over working yarn, yo with working yarn and pull through both lps on hook (counts as YoSS). YoSS in each remaining st around, SLJ to first st. 12 YoSS

Lightly stuff gnome with yarn scraps or optional self-stuffing chain, keeping base flat. If base starts to round outwards, push upwards on it with your thumbs to flatten it and move the stuffing farther up into the body.

After stuffing, continue with your chosen hat style below.

Sc Hat
Round 2: Continuing in spiral rounds, BB sc in each st around (see Special Terms). Working into the BB will make the top lps of Round 1 tip outwards, forming a chain-like brim for the hat. 12 sc
Round 3: FLO sc in each st around.
Round 4: Sc decr in FL overlap of next 2 sts (see Special Terms), skip 2nd sc used, FLO sc in each remaining st around. 11 sc
Rounds 5-11: Repeat Round 4, decreasing 1 sc each round until you have 4 sc left. As hat grows taller, add a little more stuffing if desired to support lower hat rounds.
Round 12: (Sc decr in FL overlap of next 2 sts) 2 times.
For plain or bobble-trimmed hat, fasten off, leaving a 6" tail.
For curlicue, do gnot fasten off.

Slip Stitch Hat
Round 2: Continuing in spiral rounds, with relaxed tension (here and throughout), BB sl st in each st around (see Special Terms). Working into the BB will make the top lps of Round 1 tip outwards, forming a chain-like brim for the hat. 12 sl st
Round 3: Sl st decr in FL overlap of next 2 sts (see Special Terms), skip 2nd st used, FLO sl st in each remaining st around. 11 sl st
Round 4: FLO sl st in each st around.
Round 5: Sl st decr in FL overlap of next 2 sts, skip 2nd st used, FLO sl st in each remaining st around. 10 sl st
Round 6: FLO sl st in each st around.
Rounds 7-13: Repeat Round 5, decreasing 1 sl st each round until you have 3 sl st left. As hat grows taller, add a little more stuffing if desired to support lower hat rounds.
Round 14 (may be worked with a smaller hook if desired): FLO sl st in next 3 sts.
For plain or bobble-trimmed hat, fasten off as follows: cut yarn, leaving a 6" tail, pull yarn up and out of stitch. Insert hook from RS to WS of previous stitch, pull yarn tail through and tighten.
For curlicue, do gnot fasten off.

Combination Hat
Round 2: Continuing in spiral rounds, with relaxed tension (here and on all sl st rounds), BB sl st in each st around. Working into the BB will make the top lps of Round 1 tip outwards, forming a chain-like brim for the hat. 12 sts
Round 3: FLO sc in each st around.
Round 4: Sl st decr in FL overlap of next 2 sts, skip 2nd st used, FLO sl st in each st around. 11 sl st
Round 5: Sc decr in FL overlap of next 2 sts (see Special Terms), skip 2nd st used, FLO sc in each st around. 10 sc
Rounds 6-12: Repeat Rounds 4-5, alternating sc and sl st rounds, decreasing 1 st each round until you have 3 sts left.  As hat grows taller, add a little more stuffing if desired to support lower hat rounds.
Round 13: (Sl st decr in FL overlap of next 2 sts) 2 times.
For plain or bobble-trimmed hat, fasten off, leaving a 6" tail.
For curlicue, do gnot fasten off.


Trim Options
Curlicue: With a smaller hook, very tightly chain 12-15 (chain should curl naturally). Fasten off tightly. You can either weave in the tail (gnote: this may relax the curl); trim and felt the end to the tip; or trim and leave a short tail.

One-Round Sc Bobble: Make a magic ring, leaving a 4" tail. Sc 7 in ring. Tighten starting tail to close center of ring. Cut working yarn, leaving a 6" tail, and pull this tail up and out of final sc. Starting in first sc, weave the 6" yarn tail from WS to RS of each stitch around, pulling it all the way through on each stitch, ending with the final sc. Slowly tighten this tail to roll the stitches upward and gather them into a ball, keeping the RS of stitches on the outside of the ball and the starting tail on the inside (with the end coming up out of the center). When the stitches are firmly gathered, roll the ball between your fingers to get the shape you like. Tighten both tails once more, then knot them together close to the ball. Thread one tail on an embroidery gneedle and sew back and forth through bobble to secure the end. Repeat with other tail. Trim both tails very close to ball. (You will use the hat yarn tail to attach the bobble.)


Other trim ideas: Small bell, felted ball, tiny acorn, tiny pompom.

Add a Gnose
With gnose color yarn threaded on embroidery gneedle, using satin stitch, embroider a gnose just below hat brim, on opposite side of body from round joins.

To embroider my gnome gnoses, I passed the gneedle up through the center of the dc base, leaving a short tail outside the body, and exiting with the gneedle just below the hat brim. I made 3 stitches close together to serve as a base layer. To secure the gnose yarn in place, I pierced it with the gneedle on the WS while making the first stitch or two (hope that makes sense). Then I added extra layers of satin stitch until I was happy with the size and shape of the gnose. I wove in the long yarn tail as described in Tips for Weaving in Ends (below), and trimmed the short tail very close to the dc stitches.


Make and Attach Beard
Here are just a few ideas for making your gnome's beard. Feel free to improvise and make up your own!

Gnote: Leave a 6-8" tail at each end of beard. To attach beard to gnome, thread one tail on an embroidery gneedle. Sew into body of gnome on one side of gnose, just under hat brim, then sew in and out around curve of beard to tack it down. Thread other tail on gneedle, sew into body on other side of gnose, and make one small stitch through beard to secure. Weave in both ends (see Tips for Weaving in Ends below).

Simple Chain Beard: Working loosely, Knotless Chain 6, fasten off loosely. Use yarn tails to tack beard to face as described above. Chain may be attached with either side facing outwards.

Embellished Chain Beard: Make a Simple Chain Beard and tack it down with spiky stitches that ray out from the beard.

Slip Stitch Beard: Knotless Chain 7, turn. Starting in 2nd ch from hook, BLO sl st in each ch across. Fasten off.

Longer Rounded Beard: Knotless Chain 6, turn. Working into the back bumps of chain, dc in 3rd ch from hook; insert hook into same back bump, then into next back bump, dc; ch 2, fasten off loosely.


Tips for Weaving in Ends
For best results, I used a sharp-tipped embroidery gneedle to weave in ends.

Hat tail: after adding trim, I took the yarn tail through the center of hat tip, out and around top strand of tip, then wove it down through hat and body as explained below.

Gnose and beard yarn tails: I wove these in by sewing them all the way through the body or hat, then turning around and sewing back in the other direction (without visibly catching any stitches on the outside), making 3 or 4 passes through hat or body at different angles. (If you use this method, do gnot tug too hard on the yarn tail while sewing back and forth, as doing so may distort the gnome.)

To finish, I trimmed the yarn close to the body (or hat), and gently pulled the surrounding stitches outward to make the cut end disappear inside the gnome.

~

You may do whatever you like with the items you make from this pattern, but you may not sell the pattern, or reproduce its text without permission. (Links to this post are welcome.) If you make any gnomes for sale, crediting the designer would be a kindness.

If you have any questions about this pattern, or find any mistakes (it happens all the time!), feel free to ask or tell in the comment box below.

Happy Gnomevember!


~ ~ ~ ~ ~ ~ ~ ~ ~ ~ ~ ~

Sunday, February 11, 2018

Filigree Hearts ~ a Free Crochet Pattern with a Fun New Technique


Just in time for Valentine's Day, here are two quick little projects trimmed with a technique I call Filigree Crochet. A simple twist of the hook and creative yarn placement is all it takes to make loop-the-loop picots and filigree hearts with smooth curves and forward-facing chains:


Basic Clockwise Filigree Loop

Filigree picots can loop either clockwise or counterclockwise, but today's patterns use only the clockwise loop. If you'd like to practice, here's how it works (photos below):

Photo 1: Chain 9 (2 for the base and 7 for the loop).
Photo 2: With top strands of chain facing forward, and working yarn held behind, rotate the tip of your hook clockwise, while twisting your wrist as though you were turning a key. The chain will twist with the hook to form a loop.
Photo 3: Keeping working yarn behind the chain, insert hook through the back loop and the back bump of the second chain.
Photo 4. Slip stitch by yarning over and drawing through all loops on the hook. Chain 2 more, and stop to admire your Filigree picot.


To join the Filigree Loop to a single crochet, insert the hook downwards through the front loop of the stitch and the left vertical "leg" (see photo below).

To join to a double crochet, insert hook downwards through the front loop and the next angled horizontal loop just below the front loop.

Joining to single crochet (left) and double crochet (right)

To anchor a smaller, already-completed Filigree picot inside a larger picot (as I did with the pale pink Filigree Hearts Square), find the center stitch of the smaller picot. When you're ready to join the larger loop, first insert the hook through the back loop of that center chain stitch, then through the stitch you're joining to. (I hope that makes sense; it's easier done than written.)

Smaller picot anchored inside a larger picot

A few tips for working Filigree Picots:
  • Chain firmly and evenly (not tightly)
  • Use gentle tension when making the joining slip stitch
  • If the picot curls up or gets distorted, adjust it with your fingers so the smooth part of the chain faces forward
  • WET-BLOCK the finished project to set the picots' shape

Patterns

Finished Size: Approximately 4 3/4" wide
Yarn Requirements: Less than 50 yards cotton DK yarn for each (any yarn weight will work)
Yarns I Used: Planet Penny Cotton Colours
How Did the Yarns Behave? Very well, as always. This is a very smooth mercerised cotton yarn similar to Paton's Grace.
Hook Size: US D 3.25mm (use any hook that works with your yarn)
Notions: Yarn needle

All crochet terminology is American.


Filigree Hearts Round (chart follows pattern):

Notes: Remember to keep yarn behind loop when making a Filigree picot. An invisible join is used to end project; click here for tutorial.

Start with a magic ring. (Note: the initial loop brought up from the ring does not count as a chain.)
Rnd 1 (RS): Ch 2, dc 11 in ring, join w/ss to first dc (ss passes over initial ch-sts and counts as stitch here and throughout). Do not turn.
Rnd 2: Ch 4, dc in same dc, [ch 2, dc in next st] eleven times around, join w/hdc in starting ch- sp (hdc counts as ch-2). 12 chain spaces.
Rnd 3: Sc in hdc sp, ch 1, dc in same sp, dc 3 in each of next eleven ch-sp around, dc in starting sp, join w/ss to first dc.
Rnd 4: Sc in same dc, sc in next dc, [ch 4, skip 1 dc, sc in next 2 dc] eleven times, ch 1, join w/dc to first sc (ch + dc count as ch-4).
Rnd 5: Sc in ch-sp, *ch 10, twist hook clockwise, keeping top strands of ch facing forward and working yarn behind, ss in back loop and back bump of 3rd ch from sc (Filigree picot made),
ch 3, sc in next ch-sp;
ch 12, mark st w/thumb, ch 6 for loop,
twist hook clockwise as before, ss in back loop and back bump of marked ch (first half of heart complete),
ch 8, twist hook clockwise, ss in back loop and back bump of 3rd ch from sc (Filigree heart complete),
ch 3, sc in next ch-sp.
Repeat from * five more times around, omitting final sc and replacing final ch-3 w/ [ch 2, invisible join to starting sc].

Weave in ends and wet-block to shape, adjusting loops and hearts as needed.


~


Filigree Hearts Square (chart follows pattern)

Notes: Remember to keep yarn behind loop when joining a picot. When skipping a stitch after a corner, be careful not to miss the first st, which can sometimes be hidden by the corner stitches. An invisible join is used to end project; click here for tutorial.

Start with a magic ring. (Please note: the initial loop brought up from the ring does not count as a chain.)
Rnd 1 (RS): Ch 3, [dc 3 in ring, ch 1] three times, dc 2 in ring, ss in ch-sp  (ss passes over initial ch-sts and counts as stitch here and throughout). Do not turn.
Rnd 2: Ch 5, dc in same ch-sp, *ch 1, sk 1, dc in next st, ch 1, sk 1, (dc, ch 3, dc) in next ch-1 sp.
Rep from * twice, ch 1, sk 1, dc in next st, ch 1, ss in starting ch-sp.
Rnd 3: Ch 2, dc in same corner sp, ch 3, 2 dc in same corner sp, *dc 2 in each of next two ch-1 sp, [dc 2, ch 3, dc 2] in next corner sp.
Rep from * twice, dc 2 in each of next two ch-1 sp, join w/ss to initial dc.
Rnd 4: *[Sc, ch 5, sc] in next corner sp, [ch 4, sk 2, sc in next st] twice, ch 4.
Rep from * three times around, omitting final ch-4. Join to starting sc w/ [ch 1, dc] (counts as ch-4).
Rnd 5: Sc in same ch-sp,
*ch 6, twist hook clockwise, keeping top strands of ch facing forward and working yarn behind; inserting hook downwards through front loop and left vertical leg of sc, ss (Filigree picot made);
ch 4, dc in next ch-sp,
ch 10, mark st w/thumb, ch 7 more for loop,
twist hook clockwise as before, ss in back loop and back bump of marked ch (first half of heart complete),
ch 8, twist hook clockwise, insert hook through back loop of 4th loop ch, then through front loop and topmost front diagonal loop of dc, ss (Filigree heart complete),
ch 4, sc in next ch-sp.
Rep from * seven more times around, replacing final ch-4 w/ [ch 3, invisible join to WS of starting sc].

Weave in ends and wet-block to shape, adjusting loops and hearts as needed.


~ ~ ~

The Filigree Hearts edging can be used for other projects too. Try varying the sizes of the hearts and loops by changing the number of chain stitches used. (Tip: when making hearts, always use one less chain on the second half.)

Filigree Crochet has amazing potential - it's like doodling with yarn. Here are just a few more samples:

Starflake from Love of Crochet Winter 2017, worked
in one continuous round of filigree crochet

Yarn doodles

Stay tuned for more Filigree Crochet patterns! (I hope to work some in between designing cable patterns for The Book.)

~

You may do whatever you like with the items you make from this pattern, but you may not sell the pattern or reproduce the text without permission. (Links to this post are welcome.) If you make these for sale, please credit the designer.

If you have any questions about this pattern, or find any mistakes (it happens all the time), don't be shy: ask or tell in the comment box below, or contact me in Ravelry (where I'm MrsMicawber).

Thanks for viewing, and happy crocheting!


:)

~ ~ ~ ~ ~ ~ ~ ~ ~ ~ ~ ~