Back in the dawn of blogging time - or, in my case, 2012 - I wrote a tutorial for the Knotless Standing Single Crochet, a free-standing single crochet worked with a new piece of yarn into an existing project. (Very handy for starting a new color when working multicolor crochet in the round, or at the edge of flat striped rows. No slipknot is used, hence the "knotless".)
At the end of that post, I hinted that the Knotless Standing technique could be applied to taller stitches, but that further research would be required - after which I apparently forgot all about the topic, until a few weeks ago when reader Jennifer contacted me to ask about a follow-up tutorial.
Thanks to Jennifer's question, I've taken a deeper (or do I mean taller?) look at Knotless Standing Stitches, and this post is the result. As you'll see, the basic technique remains the same through all applicable stitch heights, with an extra tail-weaving step added to the taller stitches.
~ ~ ~
This technique works well with:
US single crochet (sc), double crochet (dc), and taller standard crochet stitches
Dc and taller clusters (not demonstrated in this post)
This technique does NOT work with:
US half double crochet (hdc)
Any single stitch that ends by pulling the yarn through 3 loops
Taller Knotless Standing Stitches Phototutorial (scroll down for videotutorial)
To start a Knotless Standing Stitch, wrap the new yarn across the front of the hook towards your hook hand, around the back away from your hook hand, then drop the tail in front, over the working yarn:
Holding the yarn tail in place (against the fabric for sc, against the hook for dc or taller), yarn over as many times as needed for your stitch (remember, this technique doesn't work with hdc).
Insert hook into desired stitch or space, and work the stitch as usual until you have 2 loops left on the hook (if the stitch has loosened up, pull gently on yarn tail to tighten stitch). Here I have a partially-worked Knotless Standing Dc:
Before you complete the stitch, move the yarn tail behind the hook, away from your hook hand, and over the working yarn:
Yarn over and pull through the 2 loops on the hook to complete the stitch:
On a dc or taller stitch, the yarn tail will be sticking out of the stitch post on the back. After working a few more stitches, or just before ending the round, weave the tail downwards (towards the base of the stitch), through the back bump(s) of the Standing Stitch below where the tail comes out. Always weave the tail through as many back bumps as there were yarnovers at the beginning of the stitch. (In other words, weave through 1 back bump for a dc, 2 back bumps for a treble, etc.) In this photo, I've woven through 1 back bump of my Knotless Standing Dc:
After weaving the tail down through the stitch post, weave the remainder through other stitches when and as desired.
What Size Knotless Standing Stitch Should You Use?
If working flat, start with a Standing Stitch the same size as the remaining stitches in the row.
If working in the round, you have two options: use a Standing Stitch the same size as all the other stitches in the round, OR one size shorter. If you start with a shorter Standing Stitch, you can close the round with a join (such as a slip stitch, slip loop join, long loop join, or invisible join) that passes over the Standing Stitch and connects to the stitch after it, thus preserving the stitch count.
Knotless Standing Cluster
To use this technique with a cluster stitch: wrap the starting yarn tail as for any Knotless Standing Stitch. Yarn over as appropriate, and work the cluster until you have 3 loops left on the hook (or until you are ready to "yarn over and pull through all loops on hook"). Move the tail behind the hook and over the working yarn, then complete the stitch. Weave the tail down through either side of the cluster as desired.
~
Knotless Standing Stitches Videotutorial
This tutorial includes Knotless Standing Sc, Dc, and Tr, and shows how to start weaving in the tail for all three.
~
If you have any questions about this technique, feel free to ask in the comment box below. You can also use the contact form at the upper right side of this page, or find me on Ravelry as MrsMicawber.
As always, thanks for viewing, and happy crocheting!
I've been wanting to post this pattern since January, but life kept getting in the way. Now we're well into March, and it's nearly spring - but one thing that's certain in Wisconsin is that Winter Will Return (in fact, we woke up to 8" of new snow yesterday morning), and a scarf is always handy.
So, in the spirit of better-late-than-never, I present the:
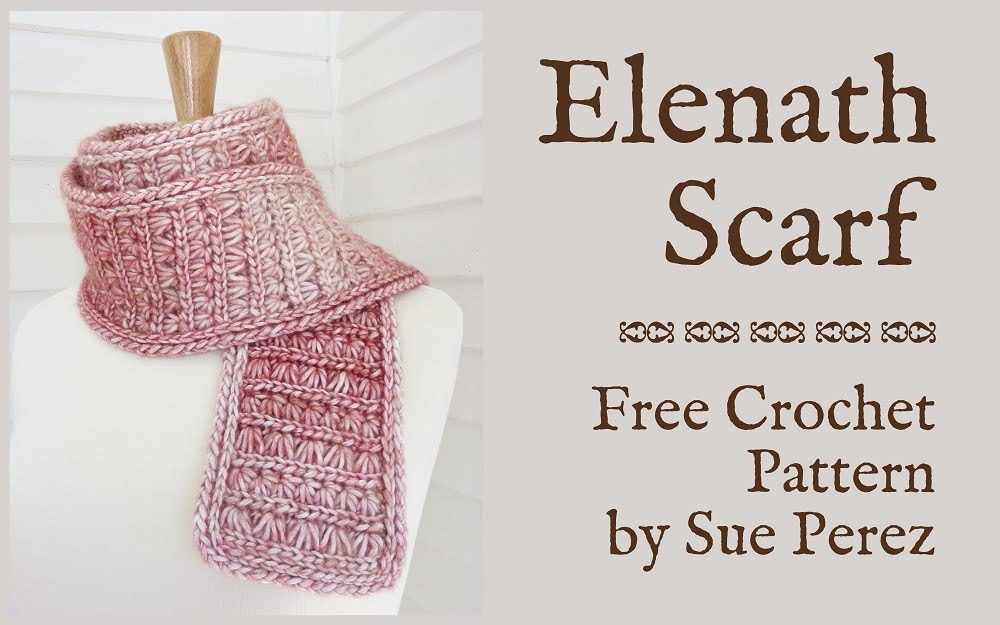
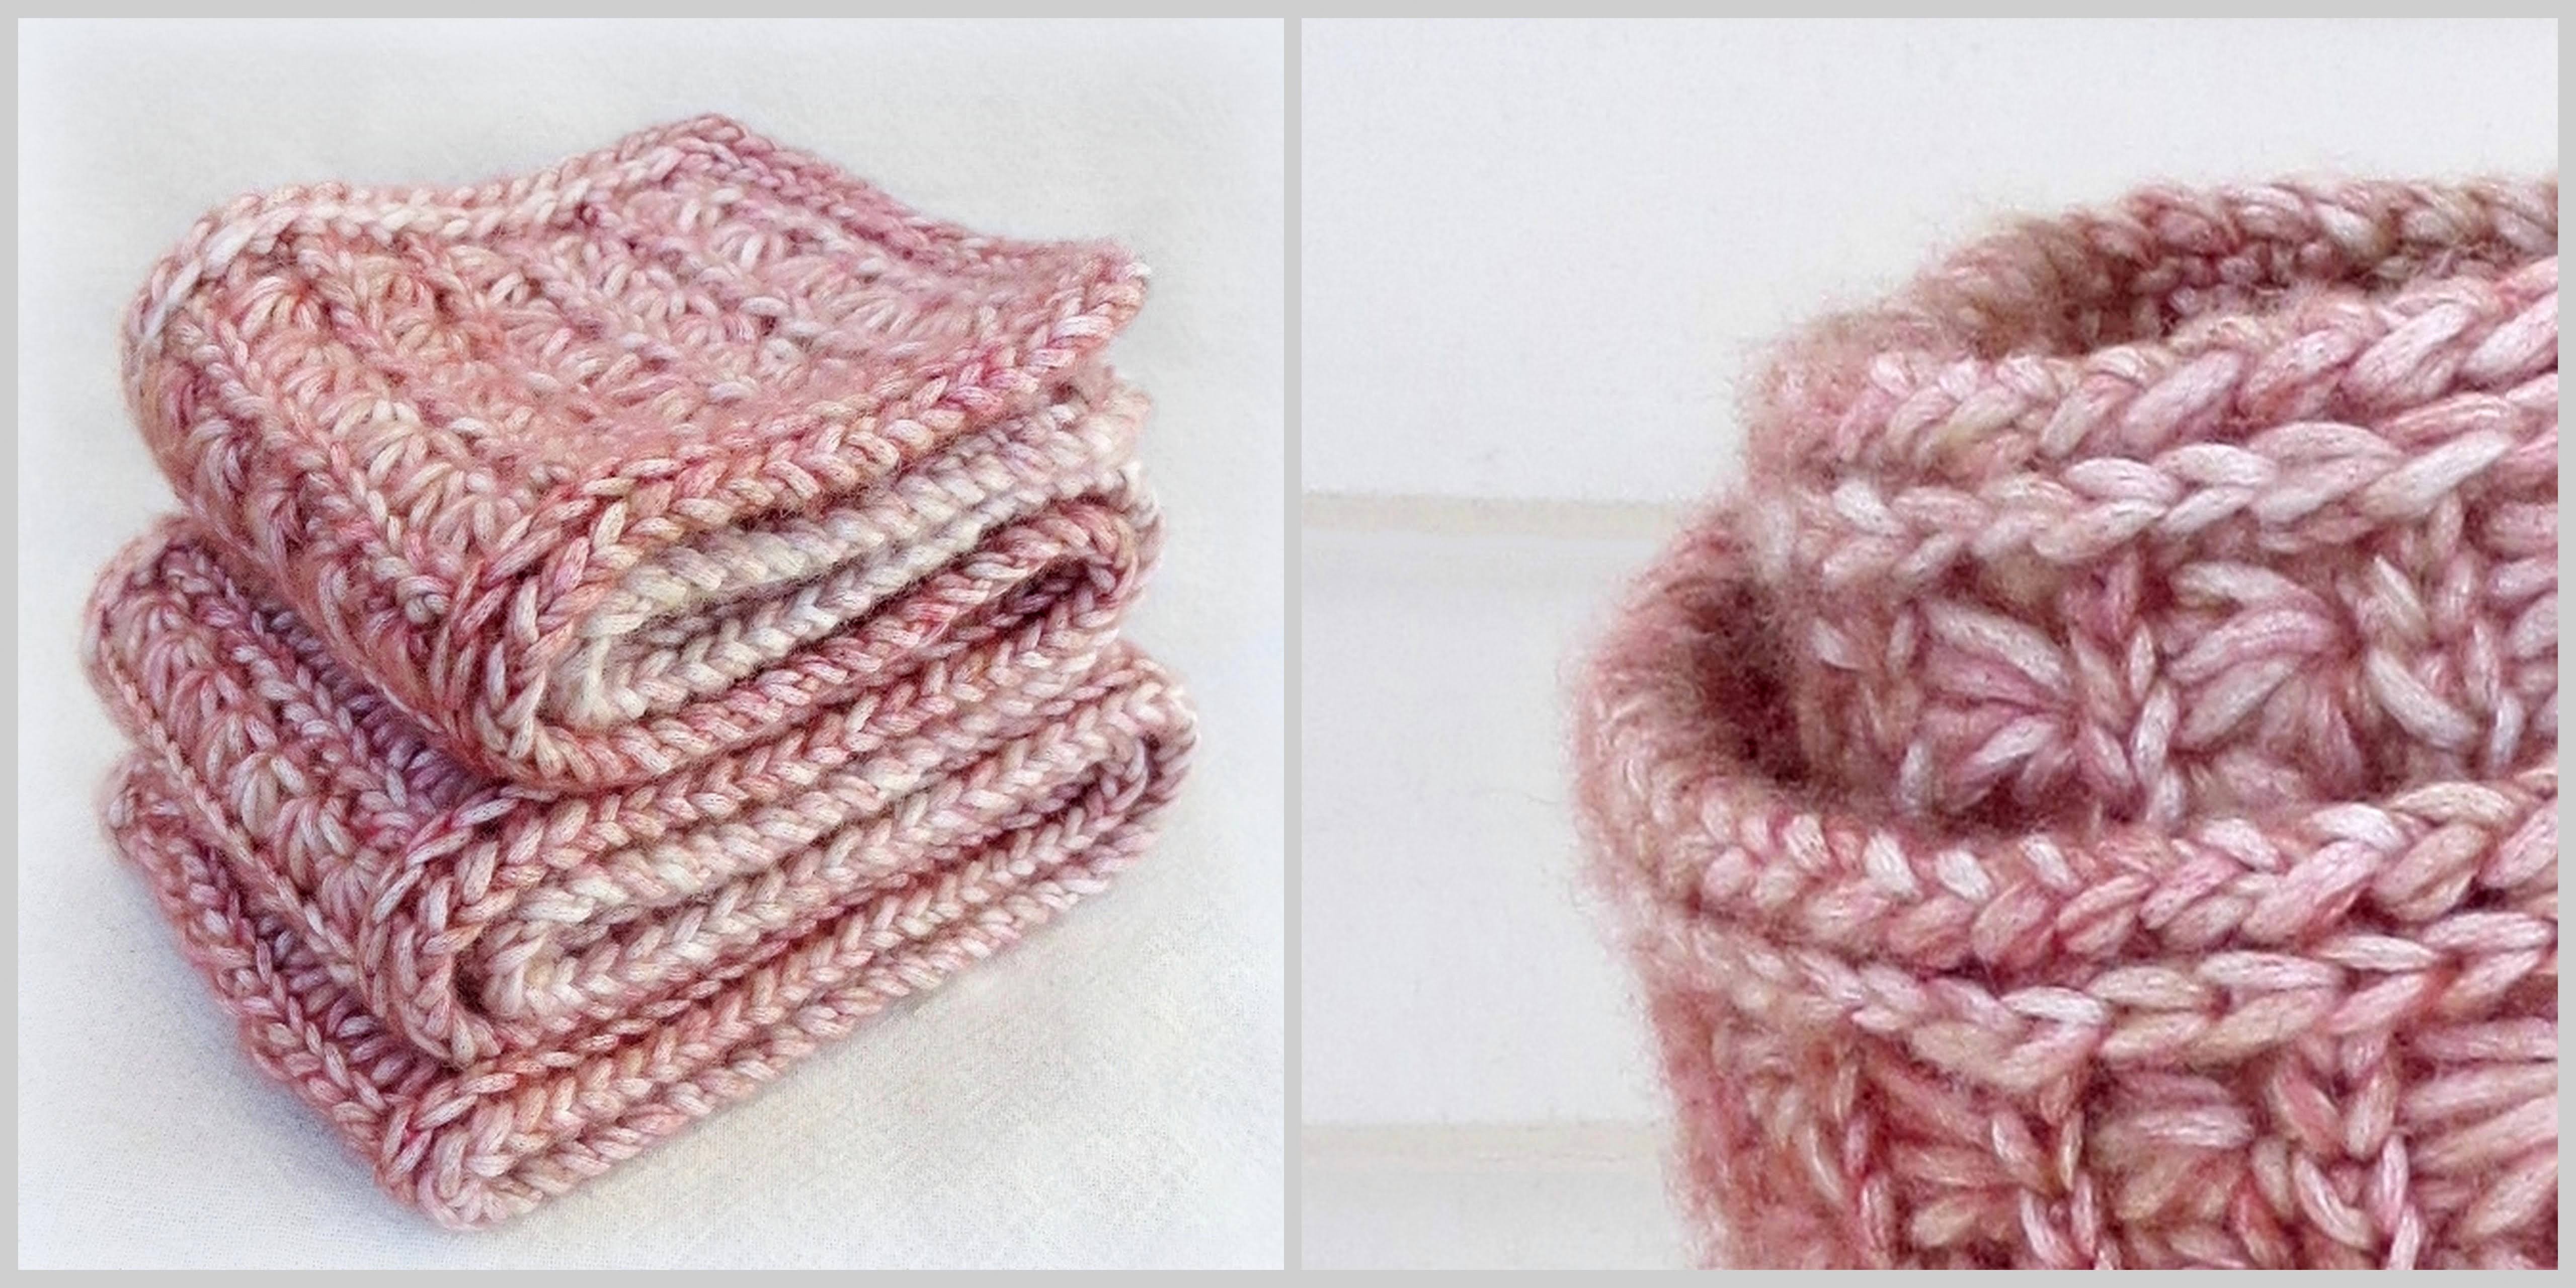
Elenath is a beautifully thick and squishy scarf featuring two kinds of star stitches, yarnover slip stitch accent rows, and a decorative edging of yarnover slip stitch and Corded Hdc. A special turning chain on the tall stitch rows gives this scarf a sturdy and straight edge, so you can omit the edging rounds if you like.
The name "Elenath" comes from the Sindarin language invented by J.R.R. Tolkien, and means "starry host" or "all the host of the stars of heaven".
~ ~ ~
Elenath Scarf Pattern in Mostly Plain English (videotutorial follows written pattern)
Sample Size: 4½" x 60" (size is easily customized)
Yarn Requirements: Worsted weight yarn, approx. 300 yards (more for a larger scarf)
Yarn I Used: Loops & Threads Natural Marl (discontinued)
Hook(s): Choose a hook size appropriate for your yarn. Optional: extra hook one or two sizes smaller for edging.
Hook Sizes I Used: US J/6mm; US H/5mm for edging
Recommended stitch tension: Relaxed for star stitches; moderate to firm for yarnover slip stitch
Notions: Yarn needle for weaving in ends
All crochet terminology is American.
~
Abbreviations and Special Terms
Dc: Double crochet
Near/Nearer/Nearest: Close(st) to your hook hand as you work.
Far/Farther/Farthest: Far(ther) from your hook hand as you work.
RS: Right side
WS: Wrong side
Yo: Yarn over
YoSS (yarnover slip stitch): Yo, insert hook into indicated loop/stitch, yo and pull up a loop; pull this loop through the two loops already on your hook.
Pattern
Note: Scarf is worked over a multiple of 6 + 4 stitches. My sample is 16 stitches wide. For a wider scarf, increase your starting chain by any multiple of 6.
Loosely chain 17, turn.
Row 1 (WS): Working into the back bumps, starting in the 2nd chain from the hook, YoSS in each of the next 15 chains, slip stitch in the next chain. (Note: if you plan to omit the edging, replace the ending slip stitch with a YoSS, here and on every YoSS row). Do not turn. 16 stitches
Tip for Row 1:
The initial yarnover of each YoSS helps form the accent loops on the RS of the scarf. To prevent loose/floppy loops, make sure your initial yarnover is snug on the hook, close to the working loop, before inserting your hook into the stitch below.
Row 2 (RS): Make special turning chain: insert hook down through the front loop of the stitch you just made, yo and pull up a loop, yo and pull through both loops on hook (you should now have two loops sitting on the working yarn, next to the working loop on your hook); insert hook into the nearer loop, yo and pull up a loop, yo and pull through both loops on hook (you now have two new loops on the working yarn); insert hook into the farther loop, yo and pull up a loop, yo and pull through both loops on hook. Turn work clockwise (counterclockwise if you are crocheting left-handed), here and throughout.
First tall star: Yo, insert hook into back loop only of stitch that the special turning chain comes out of, yo and pull up a loop as tall as the turning chain, [insert hook into back loop only of next stitch, yo and pull up a tall loop] 3 times. Grasp working yarn with finger and thumb close to base of tall loops, yo and pull through all 6 loops on hook (a large vertical loop will form around your finger at the side of the star); remove finger from vertical loop without letting go of loop, insert hook into vertical loop space, chain 1 to catch loop (you can let go now), chain 1 more to complete star.
Remaining tall stars: [[Yo, insert hook into back loop onlyof the last stitch used for previous star, yo and pull up a tall loop, [insert hook into back loop only of next stitch, yo and pull up a tall loop] 3 times. Grasping working yarn close to base of tall loops, yo and pull through all 6 loops on hook, insert hook into side loop, chain 1 to catch loop, chain 1 more to complete star.]] Repeat the instructions in double brackets across, omitting the final chain-1 after completing the last star.
Ending dc: Yo, insert hook into the back loop just used and the back loopbelow the YoSS row, complete a dc. Special turn + 5 tall stars + ending dc = 16 stitches
Tip for Row 2:
Each star stitch (here and on Row 4) starts with a yarnover. Be careful not to add any more yarnovers between star legs (if you do, the resulting fabric will be very stiff).
Row 3 (WS): Ch 1, turn clockwise, YoSS in the back loop only each of next 15 stitches; insert hook up through the 2 topmost WS loops of special turning chain, make a slip stitch.
Row 4 (RS): Make special turning chain (as at beginning of Row 2), turn clockwise.
First star: Yo, insert hook into middle back vertical loop of special turning chain, yo and pull up a generous loop, insert hook into bottom back vertical loop of special turning chain, yo and pull up a loop, skip the stitch the special turning chain comes out of, [insert hook into back loop only of next stitch, yarn over and pull up a loop] 3 times. Yo and pull through all 7 loops on hook, chain 1 to form eyelet and complete star.
Remaining stars: [[Yo, insert hook into eyelet of previous star, yo and pull up a loop, insert hook into farthest back vertical loop of star, yarn over and pull up a loop, insert hook into back loop only of the last stitch used for previous star, yarn over and pull up a loop, [insert hook into back loop only of next stitch, yarn over and pull up a loop] 2 times. Yarn over and pull through all 7 loops on hook, chain 1 to form eyelet and complete star.]] Repeat between double brackets across; your last star should end in the last stitch.
Make ending double crochet (as at end of Row 2), inserting hook into back loop just used and back loop below YoSS row. Special turn + 7 stars + ending dc = 16 stitches
Row 5: Repeat Row 3.
Following Rows: Repeat Rows 2-5 to desired scarf length.
Final Row (RS): Chain 1, turn, slip stitch with relaxed tension in back loop only of each stitch across.
Edging
If desired, switch to a smaller hook.
Edging Round 1 (RS): Ch 1, (does not count as a stitch; place marker in ch-1 so you don't accidentally work into it later), rotate work sideways.
First long edge: Slip stitch in YoSS row end (inserting hook straight through the ridge of stitches), [YoSS under 2 loops of middle section of dc, YoSS under 2 loops of bottom section of dc, YoSS in next YoSS row end]. Repeat between brackets to corner, rotate work.
First short edge: YoSS in back loop only of each stitch across to next corner, rotate work.
Second long edge: [[YoSS in slip stitch row end, YoSS under double side loops at middle of special turning chain, YoSS under double side loops at top of special turning chain.]] Repeat between double brackets to next corner, YoSS in next slip stitch row end, rotate work.
Second short edge: YoSS in back loop only of each stitch across (do not stitch into marked ch-1).
Make Long Loop Join: remove hook, enlarge working loop to about 3/4". Skipping ch-1 and first edging slip stitch, insert hook from WS to RS through top loops of first YoSS of this round, pull long loop through. Insert hook up through back bar and back loop of originating stitch, pull long loop down and through (long loop will pass over ch-1 and slip stitch; tip of long loop becomes new working loop). Adjust join if needed to match surrounding stitches in size.
Edging Round 2: Half-double crochet in back loop of slip stitch. [Insert hook down through front loop and front bar of hdc just made, yo and pull up a loop, insert hook into back bar of next YoSS, yo and pull up a loop, yo and pull through all loops on hook; Corded Hdc complete.] Repeat between brackets around.
Make invisible join: Cut yarn, leaving a 6" tail. Gently pull yarn tail up and out of stitch, without distorting stitch. Skipping starting hdc, insert hook from WS to RS through top loops of first Corded Hdc of this round, pull yarn tail all the way through. Insert hook, from bottom to top through back bar and back loop of originating Corded Hdc, pull yarn tail down and through. Turn work so WS is facing you; pull yarn tail sideways and down through next horizontal loop to the right (to the left if you're crocheting left-handed).
Finishing
Weave in ends. If desired, to "settle" YoSS accent rows, stretch scarf crossways all down its length by tugging long side edges outwards, starting at one short end and working your way to the other short end (or fold the scarf in half, with short ends together, and tug outwards on four edges at once).
If desired, block lightly. (I didn't block my scarf at all.)
~
Videotutorial
~
Idea for Variations
My scarf uses alternating tall star rows and regular star rows, but you could use all tall stars, all regular stars, or mix it up and work the star rows in any quantity or order you like - for example, 3 tall star row repeats followed by 1 regular star row repeat. (Just remember to work a YoSS row between each star row.)
~ ~ ~
If you have any questions, or find mistakes in the pattern, please feel free to comment below, or contact me on Ravelry where I'm MrsMicawber.
Here's an easy textured edging I recently developed for an upcoming free pattern:
Corded Hdc is a simple variation of the half double crochet stitch. It makes a stretchy, sturdy edging with a corded/cabled/braided look that's attractive on both sides. It's especially effective when combined with slip stitch or yarnover slip stitch:
This scarf is edged with a round of yarnover slip stitch followed by a round of Corded Hdc.
Corded Hdc Edging Videotutorial:
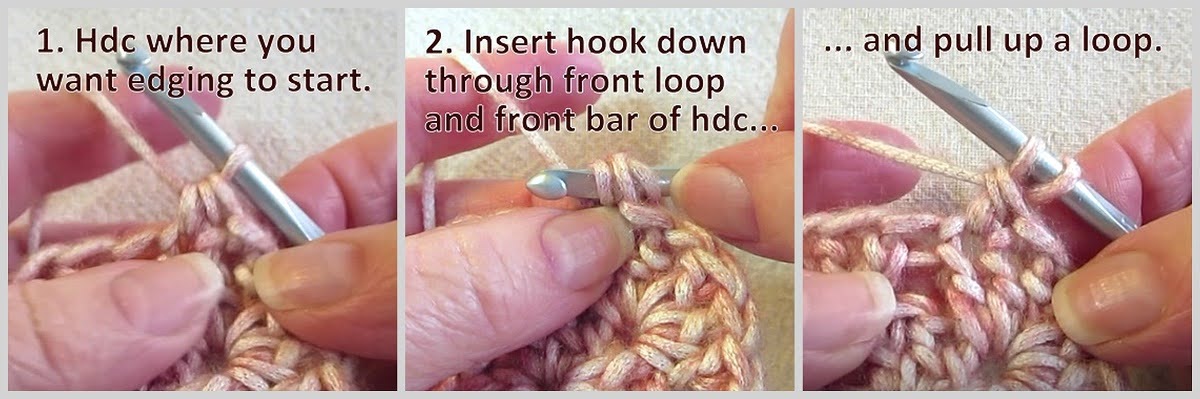
Corded Hdc Edging Phototutorial:
1. Hdc in the stitch where you want your edging to start.
2. Insert your hook down through the front loop and the front horizontal bar (the strand just below the front loop) of the hdc you just made, yarn over and pull up a loop (2 loops now on hook).
3. Insert your hook in the next stitch, yarn over and pull up a loop (3 loops now on hook).
4. Yarn over and pull through all the loops on your hook.
Repeat Steps 2-4 around your project, ending in the stitch just before the starting hdc. Finish with an invisible join (see video tutorial for details).
Corded Hdc Edging Tips
When inserting your hook into the previous stitch's front loop and front bar, you may want to place a finger onto the working loop to keep it in place.
Consider using a hook one or two sizes smaller when working this edging.
For corner spaces, 2 Corded Hdc may be enough. Experiment to see what works best for your project.
Since the back of the stitch is so attractive, consider working the edging with the project's WS facing you.
Can Corded Hdc be used to make crochet fabric? Yes, but the fabric may be rather stiff. You'll also have to decide which loops you want to work into: top loops or double top loops? Front loop and front bar, or back loop and back bar? Each will give a different appearance. Have fun trying!
Coming soon: a free scarf pattern that features Corded Hdc edging.
~
There's not much new under the sun, including crochet stitches. I developed this one myself, while experimenting with yarn and hook, but if you've seen it somewhere else under a different name, please let me know so I can give credit where credit is due.
Hello fellow crocheters! Here's a technique I developed a couple of years ago, but never got around to posting (too distracted by the book, if truth be told).
This technique has now been used in several projects, with excellent results. So, without further ado, I happily present the:
Forward Loop Box Chain is a variation of the Forward Loop chain, but with much greater elasticity.
As its name implies, Forward Loop Box Chain has a boxy shape. It looks like a chain on three sides, and like a row of bumps on the forth. When worked with normal tension, it makes a subtly handsome foundation row. If worked with a loose enough tension, on a project of some weight, a row of decorative eyelets may appear between the chain and the first row of stitches.
Where to Use the Forward Loop Box Chain
Try the Forward Loop Box Chain as a foundation row on:
Mitts
Hats
Top-down tops or ponchos
Top-down socks
Any project that needs a stretchy foundation edge with good recovery
I've used the Forward Loop Box Chain on bottom-up mitts and top-down socks, and it's held its shape well through many wearings.
Forward Loop Box Chain foundation rows
Forward Loop Box Chain Video Tutorial
(This video is for right-handed crocheters. For a left-handed version, click here.)
Forward Loop Box Chain Photo Tutorial
1. Start with a slipknot on your hook.
2-4. Make a forward loop* on the hook above the slipknot.
5-6. Make another forward loop (3 loops now on hook). Yarn over, and pull through all the loops on your hook. (If it's hard to get the hook through the loops, gently grasp the base of the loops and pull downwards/away from the hook, as in Photo 9 below.)
(*How to make a forward loop: Keep working loop on hook and working yarn draped over forefinger, from front to back. Lift forefinger slightly to form 2 vertical strands of yarn, one in front and one behind finger. Place hook behind the back strand and use hook to pull strand towards your hook hand. Slide hook up through the loop that forms. Yarn should look like a letter "D" (for right-handers) or "O", with the tip of the hook pointing up through the hole. Remove forefinger from yarn while keeping hook in the "hole". Gently pull on working yarn to tighten loop until it is snug against the working loop.)
To continue:
7-8. Insert hook into the farthest of the loops you just pulled through.
9. Make a forward loop on the hook (3 loops now on hook).
10. Yarn over and pull through all the loops on the hook.
Repeat Steps 7-10 to desired length.
For a firmer chain: After inserting hook into the farthest loop, tighten the working yarn before yarning over and pulling through the loops on the hook.
Working Into a Forward Loop Box Chain
Note: For maximum elasticity, work only into the bumpy edge.
Before you work the next row, turn your Forward Loop Box Chain so that the bumpy edge is facing you. Stretch the chain, then let it spring back to shape. You should see a row of longer bumps alternating with tiny bumps. When working into a Forward Loop Box Chain, use the longer bumps, and skip the tiny bumps.
To work the next row: Chain 1 (or an appropriate number for the stitch you plan to use). Insert hook into first longer bump, make desired stitch. *Skip the tiny bump, insert hook into next long bump, make desired stitch. Repeat from *.
That's it!
Tip: Be careful not to let the box chain twist as you work into it. Check often to make sure you are working into the long bumps, and not into one of the chain loops.
~
If you have any questions about this technique, ask away in the comment section below, or contact me in Ravelry (where I'm MrsMicawber).
I hope you'll try the Forward Loop Box Chain for yourself. If you do, let me know how it works.
Today we'll finish up the series by learning how to use I-cord as edging for crochet.
I-Cord as Edging
I-cord edging is soft, flexible, and elastic. It wraps around the fabric edge, so it looks good from both sides while offering protection from over-stretching or abrasion. Its clean lines offer a crisp visual contrast to crochet's somewhat busy texture.
I-Cord Edging as Intermediate Rows/Rounds
I-cord edging can double as a foundation for further rows of crochet, as seen in the cross-section photo below (from a cowl pattern to be included in my upcoming cable book).
You might be wondering: why use I-cord in the middle of a project, when the same look can be achieved with other stitches such as slip stitch or back bar hdc? In this project, the I-cord edging provided necessary structure, and helped counteract the fabric's tendency to curl.
So how is I-cord edging made? Let's find out! (Note: there's more than one way to make I-cord edging; I've chosen to demonstrate the one that works best for me. See Technical Q & A below for a link to another method.)
Videotutorial
Phototutorial with Instructions in Plain English
This tutorial is for a 4-stitch cord, but you can adjust that number to suit your preferences. A minimum of 3 loops is recommended. (For a "cheater" 2-loop I-cord edging, see end of post.)
Instructions are written for right-handed crocheters.
What you’ll need:
A piece of crochet - can be solid, lacy, or both
Yarn for edging
Hook
Yarn needle for weaving in
Stitch holder (can be a bobby pin or just a scrap of yarn)
Optional: Extra hook two or three sizes smaller (for hooking up Afterthought Column)
Link to tutorial for technique used in this post: Working the I-cord Body (scroll down in post for tips on working I-cord with a hook)
Starting the Edging
1. (RS) With right side facing, attach new yarn with slip stitch in any stitch of your project.
2. Chain the desired number of I-cord loops (I chained 4).
3 - 4. Starting in the second chain from the hook, insert hook in back loop of chain, yarn over and pull up a loop. Repeat in the next 2 chains - 4 loops now on hook. (Note: if you're making a different size of I-cord, you'll have a different number of loops on the hook.)
TURN.
5 - 6. (WS) With wrong side of project facing, insert hook into next crochet stitch, yarn over and pull up a loop - 5 loops now on hook.
7. Remove hook from loops. Place rightmost loop on a holder and forget about it for now.
Next Row
8. Being careful not to twist loops, insert hook into rightmost free loop, yarn over and pull up a loop.
Repeat in next loop. If you're making a 4-loop I-cord, you should now have 2 loops on your hook, and 2 empty loops remaining.
9 - 10. Insert your hook into both remaining loops(right loop first, left loop second), yarn over and pull up a loop.
11. Insert hook into next crochet stitch, yarn over and pull up a loop - 4 loops now on hook.
Tips:
Always check that each loop is properly oriented before inserting the hook.
Gently pinching the base of the row can help keep loops facing forward.
Following Rows
*Remove hook from 3 leftmost loops, leaving only the rightmost loop on the hook. Yarn over and pull up a loop, insert hook in next loop, yarn over and pull up a loop, insert hook into both remaining loops together, yarn over and pull up a loop, insert hook into next crochet stitch, yarn over and pull up a loop (4 loops now on hook). Repeat from *.
Note: Each time you work these 4 loops, you're making and attaching a new row of I-cord to the project. The first 3 loops are the actual I-cord loops; the 4th loop is what I call an "attachment loop". (More on this in Technical Q & A below.)
Tip: Keep a relaxed stitch tension when working I-cord rows. Here's what your I-cord should look like on the back (which is the RS of the project):
Don't tighten the loose loops; we'll need them later.
Working Into or Over Spaces
When making I-cord edging, there are two ways to deal with spaces or corners in your crochet.
12 - 13. You can attach multiple I-cord rows in the same space or stitch. Photo 13 below shows 3 rows of I-cord worked into the corner space.
14. You can work detached I-cord for as many rows as you like, then re-attach to the work on the other side of the space.
To work detached rows, do not pull up a loop in the next stitch or space. With one less loop on the hook, work standard I-cord rows (yarn over and pull up a loop in each loop from right to left, remove hook from all but rightmost loop, repeat) to desired length. When you're ready to re-attach to the crochet, insert your hook into the desired stitch or space, yarn over and pull up a loop. Photo 14 below shows a few rows of detached I-cord that have not yet been re-attached to the project.
Tips:
When working into or around spaces or corners, work the same number of I-cord rows as you would crochet stitches into that space. For example, in the triangular sample below, I worked 4 rows of I-cord into or over each corner.
You can combine the two methods (attached and detached) in any stitch or space.
Either method can be used to increase stitch count, add circumference to a fabric edge, or create special effects (e.g. decorative detached I-cord loops along an edge).
To tighten up a fabric edge, simply skip a stitch or stitches before pulling up the next attachment loop.
Ending the Edging: Afterthought Column
Not pictured:When you have pulled up the final attachment loop in the last empty crochet stitch, remove hook and place all loops on a holder or scrap of yarn. (These loops will be called "live" loops.)
15-16. Take original reserved loop (from Step 7) off its holder. Insert hook from bottom to top through slip stitch used to attach edging yarn, place reserved loop on hook, pull reserved loop through slip stitch.
17. With RS of project facing you, insert hook under first loose strand; pull strand through loop on hook. *Insert hook under next loose strand, pull through loop on hook. Repeat from * around the project.
18. If you worked any detached I-cord at the corners, the "loose" strand may have tightened up and be hard to find. See second note below.
Tips:
Be careful to hook up 1 strand for each row of I-cord. (If you miss a row, your edging will pucker.)
Each row of I-cord will have two strands under it, forming a V that resembles the legs of a single crochet. Make sure you pick up the strand that is attached to the rightmost I-cord loop. (To check, tug on the strand as you pick it up. The I-cord loop nearest you should tighten up.)
19. When you have hooked up the last loose strand, place the loop on the holder with the other live loops. Cut working yarn, leaving a 6" tail. Thread the tail on a yarn needle.
Seaming the Ends
Before starting the seam, identify the stitches you will be attaching to (I call them "target stitches"): look for the first row of recognizable I-cord loops just above the I-cord starting chain.
Note: You should have 1 more live loop than you do target stitches.
To begin the seam, insert needle from back to front through the rightmost loop on the holder.
Pass needle behind the 2 legs of the target stitch.
Insert needle from front to back through the originating loop; tighten gently. First duplicate stitch made.
Repeat this step, working across the row, until you have 2 live loops left on the holder, and 1 target stitch left in the target row.
Keeping leftmost loop behind, insert needle from back to front through both remaining live loops, pass needle behind 2 legs of the last target stitch, insert needle front to back through the 2 loops.
Seam is now complete.
Before weaving in the ends, tighten or loosen the seam loops as needed to match surrounding stitch size. If tightening, work from right to left (or beginning to end) of the seam. If loosening, work from left to right (or end to beginning).
Weave in ends and admire your nifty I-cord edging!
Technical Q & A
Why is the hook inserted into 2 loops at once on every row?
To maintain the stitch count. Each time you pull up an attachment loop from the project, you're adding a loop; inserting the hook into 2 loops at a time acts as a decrease to get you back down to the desired number of loops. (Confused? Read on.)
The tutorial shows you picking up 4 loops for every I-cord row, but then you hooked up an extra column of loops after the fact. Doesn't that make it a 5-stitch I-cord?
No; it's still a 4-stitch I-cord. As mentioned (far) above, the last loop picked up in every row is what I call an "attachment loop". It doesn't count as an I-cord loop; instead it acts as the "legs" of what will essentially become a single crochet attaching the I-cord to the project. What I've initially worked in this tutorial is a loose, attached 3-stitch I-cord; hooking up the afterthought column adds the 4th I-cord loop to every row. (It's kind of mind-blowing, for me at least, but if you count the visible I-cord loops after hooking up the afterthought column, you'll find that there are only 4 columns of loops.)
You mentioned that there's another way to make I-cord edging? Yes; there are two basic methods for making attached I-cord, and I've shown you my adaptation of one of them. The other basic method is worked RS facing; it eliminates the decrease, and instead inserts the hook through the last I-cord loop and the next crochet stitch at the same time. You can find an example of it here.
The other way seems more straightforward; why do you prefer your method? I found that working the I-cord loosely from the WS, then hooking up an afterthought column on the RS, gave me a smoother, stretchier result, with no crochet stitches visible between I-cord loops. I'd encourage you to try both methods, and see what works best for you.
~ ~ ~
But wait, there's more!
Cheater 2-Stitch I-Cord Edging
This minimal I-cord edging gives an interesting double-chain edge to any flat piece of crochet. It's especially appropriate for pieces that will later be joined by seaming or other methods.
With RS facing, using attached yarn or project yarn, loosely chain 1.
Starting in the next stitch, work 1 round of very loose single crochet. Place working loop on holder. Do not turn. Tip: The easiest way to work loose stitches is to pull up a very TALL first loop at the base of the stitch.
Flipping top edge of work towards you so you can see the back of the stitches, insert hook from left to right into back bump of chain stitch, then rotate hook to face in the proper direction. This will form a twisted loop on the hook (do not twist any other loops but this one.)
*Insert hook under nearest "leg" of next sc (2 loops now on hook), pull second loop through first. Repeat from *, being careful not to miss the final sc. Place final afterthought column loop on holder.
If working in the round, join ends with a double invisible join (remove holder from working loop, join with invisible join to first sc of round; bring yarn tail from back to front through final afterthought loop, remove holder, join with invisible join to twisted loop).
~ ~ ~
Whew!
This post (and series) has taken months to finish; sometimes I thought it would never be done. Anyone who has read this far probably feels the same. :D
If I-cord fascinates you as it does me, you might enjoy the following links:
Today we’ll talk about working crochet stitches into I-cord.
I-Cord as Foundation Row
I-cord makes a smashing foundation row for crochet - it's flexible, elastic, easy to work into, and looks good from both sides.
An I-cord foundation can be subtle or bold, depending on the colour used. Either way, it looks great:
Reversible, flexible, versatile I-cord
Where to Insert the Hook
There are two main factors to consider when working into I-cord:
How many loops you want to work into (2 or 1)
The direction those loops are going in relation to the stitches around them.
While there's no right or wrong way to insert the hook, you may notice slight variations in stitch appearance based on the above factors.
As you can see in the photo below, I-cord is made up of rows of interlocking Vs, with each complete row of Vs representing one column of I-cord stitches.
The Vs can point either right or left, depending on how you look at them:
Vs pointing in both directions
Should You Insert the Hook into 2 Loops or 1?
This will depend on your desired results.
Inserting the hook under 2 loops will:
Give a sturdy join between cord and crochet
Flatten the I-cord slightly
Occupy, or use up, an entire column of stitches (or Vs)
Inserting the hook under 1 loop will:
Give a more delicate join between cord and crochet
Allow the I-cord to remain more rounded
Occupy, or use up, half a column of stitches (or 1 leg of the Vs)
Tip: If you're working into 2 loops, start with an odd-count I-cord (eg 3, 5, 7 stitches) - it will fold neatly in half and give a better appearance than an even-count cord. (I like to use a 5-stitch I-cord.)
Working into 2 Loops - Direction of Vs
When working into 2 loops, if you insert the hook under a leftward-pointing V, it's like working back across a row of crochet in a back-and-forth project. (I call this "against the loops", for lack of a better name.)
If you insert your hook under a rightward-pointing V, it's like working spiral rounds in crochet, where all the stitches are going the same way. (I call this "with the loops".)
Stitches worked "with the loops" will sit closer to the front of the I-cord, making the I-cord look a tiny bit smaller.
Stitches worked "against the loops" will sit back a bit, allowing more I-cord to show. They'll also expose a little more of the I-cord loops between the stitches, as seen below:
Remember, there's no wrong way to insert your hook. You can work into any loops you like - just be careful that you stick with the same loops all the way around, or your I-cord will twist.
Working into 1 Loop - Direction of Vs Here's where the terminology can get a little confusing.
Because the Vs go in both directions, there's no way to say whether a single strand is a "back loop" or a "front loop":
So we'll have to pick a direction - in this case "against the loops", or with the Vs pointing left - and use that as our frame of reference for back loop vs. front loop.
As you can see in the samples below, the "BLO" stitches sit more tidily into the work, while the "FLO" stitches seem to stretch out the I-cord:
Conclusion: Whether working into 1 loop or 2, choose the loop(s) that give the desired appearance. Do I Have to Work into Every Stitch?
Nope! Working into I-cord is just like working into a starting chain or foundation row. You can skip stitches or work more than one stitch into a stitch - whatever your project demands.
Gauge
As with any starting chain or foundation stitch, you may find that the gauge differs between the foundation and the main body of the work. My own I-cord foundations often have a tighter gauge than crochet stitches worked into them with the same hook size; your mileage may vary.
A tighter I-cord foundation is not a bad thing. If you're making a top-down cowl or sweater, or a bottom-up hat, it can draw in the edge attractively, and help prevent stretching out.
But if you want the I-cord gauge to closely match the crochet stitch gauge, here are some options:
If I-cord is too tight for the crochet (crochet curves outwards when cord is laid flat):
Work the I-cord with a larger hook and/or the crochet stitches with a smaller hook
Skip some I-cord stitches (as needed) when working into the I-cord
If I-cord is too loose for the crochet (crochet cups inwards when cord is laid flat):
Work the I-cord with a smaller hook, and/or the crochet stitches with a larger hook
Work more than one crochet stitch (as needed) into your I-cord stitches
Summary
Treat an I-cord foundation as you would any crochet foundation: simply choose a loop or set of loops to work into, be consistent when working into those loops, and adjust hook, stitch count, or tension as needed.
Swatching is always a good idea, too. :)
~ ~ ~
In the next (and final!) I-cord post, we'll learn how to use I-cord as a finishing edge for crochet.
Also coming soon: a free pattern featuring an I-cord foundation and finishing edge, with lacy crochet in between:
Today we’ll learn how to stitch I-cord into a continuous-looking loop.
Seamless-Looking Circular I-Cord
Circular I-cord makes a wonderful foundation and/or finishing edge for crocheted projects. It's tempting to call this type of cord "grafted" (as I have in earlier posts), but true grafting, in the knitting sense of the word, requires live loops at each end. What we'll be doing today is not grafting, but seaming I-cord to form a continuous-looking ring, using a duplicate stitch technique inspired by this post from TECHKnitter.
You can use any I-cord cast on you like for this technique, but for a soft, easily-seamed join, I recommend the method shown below.
This tutorial is for a 4-stitch cord. As always, you can adjust the numbers to suit your preferences.
Instructions are written for right-handed crocheters.
What you’ll need:
Yarn (non-slippery is best, worsted weight or larger)
Hook
Yarn needle for weaving in
Optional: Extra hook two or three sizes smaller (for hooking up Afterthought Column)
Optional: Stitch markers
1. Start with a single adjustable loop (drape yarn over the hook from back to front to back again, with tail to the left of running yarn).
2. Grasping ring to secure, insert hook into ring, pull up a loop, then chain 1.
3. Tighten the chain by pulling upwards on working loop while holding the ring.
4. Gently snug the working loop back down to the hook.
5. Repeat Steps 2-4 three more times. You should now have 4 loops on your hook (see photo 5 below), each with a small tight chain stitch beneath it.
Note: The tightened chain stitches will count as Row 1 of your I-cord, and the loops on your hook will count as Row 2.
6. Remove all loops from the hook. Leaving the rightmost loop hanging free, begin working the I-cord body (see this post, "Working the Body"). Remember to keep tension relaxed, and don't tug the cord.
Photo 6 shows what my cord looked like after 6 rows (remember that the loops on the hook count as a row):
(Note: I tried using a Sharpie to mark the front "legs" of my Row 2 stitches, but all it did was leave faint smudges on the yarn plies.)
Work I-cord rows to the desired length (my sample was 30 rows long; anything shorter was very awkward to seam).
7-8. Gently pull the starting tail out of the starting loop (doing this will keep the starting end smooth).
Not pictured: Place a marker (if desired) in the free loop, then hook up the Afterthought Column (see this post, "Afterthought Column"). You should now have 4 live loops, with the running yarn exiting the loop to the right of the Afterthought Column.
Remove hook from loops, placing loops on holder if desired.
The last stitch of the Afterthought Column will be the first stitch used for the seam. Before you seam the cord, you'll need to shape it into a ring, lining up each last stitch with the Row 2 stitch of the same column.
Lining up the Stitches for Seaming
9. If you placed a marker before hooking up the Afterthought Column, you're good to go. If not, identify the Afterthought Column's Row 2 stitch (it will be a little bigger than the other loops, and the yarn tail will be coming out of the stitch below it). In Photo 9 below, the Afterthought Column's Row 2 stitch is marked with an orange V.
10. Pinch the cord so the Afterthought Column is facing you. Work your way to the other end of the cord, always keeping the same column pinched and facing you. (You can also do this in reverse, by following the Afterthought Column from its end to its beginning.) If you haven't already done so, place a marker in the the Row 2 stitch.
11. Photo 11 shows the Afterthought column identified and marked with black Vs. The final, live loop of the Afterthought column is marked with brown dots. The loop behind it, marked with green dots, is the stitch with the running yarn coming out of it.
12. Cut yarn, leaving a 4-6" tail. Thread a yarn needle onto the running yarn (this will weight the running yarn and keep it out of your way during the next step).
13. Without twisting the I-cord, form it into a ring, keeping the Afterthought Column on top.
14. Carefully insert hook into center of cord, several rows from the end, bringing it out between the live loops at the end of the cord. Yarn over with the starting yarn tail.
15. With hook, pull the starting tail through the cord, and out. Gently pull the starting tail until Row 1 of the cord is sitting in the center of the live loops at the end of the cord. Be careful to keep the Afterthought Column ends lined up.
Seaming the Cord
16. With needle, sew from WS to RS through the live Afterthought Column ending stitch, making sure the stitch loop is facing forward and not twisted.
17. Next sew from right to left behind the "legs", or V, of the Row 2 stitch.
18. Sew back through the ending stitch, from RS to WS. First duplicate stitch complete.
Not pictured: Moving one stitch to the left each time, rotating ring as needed, repeat steps 16-18 in each column until all the stitches are seamed. Each duplicate stitch you make will cover the tiny Row 1 stitch of the same column.
When seam is complete, check the join and adjust stitch tension as needed to match surrounding stitches in size. (To adjust, gently pull on one side of a seam stitch at a time, working from right to left around the ring. You may have to go back and forth a few times to get all the stitches adjusted.)
19. Finally, work an extra duplicate stitch in the next stitch to the left (marked with green dots in Photo 19), keeping the duplicate stitch behind the original stitch. Pull yarn to slightly shrink the extra duplicate stitch. Weave in ends by hiding them in the cord.
Congratulations! You've just completed a seamless-looking circular I-cord.
Can you spot the seam in mine? :)
~
In Part 5, we'll learn how to use our I-cord as a foundation for crochet.
You may do whatever you like with any items you make using this tutorial, but you may not distribute the tutorial, its text, or images, without permission. (Links are always welcome.)


.jpg)