Thursday, August 29, 2013

Chicory Square Block and Bag ~ a Fully Charted Free Crochet Pattern

What does a crocheter do with custom hand-dyed chicory-blossom-coloured yarn? Design a block for it, of course.


Then she makes a few more blocks and joins them into a flowery square:


Then she juggles the block rounds to come up with a lacy version:


Finally she joins the flowery square to the lacy square, adds some straps, a fabric lining, and a bobble-ended tie...


...and she has herself a bag. A Chicory Square bag.


And then, of course, she tries it in a completely different yarn weight, just to see if it works....


It does. :)

~ ~ ~

Chicory Square is a quick, versatile, join-as-you-go block that can be combined in several ways. For a traditional-looking project with a bit of granny appeal, make all 5 pattern rounds. For a very lacy project, leave off the granny cluster rounds and join blocks at Round 3. (You can always use the granny and lacy rounds as a border).

Chicory Square blocks can be made with any weight yarn and are suitable for all kinds of projects. Use thread-weight yarn for a dainty table topper. Try worsted weight for bags, pillows, and blankets. A long strip of blocks in DK or fingering weight would make a lovely scarf or garment border, and a wider strip a beautiful flowery wrap or table runner.

More ideas for variations: try changing colours on every round - or go elegantly monotone by sticking to one colour throughout. Add your own border - the chain loops of Rounds 3 and 5 offer plenty of options for embellishment.


Included below are charts for the Chicory Square block, scalloped border, straps, tie, and assembly instructions for a Chicory Square bag - all followed by a pattern in plain English.


Materials:

Any yarn you like with the appropriate size hook. (For scalloped border, use a hook one size larger than you use for the blocks.)

Worsted Weight yarn will yield a 5-round block approximately 4 3/4" square.
DK weight yarn will yield a 5-round block approximately 3 1/4" square.

Yarns/Hooks I used:

10" Square Bag, 4 blocks on each side: Hand-dyed worsted weight kitchen cotton yarn in 2 shades of chicory, less than 100 yards of each shade; Lily Sugar 'n Cream in Sage Green, 1 skein. Hook size H/8, 5mm for blocks; size I/9 5.5mm for scalloped border.

Small Blocks: Planet Penny Cotton Club Yarn in Jade, Lime, Delphinium, Cornflower, less than 1 skein of each. Hook size D/3, 3.25mm.

Allow more yarn for a larger project.

Chicory Square Charted Pattern

Note to chart readers: I had to invent a few symbols here to make up for a gap in the official lexicon. (CYC, are you listening?) :)

See instructions and photos below charts for special stitch explanations.


(Isn't this a nice chart? I've been playing with some free drawing software and am pretty happy with the results.)

Joined Blocks with Border Chart


Bag Assembly, Strap, and Tie


Chicory Square Crochet Pattern in Plain English (with a Few Helpful Photos)

Special Stitches:

Inverse Slip Stitch (inverse sl st): Holding yarn to front of work, insert hook back to front in indicated st; yarn over and pull through.

Invisible Join: Cut yarn, leaving 3" tail. Gently pull yarn up and out of the stitch. Insert hook back to front of stitch you're connecting to; pull yarn tail through. Working from reverse side, insert hook from bottom to top through all horizontal strands and back loop of final stitch; pull yarn tail down and through. Gently tighten up invisible join to match other stitches in size. Finally, pull yarn tail through at least one vertical bar of next stitch to the right. Click here for an invisible join phototutorial.

Right side facing at all times.

Chain 4; join w/ slip stitch to form ring.

Round 1: Chain 1; single crochet 6 in ring. Join to starting single crochet w/ inverse slip stitch (see Special Stitches above and photo below).


Round 2: Chain 9; inverse slip stitch in same single crochet. First petal made.
(Chain 9, inverse slip stitch in next single crochet, chain 9, inverse slip stitch in same single crochet) 5 times.
Final petal: chain 9, cut yarn and join with invisible join (see Special Stitches above) to first inverse slip stitch at base of first petal. Your flower should now have 12 petals.

Round 3: Attach new yarn with slip stitch (counts as first single crochet) in any petal space.
*(Chain 3, double crochet in back bump of 3rd ch from hook, single crochet in next petal space) twice. Make corner: chain 5, double crochet in back bump of 5th ch from hook, single crochet in next petal space; corner made.*
Repeat from * to * 3 times; join w/ slip stitch to top of slip stitch at beginning of first loop. Chain 4; remove hook and place marker in loop (or draw out a long loop) to keep it "live". Do not cut yarn (unless you plan to make Round 5 a different colour).

Round 4: Attach new yarn with slip stitch (counts as first single crochet) in the next chain-3 space. Chain 2 (counts as first double crochet), double crochet 2 in same space. Make corner in next (should be a chain-5) space: double crochet 3, chain 3, double crochet 3 in chain-5 space; corner made.
*(Double crochet 3 in next chain-3 space) twice across side of square; (double crochet 3, chain 3, double crochet 3) in chain-5 space; corner made.*
Repeat from * to * two more times.
Double crochet 3 in final chain-3 space; cut yarn and join with invisible join to top of first "real" double crochet of round (do not join to starting ch-2).

Round 5: Remove marker if necessary from Round 3 loop, and tighten loop to working size. Gently pull ch-4 across back of granny cluster and to the left, holding ch-4 behind work with your finger. (See chart.) Insert hook from front to back in space between starting and ending granny clusters of previous round, and into live loop; pull loop to front and slip stitch to secure (counts as first single crochet).
Work rest of round same as Round 3, making the single crochets in spaces between granny clusters. Each side should have four (4) ch-3 loops between the ch-5 corner loops. Join final ch-3 loop with invisible join to top of starting slip stitch.

Cut yarn and tie off. Weave in all ends.

Rounds 4 - 5 may be repeated as many times as you like, or used as a border for blocks that have already been joined.

Joining the Blocks:

Join blocks on either Round 3 or Round 5 by replacing the center stitch of each ch-3 or ch-5 loop with a single crochet attached to the matching loop in opposite block.

For side joins: chain 1, single crochet in opposite ch-3 loop (inserting hook as below), chain 1, double crochet in back bump of first chain, single crochet in next space.


For outside corner joins: chain 2, single crochet in opposite ch-5 loop (inserting hook as above), chain 2, double crochet in back bump of first chain, single crochet in same space.

For inside, or 4-corner joins: work the third and fourth joining single crochets into 2 side strands of the original joining single crochet:


To make a bag like mine:

For front, make 4 Chicory Square blocks joined at Round 5. For back, make 4 blocks joined at Round 3, then work Rounds 4-5 twice as a border (this will make front and back the same size).

Scalloped Border for Single or Double Layers (see also chart above):

Increase 1 hook size. Join yarn w/slip stitch in corner space of any block; chain 1. Single crochet 3 in each ch-3 space across and in ch-5 spaces where blocks are joined; single crochet 6 in each outside corner space.

This border will work for any size combination of blocks.

Bag Assembly (see also chart above):

Start in the corner of a single square, RS facing, and work border as above across one side of square. Make 3 single crochets in next corner space. Place wrong sides of squares together, matching loop spaces and corners. Still working in same corner space, turn corner and work 3 single crochets in corner spaces of both front and back layers. Continue working scalloped border, holding front and back pieces together, around 3 sides of bag, ending with 3 single crochets in starting corner space. Turn and work 3 single crochets in corner space and in each space across unfinished (back) layer (WS facing). Finish with 3 single crochets in far corner. Join with invisible join to next single crochet.

Easy Textured Straps (see also chart above):

Leaving 8" tail, chain 3. Half-double crochet 2 together (hdc2tog) in 2nd and 3rd chains from hook. *Chain 2, turn, hdc2tog in 2nd ch from hook and next stitch. Repeat from * to desired strap length (I made my straps as long as one side of the bag - about 10"). Cut yarn and tie off, leaving 8" tail.

Make 2 straps. Use yarn tails to sew to front and back of bag. (You can decide where to attach them - on my bag they were attached to the third scallop in from either edge.)

Optional Tie (see also chart above):

Chain 3; hdc 4 in back loop of 3rd chain from hook. Inverse slip stitch to first hdc; pull yarn tail and working yarn end to tighten bobble. Chain to desired length of tie (mine was about 80 chains). To make finishing bobble, hdc 4 in back loop of 3rd ch from hook. Inverse slip stitch to first hdc; pull yarn to tighten bobble. Cut yarn; insert hook through opposite end of bobble and pull yarn tail through to hide in bobble; carefully trim. Repeat with yarn tail at other end of tie.


Working from outside of bag, thread bobbles through center 2 spaces just below scalloped border, then across open top of bag. From inside, thread through center 2 spaces of front of bag. Tie may be pulled open to access bag, or tied in a bow to keep bag shut.


Line bag as desired and enjoy!

(In my next post, I'll show you how I made a lining, with pocket, for my Chicory Square Bag.)

You are free to do whatever you like with the items you make from this pattern, but you may not sell the pattern or re-post on a different website.

Thanks for viewing, and happy crocheting!


~ ~ ~ ~ ~ ~ ~ ~ ~ ~ ~ ~

Friday, August 23, 2013

Dyeing in my Sleep


The scene: Snowcatcher's house in Colorado. The date: a Sunday evening in July. We had just finished riding Bike MS - 133 miles in two days.

"Let's dye some yarn!" said Deb. I was practically asleep on my feet, but she had enough energy for both of us.

Our goal: to replicate the colour of chicory blossom.


Deb supplied the plain white cotton kitchen yarn, which we wound into 100-yard hanks and secured in several places to prevent tangling. She also supplied fiber reactive dyes, potassium dichromate (used to condition the yarn before dyeing) and soda ash (used as a mordant). Deb's husband the Lizard supplied the empty ice cream containers used to pre-soak the yarn. (Thanks for eating all that ice cream, Lizard.)

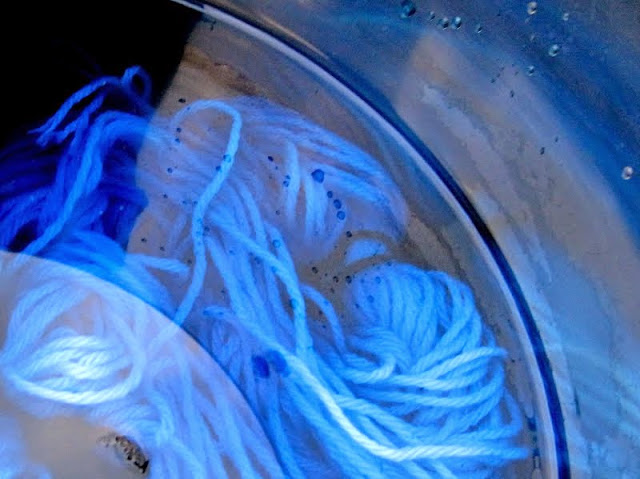
Working outside on Deb's front porch, we soaked the yarn in a chrome bath (made from water mixed with photographer's potassium dichromate). The chrome bath softens the cotton yarn and is said to add brightness to the finished product, but its first effect was to turn the yarn a vivid yellow:


After soaking for 30 minutes, the yarn was rinsed (I think) and then placed in a soda ash bath for mordanting. (A mordant is a substance that acts as a fixative for the dye - in other words, it helps the colour stick to the fiber.)

The yarn looked a paler yellow at this point:


After 5 minutes of mordanting, it was time for the dye bath. Deb got out a large metal pot - dedicated to this purpose - put in plenty of water, and then we started adding dye powder. (We used 2 shades, Alpine Blue and another which I can't remember - something in the violet family.)

Though the dye looks very dark...


...the yarn comes out much lighter than you'd think (and after washing and drying is lighter still).

We kept adding colour to the pot, stirring the yarn around, until we felt we had a good shade:


Then I stumbled inside, in a sort of waking coma, while Deb kindly washed the yarn for me. (I was horridly sleepy by this point, but she had as much energy as ever. How does she do it?)

After washing the yarn, Deb thought it could use a bit more colour, so she gave the second skein a longer soak. (Meanwhile I sat in a stupor and made encouraging noises as she passed back and forth from the porch to the bathroom.) When my two skeins were done, she did a third for herself - this time using wool sock yarn.

We draped the washed yarn over the porch railing to dry:


(You can see that the wool yarn, on the right, came out quite a different colour than the cotton, even though the dye bath was the same.)

When the yarn was dry we wound it into balls, and I had two lovely shades of chicory-tinted yarn to take back to Wisconsin.

And what, you may be wondering, did I do with this very special custom-dyed yarn?


Designed a pattern for it, of course. Watch this space.

~ ~ ~

With very great thanks to Deb, who provided all the supplies and did most of the work. Check out her blog to read more about her yarn-dying adventures. :)

~ ~ ~ ~ ~ ~ ~ ~ ~ ~ ~ ~

Tuesday, August 20, 2013

Painting the Kitchen

For a long time now, I've been wanting to paint the kitchen. When we moved in more than 10 years ago, it was neatly papered and quite livable - but over time the paper began to curl up at the seams.

(I've mentioned before that our apartment occupies the bottom floor of a house built in 1903. As renters, with a dilatory and somewhat uninterested landlord, it's difficult for us to strike the right balance when it comes to things like painting. We want very much for things to look as nice as they can, but are reluctant to put too much effort into a place that is not our own. There is also, I'm ashamed to say, the sneaking feeling that if the landlord doesn't care, why should we? On the other hand, we have to live here - and he doesn't.)

So there we were with ever-more-curling wallpaper. I tried to ignore it. I reminded myself of the unimaginable horrors that can lurk under wallpaper in an old house - spots, stains, water damage, holes. Who knew what the previous tenants had hidden with that paper?

But I finally realised it had to go.


Our landlord was perfectly happy to pay for painting materials if we would provide the labour, so after much agonizing over colours (trying to think what would look best with grey wall tiles, an avodado-green stove, and a brick-patterned linoleum floor), we stocked up on all the necessaries: wall cleaner, paint, roller, tray, brush, painter's tape, tarps. And last week the ordeal began.


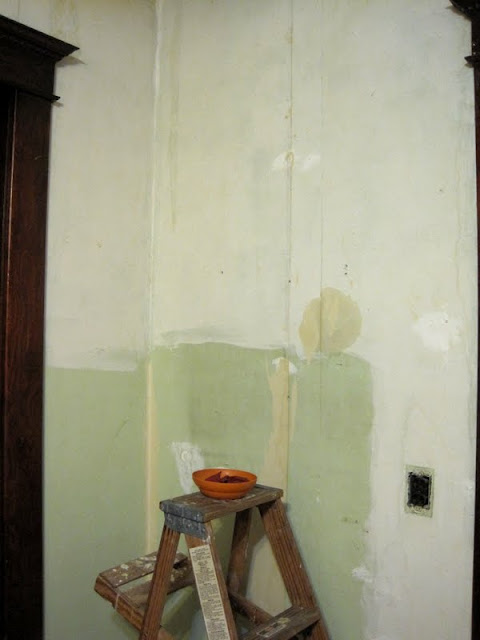
The first part, removing the wallpaper, was rather fun. Years of steam from cooking had loosened it to the point that it peeled away pretty cleanly. Any residue came off very quickly when spritzed with water. And the imagined horrors proved largely nonexistent - apart from one very spotty, damp patch where a leak had occurred years before, the walls were in fairly decent shape.

Aaack!

The spotty damp patch was scrubbed and scraped and allowed to dry. Then I spent a day washing the walls and ceiling. As this involved use of a product called TSP (trisodium phosphate), a highly effective but caustic cleaner, I had to wear heavy rubber gloves, large goggles, and something that looked like a WWII era gas mask. (The mask was very good at blocking all sorts of vapours, oxygen apparently included. I kept having to lift it up to breathe.)

I thought my legs were in good shape from cycling, but that day of climbing up and down, up and down, up and down a stepladder, bucket and brush in hand, made them pretty sore. And cleaning a ceiling is surprisingly awkward. They say conductors have strong hearts from working with their arms raised above chest level - if so my heart must definitely be stronger than it was a week ago.

After cleaning, the walls were allowed to dry for a day or two before spackling all the various holes and scraped areas. (Isn't "spackle" a fun word? Kind of a cross between "sparkle" and "cackle".) Then came the priming of the spackled areas.

Finally, after days of prep work, it was time to paint. (Or almost - I still had to tape all the woodwork edges, cover the refrigerator, and tarp the floor. That took the better part of a morning.) At last I cracked open the can of paint and had at it. And after more hours than I can count spent climbing up and down the stepladder, this time with paintbrush or roller in hand, the work was complete.

The kitchen walls and ceiling are now a soft, warm grey that seems to subtly change colour as the sunlight moves across the room - looking sometimes very faintly green, sometimes taupe, sometimes light rosy brown. It's relaxing and inviting and amazingly easy on the eyes. The room has taken on a certain elegance it never had before; even the avocado-green stove (relic of the 70s) looks better.


The beautiful old doorframes stand tall and dignified in their fresh new surroundings.

Looking from the kitchen into the dining and living room

And I've gotten a serious workout - all my joints (except my ankles) are sore. (How do painters avoid repetitive strain injury?) I can honestly say now that I would rather ride my bike 70 miles - several days in a row - than prep and paint a room in an old house. I haven't been on the bike for over a week, thanks to this paint job, but plenty of calories have been burned notwithstanding. And I'm so glad it's done! :)

~ ~ ~

Do you like to paint rooms? If so, which is more fun - the planning or the painting? The anticipation or the reality?

~ ~ ~ ~ ~ ~ ~ ~ ~ ~ ~ ~

Wednesday, August 14, 2013

Removing Old Wallpaper

~ ~ ~ ~ ~ ~ ~

How satisfying
to grasp a loose edge and
peel off the long, long strip

~ ~ ~ ~ ~ ~ ~

Sunday, August 11, 2013

On the Shores of Lake Michigan


As a (very late) anniversary celebration, Mr. M and I treated ourselves to a night away in Two Rivers, Wisconsin, a delightful fishing town. Poised on the shores of Lake Michigan between a flourishing port city to the south, and a state forest to the north, Two Rivers has something for everyone: fine white sand beaches, trails for walking and cycling (no, we didn't bring our bikes), kayaking, fishing, historical sites, and great restaurants.

Our first destination was the lovely Point Beach State Forest, home to the historic Rawley Point Lighthouse, one of the largest on the Great Lakes and still in operation. The waters near Rawley Point are full of shipwrecks that occurred before the lighthouse was built (though apparently none have occurred since).


We park in the tiny parking area and follow the path through the woods...


...which open up shortly to reveal the lighthouse and the original lighthouse keeper's residence.


(The lighthouse is now operated by the Coast Guard, and the house is a private dwelling, so this is as close as we could get.)

A charming boardwalk leads over grassy dunes...


...to where Lake Michigan stretches away to the horizon.


Just here the water is full of mossy bits, and looks for all the world like pea soup. (Water clarity is determined by wind direction. Later we will visit another beach a few miles away where the water is crystal clear.)


The immensity of the lake, and the long stretch of shoreline, assuage some of the sea-longing buried in our Californian hearts.


There are even shells in the sand....


...and tide ripples like finely etched drawings.


Farther down the shore, the wavelets have cut into the sand creating miniature cliffs:


We sit on the sand to look out at the lake, but after a few minutes, sand flies appear (out of nowhere it seems) and show an uncomfortable appetite for bare ankles. So up we get and head back towards the lighthouse and the trail to our car.


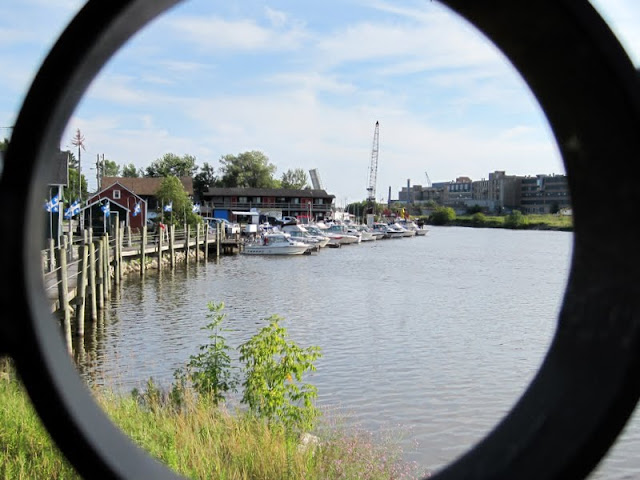
Back in Two Rivers, we stop at the historic Rogers Street Fishing Village (the buildings of which have unfortunately closed for the day). Along the boardwalk fly flags of Quebec, in honour of the French Canadian fishermen who helped found the city.


Looking back at the fishing village through the bridge railing:


Next we head back to the beach - this time the public beach in Two Rivers. Evening is coming on - the sand is covered with resting gulls, and a white sail catches the rays of the sun.


A powered parachute buzzes overhead:


Not all the gulls are resting - some are still playing in the water and poking about for food:


Full of fresh air and lake breezes, we head back to our B&B. The next morning we bid a fond farewell to Two Rivers, deciding that someday we'll come back with our bicycles to take advantage of the many scenic trails.

In no particular hurry to get home, we stop in Manitowoc (just south of Two Rivers), for a look at the breakwater and some of the miniature shoreline gardens planted along the Marina Trail:


Far out on the lake, a plume of smoke can be seen as a ship heads our way:


Boats at rest in the silver-watered marina:


Flourishing plant life borders the trail and the various inlets:


Among the flowers can be seen woolly burdock...


...tansy...


...and bitter nightshade:


All this time the plume of smoke has been drawing nearer. It turns out to belong to the S.S. Badger, a car and passenger ferry which crosses Lake Michigan daily from spring through fall.

The ferry enters between the breakwaters, sounding its foghorn (which echoes back eerily from the port buildings):


The ship turns very slowly, then backs (even more slowly) up to the dock.


Meanwhile, we follow the footpath to the North Breakwater Light:


Looking back from the lighthouse to shore:


The day has grown very humid. We walk back down the breakwater...


 ...past the marina, with its tantalizing and satisfying view of masts and rigging...


...where a sailor dog waits patiently for his ship to come in...


...then back to our car to begin the drive home.


A very pleasant break from routine, with lots of lake views, beach walks, good food, and plenty of trees and flowers. :)

~ ~ ~ ~ ~ ~ ~ ~ ~ ~ ~ ~