Showing posts with label Clothing Makeover. Show all posts

Friday, May 29, 2015

Iris and Columbine and (a Few) Things Accomplished

This morning I had a terrible dream. I dreamt it was the last day of September, and that October and autumn were upon us. "It can't be almost October," I wailed. "I don't even remember having a summer!" What a relief to wake up and find it was still only May after all.

But the dream was nonetheless symbolic of how I feel about the year. It's spinning by too quickly, and I don't feel I'm accomplishing much. I had great hopes of Memorial Day weekend: I saw myself completing several sewing projects, writing a blog post or two, taking several long bike rides, and working in some crochet time. But when the weekend was over, most of those things remained undone.

So this post is a reminder to myself of the few things I have accomplished recently. (If it seems to you like a desperate attempt at self-reassurance - it is.)

~ ~ ~

But first, the promised iris and columbine, both of which are blooming against the garage wall right now:


The columbine is wild and volunteer. I don't know how it came there, but I am so grateful it did - especially as I haven't spotted any on my rides yet this year. It seems to be missing from all its usual haunts.


The irises too were a gift, left over from the previous tenants. They've had their ups and downs over the years (the iris I mean, not the tenants): divided and replanted by me, they sulked for a season then bloomed furiously and in beautiful profusion for some years. A few summers back about half of them died after being accidentally sprayed with something caustic by the man of the house (grrr). The next fall the leaves of the survivors were mowed down by ignorant landscapers before they had a chance to die back (double grrr). The irises very reasonably took umbrage at this shabby treatment and for a few years refused to bloom at all, but now they've bounced back and are delighting us with their lordly beauty and beguiling scent.


~ ~ ~

Something attempted, something done: I re-webbed an old beach chair. Before and after photos:
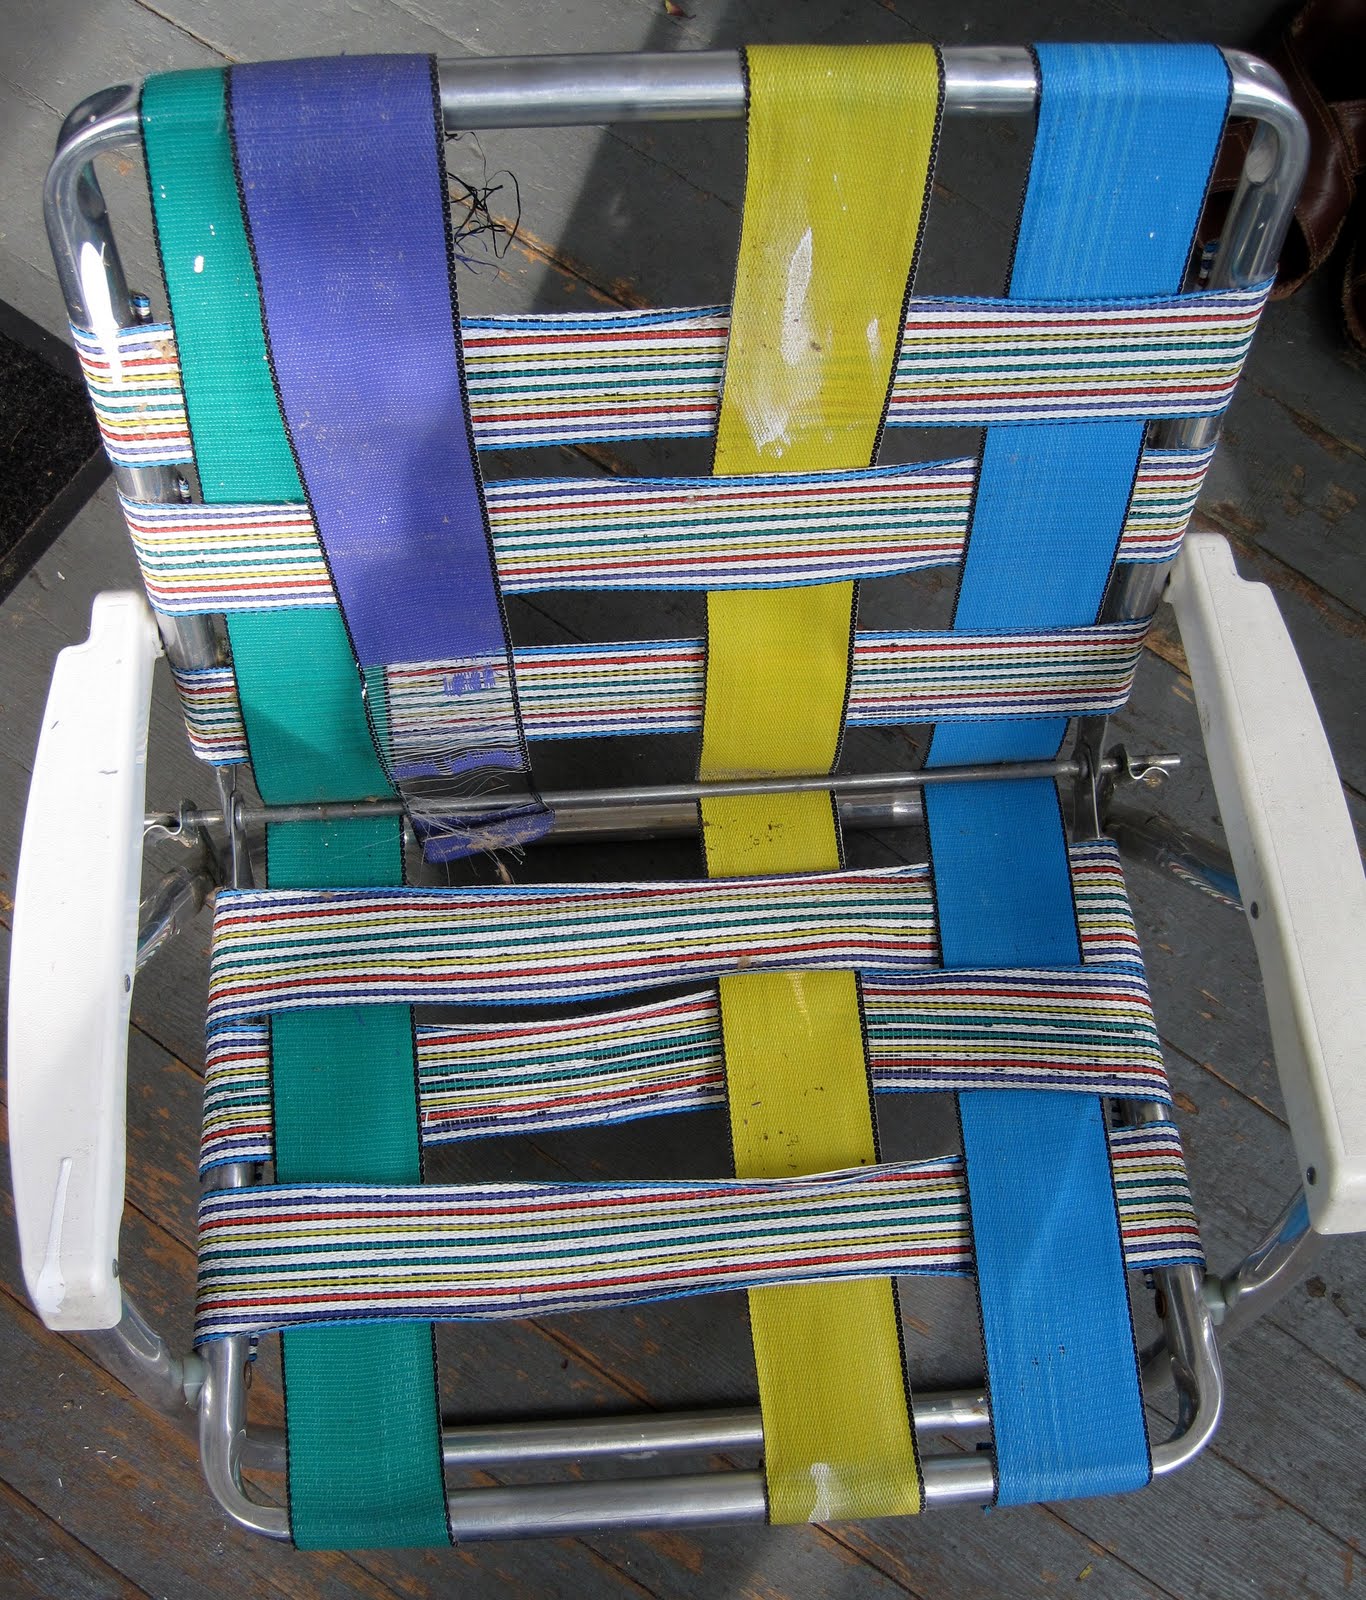


I'd been putting off this project for years, and it turned out to be so much easier than I thought, thanks in great part to this video tutorial.

~ ~ ~

I altered a pair of jeans - another long-deferred project. (No "before" photos on this one, I'm afraid.) This is the one sewing project I did accomplish Memorial weekend, and though time-consuming, it was very worth it.

The jeans fit through the hips, but that was about all. Everywhere else they were an exercise in frumpiness. The waistband was too big in the back, the front crotch depth was all wrong - both waistband and crotch sagged in front - and the legs were floppily shapeless.

So I took off the waistband and beltloops in front (leaving the button and buttonhole intact); took in the top side seams; drew a new, lower front waistline, staystitched and cut off the excess fabric, altered the waistband to fit the new waistline, and re-attached it by simply topstitching around the waist curve.

To avoid multiple seams at the side, the waistband alterations were made closer to center front, under where the front belt loops should go. You can see the seamline in the photo below:
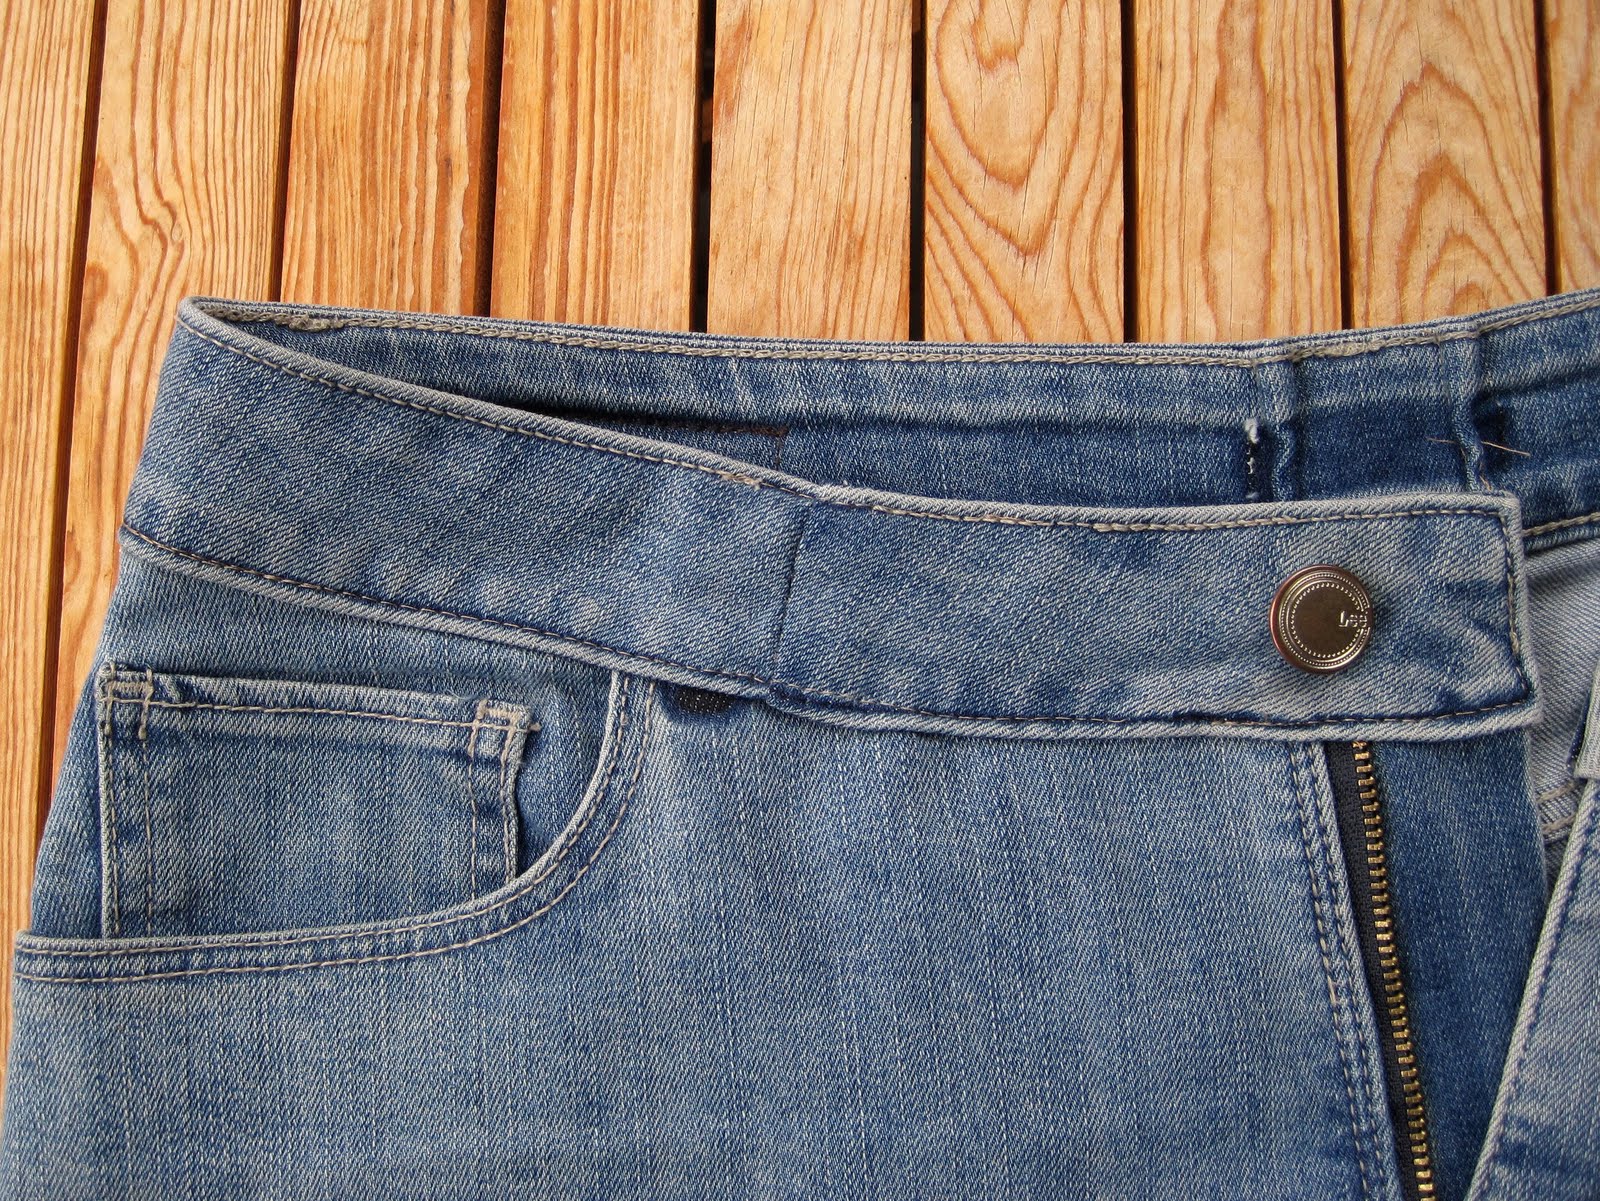

Some tiny darts in the back waistband and yoke solved the rear waist gap. Then the legs were taken in from the ankle up, tapering to the crotch area:


The jeans fit much better now, and have gone from frumpy and saggy to well-fitting and moderately stylish in cut.

No, I'm not going to model them for you. :)

~ ~ ~

May can be stormy in Wisconsin, and Memorial Weekend nearly always ends with a day or two of rain. This year was no different, but I did manage to squeeze in two short rides.


What red-twig dogwood looks like in late spring as it flowers:


Another type of dogwood (Alternate-Leaved Dogwood, I think) is blooming right now:


While taking the dogwood photos, I happened to look down and see a large stalk of wild asparagus. A few minutes' hunting produced enough to fill our next morning's omelette:


This is why cycling jerseys have rear pockets. :)


Cattle resting in the shade on a hot day (with one brave bovine working on her tan):


A few days and storms later, the skies cleared long enough for an evening ride....


I fell in love with this little barn:


~ ~ ~

What else have I been doing lately?

Admiring the rain on the chive blossoms:


And making the first cherry breakfast focaccia of the year (which we enjoyed with our wild asparagus omelettes):


What have you been up to this week?

~ ~ ~ ~ ~ ~ ~ ~ ~ ~ ~ ~

Friday, May 27, 2011

A Sundress for Little C

My youngest great-niece turns 2 today.  I thought it would be fun to make her a little sundress, with a crocheted bodice or yoke and a thrifted men's shirt for the body.

There are a lot of cute patterns out there for re-purposing men's shirts into girls' dresses, and also many cute ideas for crochet-top dresses.  I decided to come up with my own design, which was dictated by the amount of yarn I had available (1 skein), and my almost pathological dislike of weaving in yarn ends (hence the 1-piece yoke).

Here's how it turned out:


If you're interested in making something similar, here are some photos and a description of the process.  (I can't really call it a pattern - it was all very improvised.)

For the yoke, I knew I wanted to use this gorgeous soft yarn, so I shopped for a shirt to match:

Deborah Norville Serenity Garden Yarn
bought at JoAnn Fabrics

After a lot of messing around and frogging, I came up with a simple round yoke (using a child's dress pattern to help with the sizing).  I started with a strip of foundation single crochet (bless you, Doris Chan - you may not have invented this but I learned it from your fantastic books) because it's stretchy and flexible, and has a nice neat edge.

I joined the foundation single crochet strip into a circle (big enough to go over Little C's head), then added two rounds of a kind of tipped-sideways double crochet block stitch (chain 3, *skip 2 spaces and attach to foundation chain with dc, chain 3 and dc 3 in dc that is attached to foundation.  Repeat from * around.)  I got the idea for this stitch from an old Magic Crochet magazine.


This stitch pattern was pretty flexible, and the circle was small, so the yoke came out nice and flat without any increases.  I finished up with a round of chain 4 and sc in each block, then a half-double crochet in each chain, all the way around, to mimic the look of the starting round.  Boy, I hate crocheting into chain stitches;  don't you?  It's so much easier to crochet into a space, but that didn't look right for this piece.  And Little C is worth the trouble.

So now I had a nice round piece which I could fold in half and use for a yoke.  I also made a granny square for a pocket.  All I needed was the dress.


A brown paper grocery bag (with the bottom cut off) made great pattern paper.  After checking some online children's size measurement charts, I knew the average chest size for a 2-year old was 21".  So I added an inch for ease, and cut a piece of paper 11" wide (half of 22") to make a pattern block for the dress.  (I didn't need to add side seam allowances because I would be using the shirt, and those side seams were already sewn.)  The length of the grocery bag was about right for the length of the dress.

I laid the folded yoke on the pattern block, and traced out the neck and armhole shapes on one side, adding seam allowances:


Then folded the paper in half and cut out the neck and armholes:


Time to lay it on the shirt and see how much room I had. (The pattern piece looks so skinny because it represents the basic shape of the dress without any gathers. Imagine it split in two and spread out as wide as the shirt.  That's how I would cut the shirt.)


Plenty of room, but the shirt pocket was in the way.

Adios, pocket!

With the pocket out of the way, I could push the pattern piece a little higher up the shirt, and get maximum length out of my fabric while still using the ready-made side seams.

Now to cut up the shirt from armhole to armhole.  I used the woven lines of the plaid as a cutting guide and cut one layer at a time; first the front, then the back:

Right across to the sleeves and carefully around the bit of armhole

Then I smoothed it out all nice and flat, and LOOK HOW UNEVEN THE HEM WAS:

Mass-produced clothing.  Sheesh.

That wouldn't do at all for Little C's dress.  I'd have to cut it off and make my own hem.  No big deal.  Time enough to work on that when the top part was done.

Next I traced and cut the armholes at each extreme side of the top (by sliding the pattern piece all the way to one side of the shirt, marking it, then all the way to the other side and marking again):


Then went to the center and marked the depth of the yoke curve.


Then sketched in a long curve, connecting it to the armholes at the sides:


Folded the shirt in half, and cut it.


Now it was time to bind the armholes, and gather and bind the yoke curves.  I didn't want any raw edges inside the dress.

After a refreshing sniff of my lilac bouquet which was sitting on the table and scenting the entire room...


I cut some 3/4" bias strips for the armholes, and some 1" bias strips for the yoke curves:


And pressed under one long edge on each (a little less than 1/4"):

Note to self:  ironing board cover needs washing

I sewed a 3/4" strip to each armhole, right sides together, and trimmed the seams a tiny bit:


Then folded them over to the wrong side and topstitched them down:


Now it was time to gather the yoke curves.  I realized I had no idea how much to gather them, nor where exactly to attach them to the yoke, so back to the brown paper pattern piece:

I marked the center points front and back,
and the side edges of where the bodice would attach.

I measured the distance between the attachment points (just under 6"), then marked my binding strips with lines that far apart.

I gathered the yoke curves using the good old zig-zag over dental floss trick, and pinned them to the binding strips between the marked lines:

Whoops!  Forgot to press these edges under. Will have to roll by hand.

Attached the strips, trimmed the excess, folded them over to the inside, and pinned in place.  I decided to hand-stitch them down instead of topstitching, to keep the curve soft and flexible (machine-stitching through all those gathers would make it pretty stiff).

All pinned and ready for hand-sewing

Top edges nice and finished

And the little dress was almost done!


The rest went pretty quickly.  I agonized over decided which side of the yoke should go in front, pinned it to the bodice:


And machine-stitched it in place.  Repeat with back yoke.  Trimmed the bottom of the dress and added a quick machine hem:


At the last minute, I modified the granny square pocket to give it a stronger top edge.  I frogged the last side of the square and did a row of single crochet instead:


And pinned it to the dress and topstitched it in place.  Hooray!  I was done!  Or was I?


Front yoke

Back yoke

Every girl needs coordinating accessories.  I had time, yarn and fabric enough left to whip up a little bag:

Cut off a chunk of sleeve and cut into a neat rectangle.
Sew side with french seam.

Gather the bottom inside...

And ziz-zag to prevent fraying.
Turn right side out and lay aside.

I crocheted a simple shell-stitch top for the bag (3 rows of shell stitches, a row of double crochets with chain spaces for drawstrings, then a frilly shell top with a round of picots to finish). Then I trimmed the bag a bit shorter (I had made it too tall), folded and hemmed the raw top edge of the bag, pinned the crochet to it, and top-stitched it on. (Sorry, forgot to take pictures of this part. You can use your imagination.)


Crocheted a couple of chain stitch handles, wove them through, and NOW I was done.


Wait...how about an amigurumi to go inside the bag?  Just kidding. I did look at some patterns online but decided I'd better quit. I bought a stuffed ladybug toy and put it in there instead.

~

Happy birthday, Little C, with love from Aunt Sue and Uncle M.  If you pull on the ladybug's tail it will scurry around.


~ ~ ~ ~ ~ ~ ~ ~ ~ ~ ~ ~