Showing posts with label Use It Up. Show all posts

Wednesday, February 1, 2017

Recycling Socks and Sugar Bags

When I started this blog nearly six years ago, its tagline was "Living Graciously on Limited Means". I meant to write about simple living - making do, mending, purchasing with an eye to the environment, cooking from scratch, and the like. But blogs, like books, have a way of ignoring the author's intentions and going in their own direction.

Apparently this blog really wanted to be a kind of country diary with cycling and crochet accents - and that's okay. But we're still living as simply as we did six years ago, and recent income changes have meant that we're earning even less than we did then. The upside is, we've had years of practice at tightening our belts. Our current situation is just a good reminder to drop some excess life-weight and find ways to slip that belt over another notch or two.

Today's post was written in that spirit.

Note: Simple living and recycling aren't always pretty; sometimes they're merely practical. So none of the photos here are intended to be Pinterest-worthy - but I do hope that someone may find them helpful.

~ ~ ~

"Drizzle with icing" must be one of the most delicious phrases in the English language. ("Top with chocolate" is a close contender.) If you like to drizzle icing on your baked goodies (who doesn't?), here's a quick tip for a reusable icing bag.

Take an empty confectioner's sugar (or other sturdy plastic) bag, and cut a large quarter-circle around one of the lower corners, like this:


Fill half-way with icing, twist top to close, and snip a very small piece off the corner:


Squeeze to drizzle the icing. Perfect for jazzing up some birthday breakfast scones:


This little bag can be washed and re-used many times over. I've been using mine for a couple of years now - the plastic seems indestructible.

~

Other uses for sturdy plastic food bags (or used freezer zip bags):
  • They make a wonderful non-stick barrier between a rolling pin and sticky dough (e.g. tortilla dough or pie crust). Cut away any zippered portion, then cut carefully along one side and across the bottom of the bag so you can open it out flat. Roll your dough, repositioning the plastic as needed. When you're done, wash the plastic and save it to use again.
  • Cut bag open as above, and use to line smaller pans (in place of butter, foil, or waxed paper) for easy release of non-baked bars and treats. (Don't put anything hot on the plastic.)
  • When shaping hamburgers, center the meat on one half of a plastic bag piece, fold the other half over it, and press with a plate. The plate will stay cleaner, and the burgers peel right off the plastic.
  • To make a bowl of leftovers airtight, drape the plastic over the bowl and hold it in place with a plate or a rubber band. (You can also use a towel and a plate.)
Best way to dry a just-washed piece of floppy plastic bag: Lay it out flat on one half of a dish towel. Fold the other half of the towel over the plastic. Press gently on the towel with one hand while drawing the plastic out with the other. The towel will absorb most of those peskily persistent water drops. Drape the plastic over a rack to finish air-drying.

(This technique also works for intact zipper bags. Dry the outer surfaces first, then turn them inside out and repeat with the inner surfaces. Air-dry until no moisture lurks in the corners.)

Some might say that all this repurposing of plastic wouldn't be necessary if we didn't buy plastic-packaged things in the first place - and they would be right. It's something we're working on. But I'm happy to state that we haven't bought any plastic wrap for at least five years. This may not save the planet, but it's one small step towards simpler and more sustainable living practices. And it saves us money. Kind of a win-win.

~ ~ ~

What can you do with a hole-y sock?

I've learned to darn my pricey merino wool socks, but cheaper cotton and bamboo socks don't seem to mend as well. Yet I don't like to throw them away - so here are some ways I keep worn socks out of landfills.

Above-the-ankle socks:
  • Cut off the feet and use them for dusting or cleaning (just slip one over your hand)
  • Use the ribbed cuffs to protect long sleeved tee shirts when cooking or slicing things that splatter. I keep a stash of cut-off sock cuffs in the drawer next to the stove, and slip them on as needed. (Many people would just push up their sleeves, but my wrists get cold in winter. The cuffs therefore serve a double purpose: they protect my sleeve hems from getting stretched out while keeping splatters off my sleeves.)
  • Speaking of cold wrists: sock cuffs, while not pretty, make great wrist warmers in a pinch. Mr. M has even been known to cut the toes from worn woolen socks, cut a slit for the thumb, and make rough-duty mitts for himself.
New Life for an Old Sock: Mrs. M's Cooking Cuff

Knee socks:
  • Cut off the toe and/or foot section and use as above for cleaning or dusting.
  • Wear the leg section as leg warmers - this works especially well under shorter socks in winter time.
Don't be afraid to cut up your old socks, by the way - the cut edges may curl, but they won't fray.

~ ~ ~

Do you have any tips for repurposing socks, sugar bags, or any other items that might otherwise be thrown away?

~ ~ ~ ~ ~ ~ ~ ~ ~ ~ ~ ~

Thursday, July 14, 2016

Sewing Projects, plus Random Thoughts on Research and the DIY Mentality

For me, having a DIY mentality is a bit like being a 2-year-old, especially when it comes to making clothes. I'm awfully prone to insisting on "doing it myself". (Why buy a pattern when I can draft it, or copy an existing garment? Why buy something ready-made if I can sew it? I will Do It Myself!)

Unlike most 2-year-olds, however, I like to bolster my efforts with copious research. If I'm going to Do It Myself, then by golly I want to get it right. This means Consulting the Experts.

When I was younger, there were few Experts to consult. Luckily I had (and still have) an older sister who was (and is) better at nearly everything. She was my resident Expert throughout my internet-less childhood. Since then, the field of available Experts has expanded into a world-wide web simply crammed with crafty wisdom, all just a keyboard-tap away.

So now, my sewing projects tend to follow this pattern:

Step 1: Preparation. I get out all the tools and materials I might need and display them prominently in the dining area. (This is meant to spur creativity and encourage diligence.)

Step 2: Research. I waste all kinds of time online read all the blog posts, tutorials, and online magazine articles I can find on the subject in question, not forgetting to check the comments sections for good ideas that might otherwise be missed. And I look at project photos. Lots of project photos.

Step 3: Action. This is where I ignore much of what I just read and decide to come up with my own method. (Do It Myself!)

Moment of Crafting Honesty: I like to think of Step 2 as research, but maybe it isn't. Maybe it's really procrastination, caused by a subliminal fear (born of previous experience) that the project won't turn out the way I hope. Or maybe it's a control thing - seeking power through knowledge. Or - gasp - maybe it's just more fun to look at other crafters' projects than it is to start my own (procrastination again).

Meanwhile, piles of fabric sit around, cluttering up the dining table, forcing us to eat our meals in the living room in front of the laptop while watching the replay of that day's Tour de France stage. (Which isn't actually a bad thing. Watching someone else exercise is almost as good as doing it yourself. Rather like looking at other people's craft projects. But I digress.)

Even the weariest river winds somewhere safe to sea, says the poet. Translated into crafting language: even the most determined researcher (or procrastinator) eventually produces something. Here are a few recent projects of mine:

Green Tee


The green fabric is a rayon-spandex jersey knit; the purple slub and grey print are blends. All are from JoAnn. I dreamed of putting together a really arty and amazing tee, à la Marcy or Katherine Tilton, but when it came down to the actual construction, a contrast neckband turned out to be enough. Anything more and it wouldn't have been me. (Aside: how do you figure out what's you? Is there a quick and easy way to make sure that you only wear what you like, and that you like everything you wear? If so, do tell.)

The grey print had very little stretch, and the neckband didn't want to lie flat, so I added four tiny darts evenly spaced around the front neckline curve. The darts are neatly camouflaged by the print:


I love the softness and drape of rayon jersey, but its slinky and crinkly properties can make the cutting-out process a real hassle. What with making sure things are on-grain, and trying to keep the fabric layers smooth, it takes me longer to cut out the pattern than it does to assemble it. But the results are worth it. (If only it didn't pill so quickly....)

Bonus tip for hemming soft, stretchy fabrics with a regular sewing machine: When cutting out, add about 1" extra length to the standard hem allowance. When it's time to hem the garment, fold at the desired hemline (the hem allowance will look really wide, but that's okay). Stitch at the desired distance from fold, then carefully trim excess hem allowance after stitching. This method gives your presser foot a more stable area of fabric to sew over, with no cut edge to get sucked into the path of the needle.

The pattern for the Green Tee was copied from a favourite purchased tee, using a method I read about in Threads magazine some years ago.


Copying an existing garment still counts as Doing It Myself, right? :)

Popsicle Top


The colours in this fabric - another rayon knit found at JoAnn - remind me of a Big Stick, the favourite popsicle of my childhood.

For this tee, I converted the Green Tee pattern to a dolman-sleeve version by folding the sleeve piece in half and pinning it to the front and back pieces in turn, matching the underarm seam points and lining up the folded sleeve edge with the shoulder edge. The underarm corner was rounded slightly during cutting to give a smooth underarm curve.


The sleeve length was dictated by the amount of available fabric - which was 1 yard. (I am a fabric Scrooge.) We will gloss over the ridiculous amount of time spent in anguishing over how to make the best of this print - which has stripes running in both directions - or in dithering between set-in sleeves and dolman. Dolman won out, mainly because there was no way to match such irregular stripes with a set-in sleeve (the shirt back has a completely different stripe pattern than the front).

This tee was cut on the cross-grain (a first for me when working with a knit), and the selvedge was used as the hem.

Once cut, the tee came together quickly, and I'm really happy with the way it turned out. It's fitted through the shoulders and chestal area, and slightly slouchy around the waist. I was afraid the underarms might be baggy, but they came out just right.


Some Other Small Projects

Brace yourself....


Yes. They're exactly what they look like. And I'm surprised to find that I like them. 'Nuff said.

(Okay - just a few words more. Some of you may be absolutely horrified by this. If so, I'm sorry. I'm not trying to shock anyone. Others are probably wondering how anyone could possibly want to make and re-use things like these. In my case, it started with a leaflet from my doctor advising only 100% cotton products in the body area involved. Other factors included: the prohibitive cost of disposable 100% cotton products, an abundance of cotton fabric scraps in my stash, and a sewing machine at the ready. Environmental concerns also played a role. If you'd like to learn more, there are plenty of articles, reviews, patterns, and tutorials on the net. Some are embarrassingly gushy, but here are two that are soberly and thoughtfully written:

http://www.showandtellmeg.com/2015/12/cloth-pads-success-and-tutorial.html
http://www.greenideareviews.com/2013/02/19/diy-homemade-pantyliners-review-do-they-work/

To my fellow sewists: even if you wouldn't use these items yourself, would you consider making some for donation to girls and women in other countries who either don't have access to, or can't afford, the disposable products we take for granted? If you'd like to help, here are two links to get you started:

http://sewinpeace.blogspot.com/2013/08/feminine-cloth-pad-tutorial.html
http://toolittlechildren.org/pad-project/

Embarassing Topic concluded.)

~ ~ ~

Wow - this post turned out much longer than I planned! Next time I'll have a month's worth of cycling photos to share.

What have you been making (or researching) lately? :)

~ ~ ~ ~ ~ ~ ~ ~ ~ ~ ~ ~

Friday, October 10, 2014

Mini Pumpkin (or Apple) Bunting ~ a Free Crochet Pattern for I Love Yarn Day

Mini Pumpkin Bunting - how's that for a cheerful phrase? It makes me smile just to type the words. (And for sheer crafty joy, Free Pattern and I Love Yarn are hard to beat.)

It's the second Friday in October, which is I Love Yarn Day here in the States. All around the country, stitchers are celebrating by making items for charity, teaching someone to knit or crochet, taking their yarn to work (don't we all do that anyway?), giving a gift of yarn, or crafting in public.

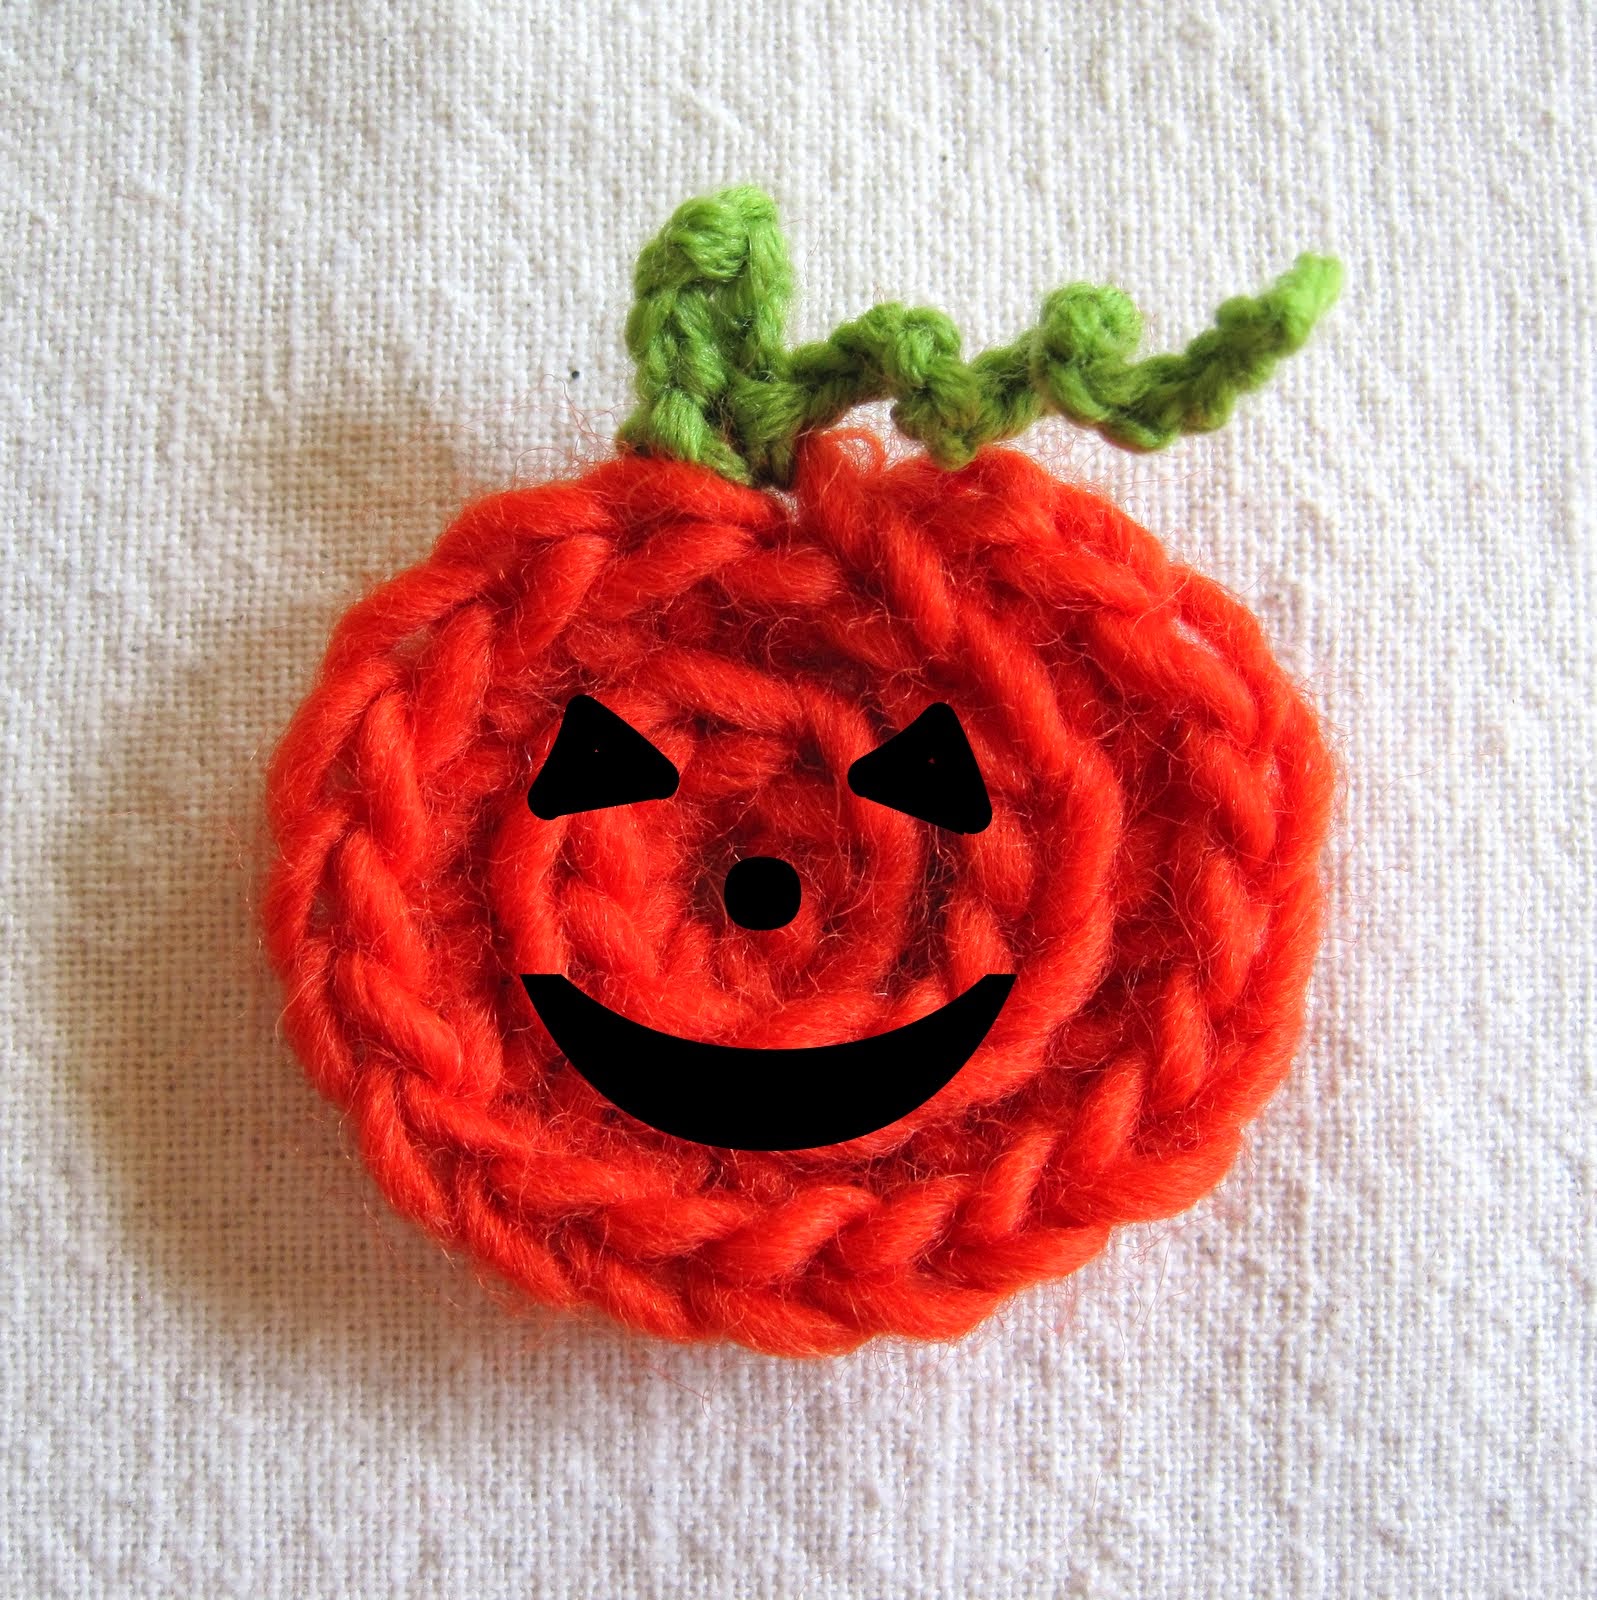
Haven't planned your yarny celebration yet? Then whip out some scrap yarn and hook up a Mini Pumpkin or two. They're fast, fun, and irresistibly cute with their tiny stems and curling vine tendrils:


Jack O'Lantern lovers, try embroidering your Mini Pumpkins with black yarn (mine has been "embroidered" by computer":


For Mini Apples, simply change yarn colours and add a leaf:


String your Mini Pumpkins (or Apples) together, and you have the perfect mini autumn bunting:


No time for bunting? Just make one Pumpkin or Apple and wear it as a yarny brooch to proclaim your Love for Yarn. Each one takes just minutes to stitch - how about making a few extra to give away?

Happy I Love Yarn Day!


~ ~ ~

Mrs. M's Mini Pumpkins or Apples

Size: 1½" - 2" diameter

Yarn Requirements
Pumpkins/Apples: Red or orange worsted weight yarn, 2½ - 3 yards for each
Stems/Tendrils/Leaves: Green DK or worsted weight yarn, about 25" for each
Bunting: Brown worsted weight yarn

Yarns I used
Orange: Stitch Nation Full O'Sheep (discontinued)
Red: Lion Brand Heartland
Green: Plymouth Select DK Merino Superwash
Brown: Caron Simply Soft

Hooks
For pumpkins/apples, US H/8 (5mm)
For stems/leaves, US D/3 (3.25mm), OR smallest hook that will work with your yarn

You will also need: Yarn needle or fine steel hook for weaving in ends

Stitches, Abbreviations, and Techniques Used
Knotless Chain - click here for tutorial, OR use Magic Ring if preferred
Ch - chain
Sc - single crochet
Hdc - half double crochet
Invisible join - click here for tutorial
Sl st - slip stitch
Partial tr - partial treble; work as for treble but leave final 2 loops on hook
Yo - yarn over
Working in the back horizontal bar(s)

Note: I made my pumpkins in 3 slightly different sizes (see Round 2 below), but you can make them all the same size if you prefer.

Mrs. M's Mini Pumpkin or Apple Pattern in Mostly Plain English
With Orange or Red, loosely Knotless Chain 2, OR make a Magic Ring and chain 1.
Round 1: Working in 1st Knotless Chain OR in Magic Ring: 1 sc, 7 hdc. Do not turn, but continue to work in spiral with right side facing you.
Round 2: Working in back horizontal bars, 2 hdc in each of the next 8 (10,12) stitches. Sc in both back bars of next hdc. Cut yarn and join with Invisible Join to both back bars of next hdc. Weave in ends.

Pumpkin Tendril and Stem:
With Green, using smallest hook that will work, tightly chain 12 - 15, join with sl st to final stitch of pumpkin, ch 7, sl st in same stitch. Cut yarn, tie off, weave in end. Without pulling on stem, tug on beginning yarn end to tighten the slipknot, then trim yarn end close to slipknot. Twirl the end of the tendril to make it curly.

Note: If your slipknots tend to pop open after trimming, dab a bit of glue, Fray-check, fabric stiffener, or clear nail polish on them.

Apple Stem and Leaf:
With Green, using smallest hook that will work, join with sl st to final stitch of apple, ch 7, sl st in same stitch (stem made), ch 5. Make leaf: in back bar of 5th ch from hook, work partial treble (see above), then yo, insert hook in same back bar, yo and draw up a loop, (yo and draw through 2 loops) 3 times to complete leaf. Cut yarn and weave in ends.

To assemble bunting:
With Brown, chain 20, sc in stem loop of first pumpkin (inserting hook from front to back). *Chain 15, sc in next stem. Repeat from *, ending with chain 20 after final pumpkin.

Pin up your bunting (or pin on your brooch) and proudly proclaim, "I love yarn!" Smile and repeat. :)

Pumpkin Phototutorial:

With Orange or Red, loosely Knotless Chain 2, OR make a Magic Ring and chain 1:


Round 1: Working in 1st Knotless Chain OR in Magic Ring space,
make 1 single crochet and 7 hdcs.
Do not turn, but continue to work in spiral with right side facing you.
Round 2: Working in back horizontal bar of each stitch, make 2 hdcs in each of
the next 8 (10,12) stitches. (Working in the back bar will tilt the top strands towards you, giving your pumpkin a swirly look.)


Sc in both back bars of next hdc:


Make Invisible Join: Cut yarn and pull up and out of last stitch.
Insert hook from bottom to top through back 2 bars of NEXT hdc,
and pull the yarn tail down and through...


...then insert hook from bottom to top through back two bars
of original hdc (where the yarn tail came from),
and gently pull the yarn tail down and through:


Weave the tail through one strand to the right, then
weave in all ends and trim.

Turn it over, and look! It's a pumpkin!


Now for the curly tendril and stem....

With Green, using the smallest hook possible for your yarn,
chain 12-15:


Attach with slip stitch to last stitch of pumpkin.
Chain 7, and slip stitch again in the same place:


Cut yarn and weave in tail. Trim starting tail close to starting knot (pull the knot really tight first, without tugging on the stem). Twirl the chain to make a tendril.

Apple Stem and Leaf

With Green yarn, using the smallest hook possible, attach with a slip stitch to final stitch of Apple.
Chain 7, slip stitch in same space.
Chain 5, then, working in back bump of 5th chain from hook,
make a partial treble (see Stitches and Abbreviations above),
then yarn over, insert hook in same back bar, yarn over and draw up a loop,
then work the loops off the hook 2 at a time to complete leaf. Cut yarn and weave in ends.


Assembling the Bunting

Got a pile o' pumpkins? (Or apples?) Get ready to join them.

With Brown yarn, chain 20. Insert hook from front to back in stem loop of first pumpkin, and make a single crochet:


*Chain 15, single crochet in next stem.

Repeat from * until all the pumpkins are used up, then finish with chain 20.

Pin up your bunting and proudly proclaim "I love yarn!" Smile and repeat. :)

~ ~ ~

You may do whatever you like with the items you make from this pattern, but you may not sell the pattern or reproduce the text. Links to this site are welcome.

Thanks for viewing, and happy crocheting!


~ ~ ~

Are you celebrating I Love Yarn Day? If so, how?

~ ~ ~ ~ ~ ~ ~ ~ ~ ~ ~ ~

Tuesday, February 5, 2013

Reinforcing Jeans

Who can find a pair of jeans that fit? For they are more precious than sapphires. Therefore guard your jeans and keep them in good repair.... 

One night, Mr. M pointed to my hip and said, "What happened to your pants?" (I can't imagine why he was looking at my hips but he seems to make rather a habit of it.)

Turns out my jeans were ripped. A favourite pair, weary with long years of service, they had given way at a weak spot right next to the back pocket. I could have thrown them into the scrap pile, but was unwilling to give them up, because they - prepare to be astonished - actually fit. (At waist and hips!)

Desperate times call for desperate measures; time to get out the sewing machine and brush up on my Jean-Patching Philosophy:
  1. Do not trim loose threads, but leave them in place to preserve as much as possible the original weave of the fabric.
  2. Use soft old denim to patch soft old denim. (There's a Biblical precedent for this.) I never throw away jeans, but keep them in my fabric stash to use as patches and potholder backings.
  3. For an inconspicuous repair, place the patch on the wrong side of the fabric.
  4. Don't try to eliminate the hole completely; instead, provide a solid backing slightly larger than the hole, and make sure the jeans, and any loose threads, are securely attached to it. The backing will then carry the strain of wear.
And now for some exciting photos:

The embarrassing tear.

Scrap denim to the rescue!
Cut on the bias as an experiment
(to avoid having to zigzag the edges),
it worked out very well.
If you cut your patch on the
straight grain, be sure to finish
the edges, or they will fray.

The two stitches I use for patching:
1. 3-step zigzag
2. Normal zigzag

Slide the patch under the hole,
and pin if necessary.
Use 3-step zigzag to outline the hole,
then switch to regular zigzag.
Make a few passes up and down to

secure the patch and any loose threads.
(Or you can make several passes
using just the 3-step zigzag.)

Trim excess patch fabric, leaving
at least 1/4" margin all around.

Note: This is not a "pretty" patch job, but a very functional one. I didn't worry too much about the thread showing, because I usually wear these jeans with a long shirt that covers up the patched area. For a nearly invisible patch, use grey or even black thread.

As long as I had my machine out, I decided to tackle my jeans' badly frayed inner thighs, choosing bias tape for a thinner, more comfortable patch.

Holey thighs, Batman!

Cut a strip of bias tape long enough
to cover the frayed areas.
First stitch it to the jeans' seamline...

...then zigzag the edge of the bias tape
to the seam allowance.

Now for some 3-step zigzagging along the outer edge
of the frayed area, then regular zigzagging
to hold everything together.

Look, ma! No more loose threads!

Extreme close-up, showing how the black thread
practically melts into the denim.

A bit of follow-up: these photos are dated October 4, 2012, making this patch job 4 months old. The jeans are still going strong (in fact I'm wearing them as I type this).

Use it up, wear it out, make it do - and patch when necessary. This will postpone the misery of shopping for new jeans. :)

~ ~ ~ ~ ~ ~ ~ ~ ~ ~ ~ ~

Tuesday, August 7, 2012

Adding Pockets to a Workout Shirt

Cycling jerseys, while admittedly not the most flattering of garments, have one enormous practical advantage over standard workout tops: pockets. Deep back pockets, with elasticised tops, that can hold all kinds of doodads safely tucked away but still within easy reach.

Since I love to take my camera on my walks (in addition to keys and occasionally a cell phone), I decided my favourite workout shirt needed some pockets too.

Attached pocket made using a Lycra print from my stash

Here's how I did it:

I marked the back of the shirt with chalk lines as placement guides...


...then measured the marked rectangle and did a bit of math to determine how large to cut my pocket fabric.

You can add any seam allowance you like -
I chose 3/8" because that's how wide
my presser foot is on one side. : )

I cut the rectangle (on the cross-grain as it  happens; length-of-grain would also be fine) and basted a line up each side edge to use as a fold guide later:


Using a standard zigzag stitch, elastic was applied to the top edge (wrong side) of the pocket. (A serger would work even better.) I cut the elastic a bit shorter than the edge and stretched it slightly while stitching...


...then folded the edge over and stitched it down, catching the elastic in the stitches.


Then I realized that I'd forgotten to mark the center of the pocket. Oops! (It would have been much easier had I done it before applying the elastic. A lesson for me.)


I pinned the pocket to the shirt, right sides facing, placing the raw edge of the pocket 3/8" in from the bottom line, and matching the edges and the centerline:


...AND being careful to fold the side edges in before pinning, as I planned to topstitch them down later:


Then I stitched across the bottom, 3/8" in from the edge, using a tiny zigzag. Here's the pocket, stitched across the bottom, and flipped right side up to hide the seam:


Next I pinned the pocket down the middle (matching the center marks), and topstitched it to the shirt with a medium zigzag stitch...


...then pinned the sides under and to the shirt (lining them up with the chalk lines), and edgestitched them down with the same medium zigzag. (Sorry, no exciting stitching pictures.)


Lycra is a bit squishy and slippery, and  likes to bunch up under the presser foot sometimes - so my side edge stitching did not come out as perfectly as it could have. (But it was good enough for me.)

And here's my shirt with its new pockets ready to hold my camera case and cell phone.


It's hands-free walking for Mrs. M from now on. : )

P.S. If you'd like to add pockets to a workout shirt, any stretch fabric will do - you could even cut up an old t-shirt. If using a fabric with minimal stretch, I would recommend making a few small tucks across the bottom edge of the pocket before attaching it to the shirt. This will give the pocket some room at the bottom (think of the difference between a flat paper bag and one with a square bottom), and will help prevent stress on the seams. Since I was using a very stretchy fabric I omitted the tucks.

~ ~ ~ ~ ~ ~ ~ ~ ~ ~ ~ ~