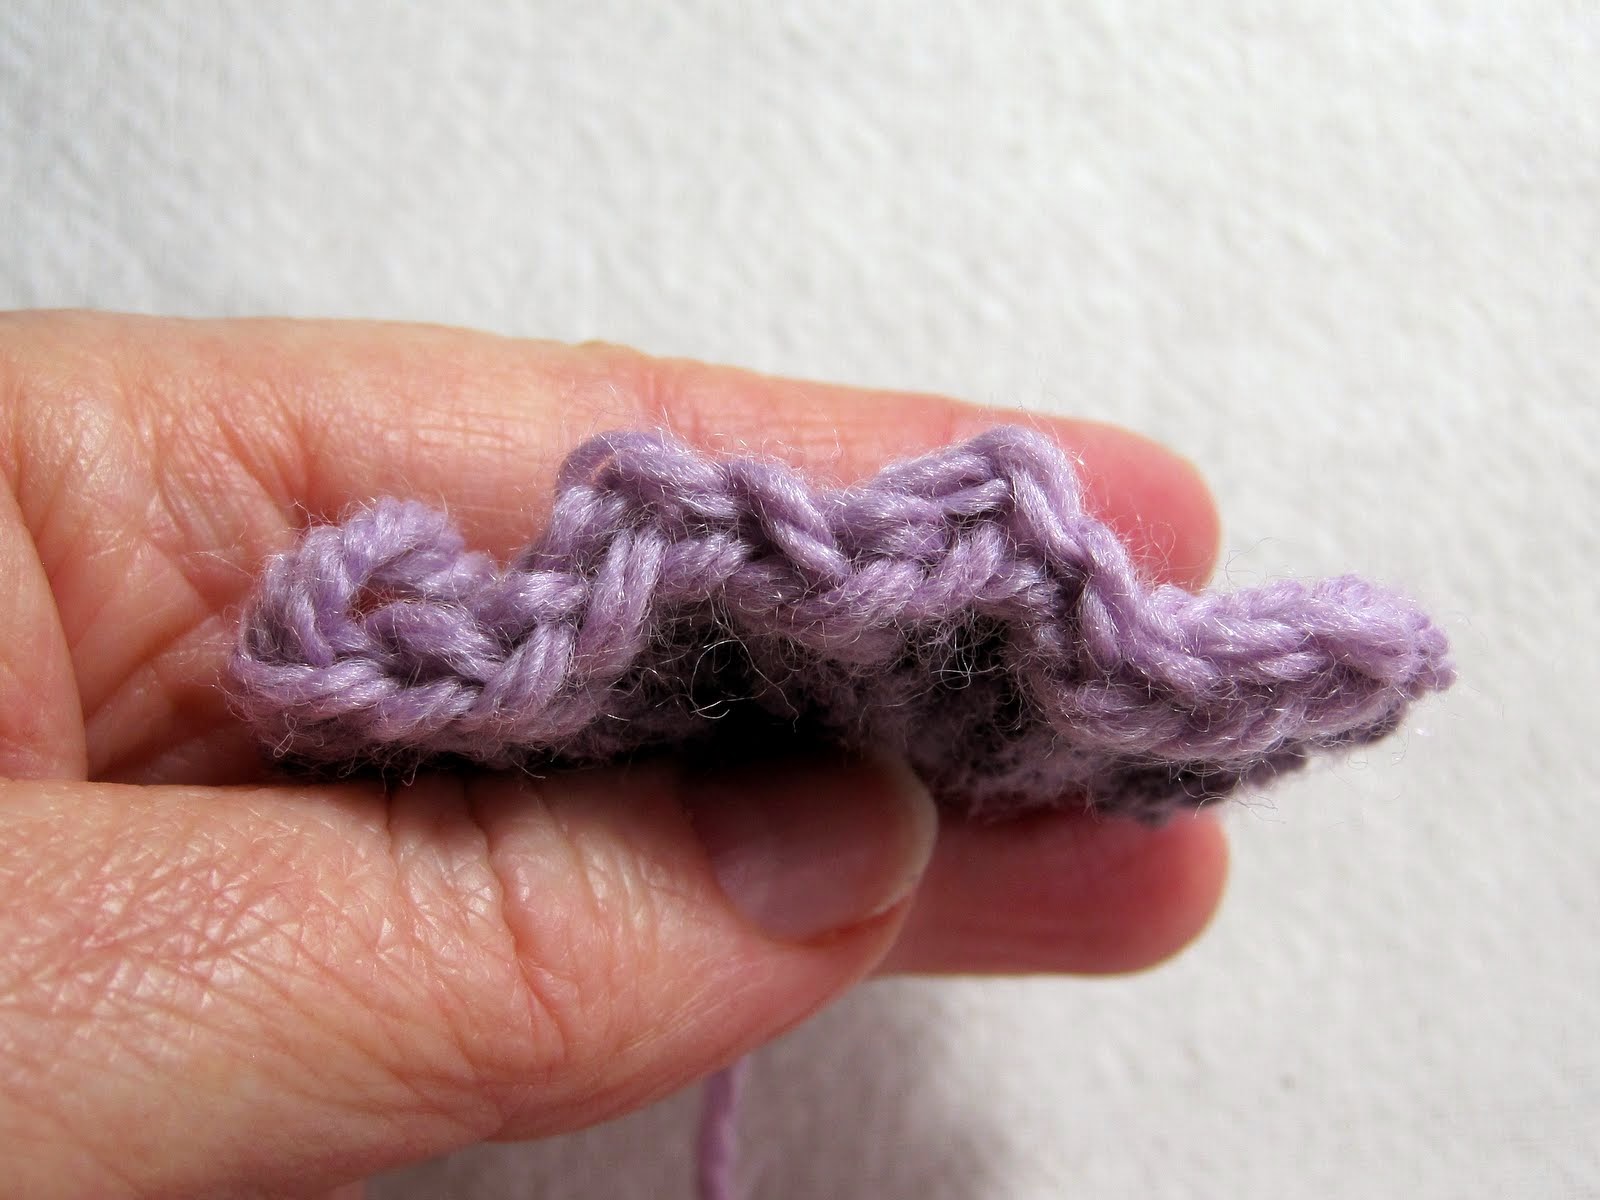
The good news: it still works.
The better news: you CAN use it for ribbing! (Gasps of amazement and delight resound around the knitting globe . . . in Mrs. M's dreams.)
Since the instructions for purling MMABO were not included in the original tutorial, I have included them below, followed by instructions for ribbing, and a video tutorial. For the original MMABO (knitwise) tutorial, click here.
Remember that MMABO works well with a hook that is smaller than your knitting needles.
A Note on Yarning Over
Crochet yarnovers are wrapped in the opposite direction to knit yarnovers. When working MMABO, be sure all yarnovers are made crochetwise. This will give your bind off the maximum amount of stretch and recovery.
To yarn over crochetwise: place the hook in front of the working yarn and scoop under the yarn to wrap yarn over hook.
Purling MMABO
To set up: Using your crochet hook, bind off the first 2 stitches purlwise. Slip the second loop (the one nearest the tip of your hook) through the first.
Holding yarn in front of the work, *insert hook purlwise (from back to front) through the stitch below the loop on your hook (where the working yarn comes out), yarn over and pull up a loop. Still keeping yarn in front of work, insert hook purlwise (from right to left, or left to right if you're working lefthanded) through (front of) next stitch on knitting needle, yarn over, slip stitch off needle (3 loops now on crochet hook), pull yarnover through all loops on hook. Repeat from *.
Note: When slipping the stitch off the needle, you can make the yarnover either before OR after you slip the stitch - it makes no difference. I tend to yarn over before slipping - not sure why..
Using MMABO on Ribbing
Despite its slight chunkiness, MMABO can be used very successfully on ribbing. Here's how it looks:
Binding off ribbing with MMABO is mostly straightforward: knit the knits and purl the purls, with one little tweak....
When using MMABO for ribbing, you need to think of each MMABO stitch as a two-part process:
Part One is when you insert your hook in the stitch below and pull up a loop. Part Two is when you insert the hook into the next stitch on the needle, slip it, then yarn over and pull through all loops on hook.
On both Part One and Part Two, you have a choice of working knitwise or purlwise, BUT:
- No matter how you work Part One, Part Two is what defines your MMABO stitch as a knit or a purl.
- Always make Part One of the new stitch in the same orientation (knitwise or purlwise) as Part Two of the previous stitch. Then finish the new stitch according to what you want it to be: a knit or a purl.
If this seems too confusing, just remember: when starting a new MMABO stitch, look at the way the yarn comes out of the stitch you just made, then insert your hook through that loop in the same direction that the yarn is going.
How about a video? (You thought I'd never ask....)
For enquiring minds who want to know why we match Part One of a new MMABO stitch to Part Two of the previous stitch: it preserves the proper wrap of the yarn and gives maximum stretch to the bind off.
~ ~ ~
If you have any questions, please feel free to ask using the comment box below; you can also email me or contact me in Ravelry (where I'm MrsMicawber).
Thanks for viewing, and happy binding off!
~ ~ ~
Speaking of binding off: what's your favourite bind off, and why?
~ ~ ~ ~ ~ ~ ~ ~ ~ ~ ~ ~


That is so cool that you invented a new thing like that! I came up with a new baby hat pattern and it's on my blog now.. I need testers.. :-) ((hugs)), Teresa :-)
ReplyDeleteAlways such lovely crochet tips here, Sue.
ReplyDeleteI tried to leave a comment on your last blog post, but everytime I started writing in the appropriate place, the whole blog page jumped forward and no comment was left in the space provided. Sometimes I wonder about all these blog quirks and then they get sorted and all runs smoothly again!
Have a wonderful weekend. Sandra
Thank you for your great tutorial I will be trying this. Have a great weekend :) x
ReplyDeleteI think you are a genius, that edging looks really gorgeous.
ReplyDeleteMy very first bind-off was a crochet bind-off because I'd taught myself to knit with two (different-sized) crochet hooks when I was about ten years old. My grandmother had given me a book to learn new stitches, and I didn't know when I flipped one particular page that knitting was the next adventure. You should have seen the look on my grandmother's face when I showed her what I had "crocheted." Got my very own set of knitting needles for the next Christmas!
ReplyDeleteI still revert back to the crochet cast-off sometimes because it is indeed more stretchy. Your tutorial is a great way to teach others this wonderful option! Now if only I could teach my crocheting snowflakers to knit... ;)
This is just brilliant, though I do not know if I could manage it as I knit right handed but crochet left handed...and I am not particularly an ace at either one.
ReplyDeleteDo have a lovely week and thanks for all that you share. You are a treasure.
This is a great tutorial, thanks for sharing! Going to try soon.
ReplyDeleteAmalia
xo