
1. Measure the front or back of your bag BEFORE adding a border or seams.
2. Calculate liner size:
Bag width ____ + 1/2" = ____ (cut liner width).
Bag length ____ x 2 = ____, + 1/2" = ____ (cut liner length).
Cut 2 pieces of fabric to the above measurements (one for the inner and one for the outer liner).
 |
| I thought I had pressed my fabric better than this.... |
My Chicory Square bag was designed for use as a project tote. (Too long have I been carrying crochet in plastic ziplock bags - it was high time I upgraded to something prettier.) So I included an inside pocket, just large enough to hold my craft scissors and a few crochet hooks.
3. For optional inside pocket, first decide how big you'd like it to be. (My finished pocket is 1/2" taller than my crochet hooks and 1" wider than my small craft scissors.)
Desired pocket width ____ + 1/2" = ____ (cut pocket width).
Desired pocket length ____ + 3/4" = ____ (cut pocket length).
Cut 1 pocket piece (or more, if you want more pockets).
4. Cut a pocket flap 2 1/2" tall by 1/2" wider than cut pocket width.

Prepare pocket flap and pocket pieces:
Press both long edges of flap under 1/4". Fold flap in half lengthwise, right sides together, and sew short side edges with 1/4" seam. Turn right side out and press. (Sorry, no photo of this step.)
Serge or zigzag raw pocket side and bottom edges. Hem pocket top with 1/4" double-folded hem. Press sides and bottom under 1/4".
6. Pin pocket to right side of inner bag liner in desired position. Pin 2 small pleats into bottom edge, near corners. (This will give the pocket some depth).
Topstitch down one side, across bottom, and up other side of pocket to attach to liner.

7. Pin flap to liner, with folded edge overlapping top edge of pocket by about 1/4".

Topstitch up one side, across top, and down other side. Be careful to catch both pressed-under top edges in your stitching.

Here I am making sure my scissors and crochet hooks will fit in the pocket....

...and stay in.
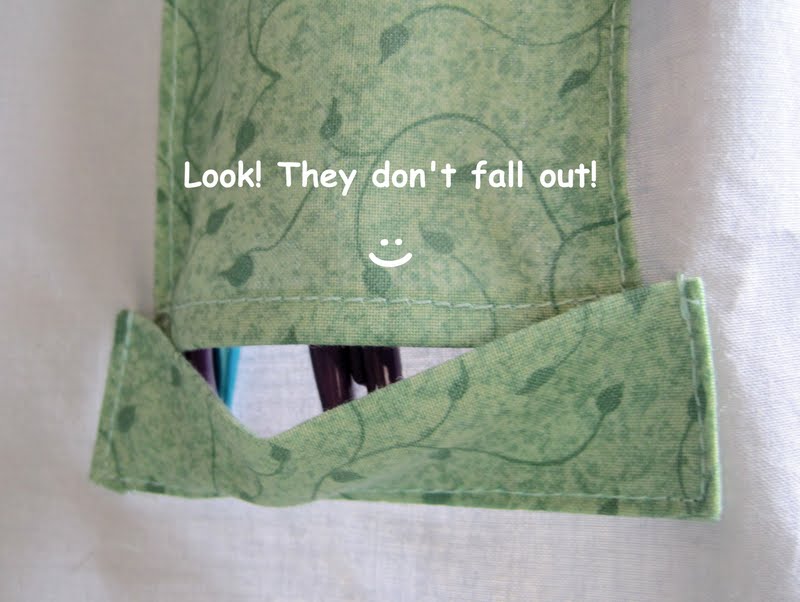
My pocket has passed the gravity test. On to the liner side seams.
8. Fold liner pieces lengthwise (separately), right sides together. Sew side seams in 1/4" seam.

9. Press raw top edges under 1/4". (You could also do this before sewing the side seams - if you do, be sure to hold the pressed edges open as you sew the seams, and re-press them afterwards.)

10. Turn the outer liner right side out, and slip the inner liner into the outer liner, wrong sides together.

Pin the pressed-under edges together...

...then topstitch to secure.

11. Slide the liner into your bag...

...pin into place...

...and get out your needles for a little handstitching.
If you are lucky enough to have a handmade needlebook, stop and admire it for a moment. Mine was a gift from the very talented Claire at Sweet Birdy Love. Isn't it beautiful?

And it just happens to match the bag.

When you're done admiring your needlebook, thread a needle and sew your liner to your bag. I used whipstitches, but you could also use blindstitches or pickstitches.

Open your bag and admire the tidy liner and crafty pocket.

Now pop in some yarn, scissors and hooks, and away you go!


If you have any questions about this tutorial, please feel free to ask using the comment box below.
Thanks for viewing, and happy sewing. And crocheting! :)
~ ~ ~ ~ ~ ~ ~ ~ ~ ~ ~ ~

