
Today we're going to make Version Two, which uses the same crown as Version One - but instead of a roll-brim it sports a wavy-looking slip stitch band...

...with decorative buttons and a detachable buttonhole strip (to increase the cuteness factor):

Like Version One, Version Two has plenty of scope for variations. It would look stunning in 2 or more colours, and you could have all kinds of fun with the colour placement. (For example: one colour on crown, another on band; crown and regular stitch rows of band the same colour, with slip stitch rows in a contrasting colour; detachable buttonhole strip in a contrasting colour.)
You could also double the band rows for a really wide, cable-y looking band.
All stitch terminology is American.
Version Two Band - Vital Stats
For yarn requirements and hook size recommendations for the crown, see the Version One post.
Hook Size Required for Regular Stitch Rows: Same size you used for crown, OR 1 size larger.
Hook Size Required for Slip Stitch Rows: 2 sizes larger than hook used for crown, OR whatever size gives the best stretch while keeping stitches neat and even.
Hook Size Required for Optional Buttonhole Strip: 1 or 2 sizes smaller than the hook you used for crown - whatever will keep the stitches small and tight.
(Hook sizes I used: On the crown, an I/9/5.5mm hook; on the band, a size J/10/6.0mm for the regular stitch rows and a K/10½/6.5mm for the slip stitch rows. For the detachable buttonhole band, a G/6/4.25mm hook.)

~ ~ ~
For the sake of convenience, here's a repeat of the shorthand pattern for the crown. If you want to follow the phototutorial for the crown, click here and you'll be magically transported to the original post.Two Roads Hat Crown Shorthand Pattern
Crown Pattern Notes: Hat is worked in a spiral, so marking the last stitch of each round is recommended. Increases are not the same on every round; read instructions carefully.
(To make a child's size hat, measure the child's head circumference. Stop increase rounds when the crochet circle's edge measures about 1/2" less than the head measurement. Work all following rounds even.)
Stitch abbreviation: Cl (cluster) - sc, dc in indicated st
To start, knotless chain 2. (Click here for a very quick tutorial.)
Right side is facing at all times.
Round 1: Cl 4 in first ch = 8 st.
Round 2: Cl in each st around = 16 st.
Round 3: [Cl in next 3 st, sk 1 st] four times around = 24 st.
Round 4: [Cl in next sc, sc in dc, cl in next 2 sc] four times around = 28 st.
Note: Be careful not to skip over any scs; watch for the places where 2 scs are next to each other.
Round 5: [Cl in next sc, sc in dc, cl in next 3 sc] four times around = 36 st.
Round 6: [Cl in next sc, sc in dc, cl in next 4 sc] four times around = 44 st.
Round 7: [Cl in next sc, sc in dc, cl in next sc, sc in sc, cl in next 3 sc] four times around = 48 st.
Round 8: [Cl in next sc, sc in dc, cl in next 2 sc, sc in next sc, cl in next 3 sc] four times around = 56 st.
Round 9: Cl in each sc around = 64 st.
Round 10, Size S: [Cl in next sc, sc in dc, cl in next 15 sc] two times around = 66 st.
Round 10, Size M,L: [Cl in next sc, sc in dc, cl in next 7 sc] four times around = 68 st.
Round 11: Cl in each sc around = 68 st (S), 72 st (M,L).
Round 12, Size S,M: Cl in each sc around = 68 st (S), 72 st (M,L).
Round 12, Size L: [Cl in next sc, sc in dc, cl in next 17 sc] two times around = 74* st.
Rounds 13 and onward: Work even - cl in each sc around = 68 (72,76) st.
*Correction - originally read 76 (thanks, njsharon on Ravelry for pointing this out). After Round 13, you should have 76 st for a Size Large.
Continue even rounds until hat is desired length. Note: Band is about 2¼" wide; when working crown of hat, stop even rounds when hat is 2-2¼" shorter than desired final length.
~ ~ ~

Two Roads Hat, Version Two Band Chart (first 7 rows only)
 |
| A bit smudgy and wrinkly - taken from my notebook :) |
Two Roads Hat, Version Two, Band Shorthand Pattern
Band Pattern Notes:
- If your slip stitch rows look very loose and sloppy at first, don't worry - they WILL tighten up as following rows are added.
- After every round, stop and check that the band is as stretchy as you want it to be; if it's not, frog the last round (or two or three) and re-work with a larger hook.
- Band is worked back and forth; each round is closed with a slip stitch in the back loop only. When making the final stitch of each round, be careful to place stitch in the proper loop - it may have sunk down into the work and be hard to see. If necessary, place marker in first and last stitch of each round to help identify them.
- When starting a round, do not stitch into the closing slip stitch from previous round. First stitch of each round should be made in the NEXT stitch after the closing slip stitch. (Again, place a marker if necessary.)
- Keep your stitches loose and even; stitches that are too tight will result in a band that is too tight.
- Instructions are for size S (M,L).
Dc/hdctog (Double crochet/half double crochet together) - yo, ins hook into indicated st, pull up lp, yo and pull through 2 lps (2 lps left on hook), yo, ins hook into same st, pull up lp, yo and pull through all lps on hook. (See phototutorial below for video demonstration.)
Starting from final cluster of final crown round, sl st in both strands of next sc. Ch 1, TURN.
Round 1 (WS): Switch to larger hook. Sl st 68 (72,76) around. Join w/sl st. Ch 1, TURN.
Round 2 (RS): Sl st 68 (72,76) around. Join w/sl st. Ch 1, but do not turn.
Round 3, Size S (RS): Switch to smaller hook. Starting in same st, hdc 4, [(sc 4, hdc 4) 8 times] = 68 st. Join w/sl st. Ch 1, TURN.
Round 3, Size M (RS): Switch to smaller hook. Starting in same st, hdc 6, [(sc 4, hdc 4) 8 times], hdc 2 = 72 st. Join w/sl st. Ch 1, TURN.
Round 3, Size L (RS): Switch to smaller hook. Starting in same st, (hdc 4, sc 4) 9 times, hdc 4 = 76 st. Join w/sl st. Ch 1, TURN.
Rounds 4-6: Switch to larger hook. Sl st 68 (72,76) around. Join w/sl st. Ch 1, TURN.
Round 7, Size S (RS): Switch to smaller hook. Keeping stitches loose, sl st 4, [(hdc, hdc/dctog 2, hdc, sl st 4) 8 times] = 68 st. Join w/sl st. Ch 1, TURN.
Round 7, Size M (RS): Switch to smaller hook. Keeping stitches loose, sl st 6, [(hdc, hdc/dctog 2, hdc, sl st 4) 8 times], sl st 2 = 72 st. Join w/sl st. Ch 1, TURN.
Round 7, Size L (RS): Switch to smaller hook. Keeping stitches loose, (sl st 4, hdc, hdc/dctog 2, hdc) 9 times, sl st 4 = 76 st. Join w/sl st. Ch 1, TURN.
Rounds 8-10: Switch to larger hook. Sl st 68 (72,76) around. Join w/sl st. Ch 1, TURN.
Round 11 (RS): Switch to smaller hook. Same as Round 3.
Rounds 12-13: Switch to larger hook. Same as Rounds 4-5.
Cut yarn, leaving 8"-10" tail. Join with invisible join (click here for invisible join tutorial) through both strands of first stitch of this round (do not join to ch-1 turning stitch). Be sure to take yarn tail back down through 2 strands on the wrong side, and then sideways through one vertical strand (see photos below if necessary).
Use yarn tail to sew on buttons. Weave in ends, block if desired, and enjoy!

Detachable Buttonhole Strip Chart
Detachable Buttonhole Strip Shorthand Pattern
Use smallest hook that will work for your yarn.
Knotless chain 3 (click here for knotless chain tutorial); tr in 1st ch. (Ch 3, tr in prev ch-3 sp) twice. Do not turn.
Round 1: In same sp, sc 3; in middle sp, sc 3; in end sp, sc 3, ch 1, sc 1, sc 3 (now working back up opposite side); in middle sp, sc 3; in end sp, sc 3, ch 1, sc 1, join w/sl st to first sc. Ch 1, TURN.
Round 2: Working in front lp only, sl st 3, ch 1, sl st 9, ch 1, sl st 3, ch 1, sl st 9. Cut yarn, and join w/invisible join to first st of round. Weave in ends.
Congratulations - you finished it!

Two Roads Hat, Version Two, Band Phototutorial with Instructions in Plain English
You've just made the final cluster of final crown round.
Slip stitch in both strands of next single crochet,
chain 1, TURN.

Round 1 (Wrong Side)
Switch to larger hook.
Slip stitch 68 (72,76) around. (Don't forget - Back Loop Only!)
Join with slip stitch to first stitch of round (don't forget to join in the back loop only).
Chain 1, TURN.
Be careful when making your joins - the joining stitch and turning chain can look an awful lot like the first stitch of the round. (If you join to one of them by mistake, you'll get extra stitches on the next round - which is Every Crocheter's Nightmare.)
Before we start Round 2, a little warning: Back Loop Slip Stitch curls towards you while you're making it. This means that when you turn your work to do the next round, it will be curling away from you, putting the back loop on the back side of your work. If you have trouble recognizing which loop is the back loop, place a marker of some kind through both strands of a few stitches at the end of each round to help you see where the loops have gone. (Remove the markers as you work the new round.)
Round 2 (Right Side):
Slip stitch 68 (72,76) around.
Join with slip stitch.
Chain 1, but do not turn. (This is the only time you don't turn at the end of a round.)
Round 3 is made with "normal" (non slip stitch) crochet stitches. I switched to a smaller hook for this round, but you can certainly use the larger hook if you like - just keep the stitches firm.
Round 3, Size S (Right Side):
Switch to smaller hook. Remember, back loop only on all stitches.
Starting in same stitch:
half double crochet 4,
(single crochet 4, half double crochet 4) 8 times = 68 stitches.
Join with slip stitch.
Chain 1, TURN.
Round 3, Size M (Right Side):
Switch to smaller hook.
Starting in same stitch:
half double crochet 6,
(single crochet 4, half double crochet 4) 8 times,
half double crochet 2 = 72 stitches.
Join with slip stitch.
Chain 1, TURN.
Round 3, Size L (Right Side):
Switch to smaller hook.
Starting in same stitch, (half double crochet 4, single crochet 4) 9 times,
half double crochet 4 = 76 stitches.
Join with slip stitch.
Chain 1, TURN.
Here's a gratuitous photo showing Round 3 complete, and the start of Round 4. Back loops are marked with dots:
Rounds 4-6:
Switch to larger hook.
Slip stitch 68 (72,76) around.
Join with slip stitch.
Chain 1, TURN.
Tip: Because you're joining your rounds with a slip stitch in the back loop only, you may find that the final stitch of each round is hard to place. The back loop of the previous round's stitch gets pulled by the join and melts down into the work, making it look much smaller than the front loop. This is what has happened in the photo below:
Sometimes the only way to find the back loop is by tugging gently on the front loop and watching to see which strand tightens up when you do (the strand that tightens is the back loop).
So keep your eyes peeled for that disappearing back loop - and if it has shrunk, just pull it out with your fingers or the hook to make room for your final stitch.
This is what your band should look like after Round 6:

Your first "road" is complete, and the band is almost halfway done.
Here's a little video that demonstrates what will happen in Round 7:
Round 7, Size S (Right Side):
Switch to smaller hook.
Keeping stitches loose, slip stitch 4,
(half double crochet 1, double crochet/half double crochet together 2, half double crochet 1, slip stitch 4) 8 times = 68 stitches.
Join with slip stitch.
Chain 1, TURN.
Round 7, Size M (Right Side):
Switch to smaller hook.
Keeping stitches loose, slip stitch 6,
(half double crochet, double crochet/half double crochet together 2, half double crochet, slip stitch 4) 8 times,
slip stitch 2 = 72 stitches.
Join with slip stitch.
Chain 1, TURN.
Round 7, Size L (Right Side):
Switch to smaller hook.
Keeping stitches loose, (slip stitch 4, half double crochet, double crochet/half double crochet together 2, half double crochet) 9 times,
slip stitch 4 = 76 stitches.
Join with slip stitch.
Chain 1, TURN.
Rounds 8-10:
Switch to larger hook.
Slip stitch 68 (72,76) around.
Join with slip stitch.
Chain 1, TURN.
Round 11 (Right Side):
Switch to smaller hook. Same as Round 3.
Rounds 12-13:
Switch to larger hook. Same as Rounds 4-5.
And you're done! (Or very nearly.)
Cut yarn, leaving 8"-10" tail. Join with invisible join (click here for invisible join tutorial), through both top strands of first stitch of this round. (Be sure you don't join to the ch-1 turning stitch!)

To make the join more secure: After you have passed the yarn tail from front to back through the starting stitch, bring the yarn tail back down through 2 strands on the wrong side, and then sideways through one vertical strand (see photos below).


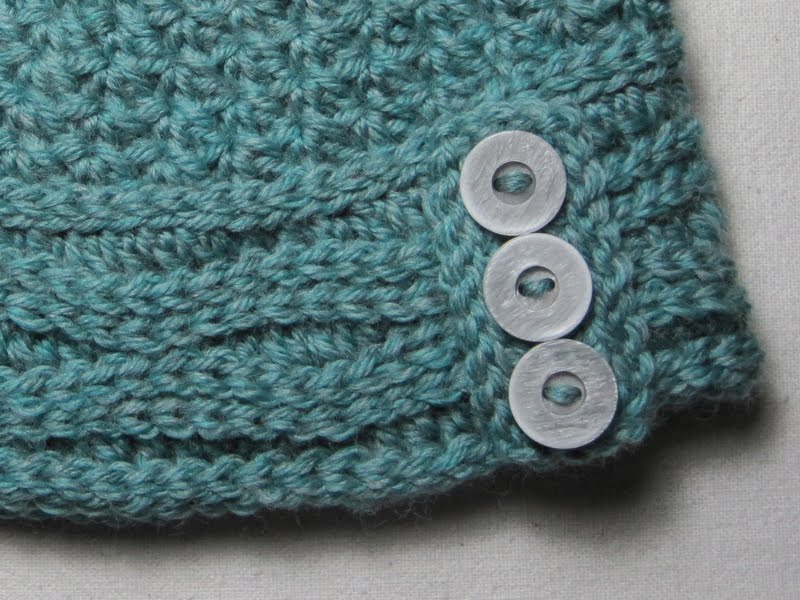
Use yarn tail to sew buttons to right side of band.

Weave in ends, block if desired, and enjoy!
Bonus Phototutorial for Detachable Buttonhole Band
Use the smallest hook that will work for your yarn.
Knotless chain 3 (click here for knotless chain tutorial); treble crochet in 1st chain:

Now (chain 3, treble crochet in previous chain-3 space) twice. Do not turn.
Your work should look like this:

Round 1 (Right Side): Do not turn. In same space, single crochet 3; in middle space, single crochet 3; in end space, single crochet 3...
...chain 1, single crochet 1, single crochet 3 (now working back up opposite side); in middle space, single crochet 3; in end space, single crochet 3, chain 1, single crochet 1,
join with slip stitch to first single crochet. Chain 1, TURN.

Round 2 (Wrong Side): Working in front loop only, slip stitch 3, chain 1, slip stitch 9, chain 1,
slip stitch 3, chain 1, slip stitch 9.
Cut yarn, and join with invisible join to first stitch of round. Weave in ends, flip band over, button onto your new hat, and reflect how quick and easy this little embellishment was. :)

Whew! These Two Roads were longer than I thought they'd be - but I'm glad we travelled down both of them.
If you have any questions, or find any mistakes in the pattern, please feel free to use the comment box below. You may also contact me in Ravelry as MrsMicawber.
You may do whatever you like with the items you make from this pattern, but you may not sell the pattern. If items made from this pattern are sold, please credit the designer. :)
Thanks for viewing, and happy back loop only crocheting!

~ ~ ~ ~ ~ ~ ~ ~ ~ ~ ~ ~
All rows and joins are worked in the back loop only unless otherwise indicated.
Starting from final cluster of final crown round, sl st in both strands of next sc. Ch 1, TURN.
Round 1 (WS): Switch to larger hook. Sl st 68 (72,76) around. Join w/sl st. Ch 1, TURN.
Round 2 (RS): Sl st 68 (72,76) around. Join w/sl st. Ch 1, but do not turn.
Round 3, Size S (RS): Switch to smaller hook. Starting in same st, hdc 4, [(sc 4, hdc 4) 8 times] = 68 st. Join w/sl st. Ch 1, TURN.
Round 3, Size M (RS): Switch to smaller hook. Starting in same st, hdc 6, [(sc 4, hdc 4) 8 times], hdc 2 = 72 st. Join w/sl st. Ch 1, TURN.
Round 3, Size L (RS): Switch to smaller hook. Starting in same st, (hdc 4, sc 4) 9 times, hdc 4 = 76 st. Join w/sl st. Ch 1, TURN.
Rounds 4-6: Switch to larger hook. Sl st 68 (72,76) around. Join w/sl st. Ch 1, TURN.
Round 7, Size S (RS): Switch to smaller hook. Keeping stitches loose, sl st 4, [(hdc, hdc/dctog 2, hdc, sl st 4) 8 times] = 68 st. Join w/sl st. Ch 1, TURN.
Round 7, Size M (RS): Switch to smaller hook. Keeping stitches loose, sl st 6, [(hdc, hdc/dctog 2, hdc, sl st 4) 8 times], sl st 2 = 72 st. Join w/sl st. Ch 1, TURN.
Round 7, Size L (RS): Switch to smaller hook. Keeping stitches loose, (sl st 4, hdc, hdc/dctog 2, hdc) 9 times, sl st 4 = 76 st. Join w/sl st. Ch 1, TURN.
Rounds 8-10: Switch to larger hook. Sl st 68 (72,76) around. Join w/sl st. Ch 1, TURN.
Round 11 (RS): Switch to smaller hook. Same as Round 3.
Rounds 12-13: Switch to larger hook. Same as Rounds 4-5.
Cut yarn, leaving 8"-10" tail. Join with invisible join (click here for invisible join tutorial) through both strands of first stitch of this round (do not join to ch-1 turning stitch). Be sure to take yarn tail back down through 2 strands on the wrong side, and then sideways through one vertical strand (see photos below if necessary).
Use yarn tail to sew on buttons. Weave in ends, block if desired, and enjoy!

Detachable Buttonhole Strip Chart
 |
| Again from the notebook |
Detachable Buttonhole Strip Shorthand Pattern
Use smallest hook that will work for your yarn.
Knotless chain 3 (click here for knotless chain tutorial); tr in 1st ch. (Ch 3, tr in prev ch-3 sp) twice. Do not turn.
Round 1: In same sp, sc 3; in middle sp, sc 3; in end sp, sc 3, ch 1, sc 1, sc 3 (now working back up opposite side); in middle sp, sc 3; in end sp, sc 3, ch 1, sc 1, join w/sl st to first sc. Ch 1, TURN.
Round 2: Working in front lp only, sl st 3, ch 1, sl st 9, ch 1, sl st 3, ch 1, sl st 9. Cut yarn, and join w/invisible join to first st of round. Weave in ends.
Congratulations - you finished it!
Two Roads Hat, Version Two, Band Phototutorial with Instructions in Plain English
- Be sure to read the Band Pattern Notes above.
- Photos are limited as the stitches are pretty straightforward.
- Whatever you do, don't forget that all stitches AND joins are made in the BACK LOOP ONLY unless otherwise indicated.
You've just made the final cluster of final crown round.
Slip stitch in both strands of next single crochet,
chain 1, TURN.

Round 1 (Wrong Side)
Switch to larger hook.
Slip stitch 68 (72,76) around. (Don't forget - Back Loop Only!)
Join with slip stitch to first stitch of round (don't forget to join in the back loop only).
Chain 1, TURN.
Be careful when making your joins - the joining stitch and turning chain can look an awful lot like the first stitch of the round. (If you join to one of them by mistake, you'll get extra stitches on the next round - which is Every Crocheter's Nightmare.)
 |
| Click on photo to enlarge |
Before we start Round 2, a little warning: Back Loop Slip Stitch curls towards you while you're making it. This means that when you turn your work to do the next round, it will be curling away from you, putting the back loop on the back side of your work. If you have trouble recognizing which loop is the back loop, place a marker of some kind through both strands of a few stitches at the end of each round to help you see where the loops have gone. (Remove the markers as you work the new round.)
Round 2 (Right Side):
Slip stitch 68 (72,76) around.
Join with slip stitch.
Chain 1, but do not turn. (This is the only time you don't turn at the end of a round.)
Round 3 is made with "normal" (non slip stitch) crochet stitches. I switched to a smaller hook for this round, but you can certainly use the larger hook if you like - just keep the stitches firm.
Round 3, Size S (Right Side):
Switch to smaller hook. Remember, back loop only on all stitches.
Starting in same stitch:
half double crochet 4,
(single crochet 4, half double crochet 4) 8 times = 68 stitches.
Join with slip stitch.
Chain 1, TURN.
Round 3, Size M (Right Side):
Switch to smaller hook.
Starting in same stitch:
half double crochet 6,
(single crochet 4, half double crochet 4) 8 times,
half double crochet 2 = 72 stitches.
Join with slip stitch.
Chain 1, TURN.
Round 3, Size L (Right Side):
Switch to smaller hook.
Starting in same stitch, (half double crochet 4, single crochet 4) 9 times,
half double crochet 4 = 76 stitches.
Join with slip stitch.
Chain 1, TURN.
Here's a gratuitous photo showing Round 3 complete, and the start of Round 4. Back loops are marked with dots:
 |
| Not sure why I took this photo, but what the heck - let's include it! :) |
Switch to larger hook.
Slip stitch 68 (72,76) around.
Join with slip stitch.
Chain 1, TURN.
Tip: Because you're joining your rounds with a slip stitch in the back loop only, you may find that the final stitch of each round is hard to place. The back loop of the previous round's stitch gets pulled by the join and melts down into the work, making it look much smaller than the front loop. This is what has happened in the photo below:
 |
| Where's the back loop? |
Sometimes the only way to find the back loop is by tugging gently on the front loop and watching to see which strand tightens up when you do (the strand that tightens is the back loop).
So keep your eyes peeled for that disappearing back loop - and if it has shrunk, just pull it out with your fingers or the hook to make room for your final stitch.
This is what your band should look like after Round 6:

Your first "road" is complete, and the band is almost halfway done.
Here's a little video that demonstrates what will happen in Round 7:
Round 7, Size S (Right Side):
Switch to smaller hook.
Keeping stitches loose, slip stitch 4,
(half double crochet 1, double crochet/half double crochet together 2, half double crochet 1, slip stitch 4) 8 times = 68 stitches.
Join with slip stitch.
Chain 1, TURN.
Round 7, Size M (Right Side):
Switch to smaller hook.
Keeping stitches loose, slip stitch 6,
(half double crochet, double crochet/half double crochet together 2, half double crochet, slip stitch 4) 8 times,
slip stitch 2 = 72 stitches.
Join with slip stitch.
Chain 1, TURN.
Round 7, Size L (Right Side):
Switch to smaller hook.
Keeping stitches loose, (slip stitch 4, half double crochet, double crochet/half double crochet together 2, half double crochet) 9 times,
slip stitch 4 = 76 stitches.
Join with slip stitch.
Chain 1, TURN.
Rounds 8-10:
Switch to larger hook.
Slip stitch 68 (72,76) around.
Join with slip stitch.
Chain 1, TURN.
Round 11 (Right Side):
Switch to smaller hook. Same as Round 3.
Rounds 12-13:
Switch to larger hook. Same as Rounds 4-5.
And you're done! (Or very nearly.)
Cut yarn, leaving 8"-10" tail. Join with invisible join (click here for invisible join tutorial), through both top strands of first stitch of this round. (Be sure you don't join to the ch-1 turning stitch!)

To make the join more secure: After you have passed the yarn tail from front to back through the starting stitch, bring the yarn tail back down through 2 strands on the wrong side, and then sideways through one vertical strand (see photos below).


Use yarn tail to sew buttons to right side of band.

Weave in ends, block if desired, and enjoy!
Bonus Phototutorial for Detachable Buttonhole Band
Use the smallest hook that will work for your yarn.
Knotless chain 3 (click here for knotless chain tutorial); treble crochet in 1st chain:

Now (chain 3, treble crochet in previous chain-3 space) twice. Do not turn.
Your work should look like this:

Round 1 (Right Side): Do not turn. In same space, single crochet 3; in middle space, single crochet 3; in end space, single crochet 3...
 |
| Working down one side |
...chain 1, single crochet 1, single crochet 3 (now working back up opposite side); in middle space, single crochet 3; in end space, single crochet 3, chain 1, single crochet 1,
join with slip stitch to first single crochet. Chain 1, TURN.

Round 2 (Wrong Side): Working in front loop only, slip stitch 3, chain 1, slip stitch 9, chain 1,
slip stitch 3, chain 1, slip stitch 9.
 |
| Slip stitching around the edge |
 |
| Ready for the invisible join |
Cut yarn, and join with invisible join to first stitch of round. Weave in ends, flip band over, button onto your new hat, and reflect how quick and easy this little embellishment was. :)

Whew! These Two Roads were longer than I thought they'd be - but I'm glad we travelled down both of them.
If you have any questions, or find any mistakes in the pattern, please feel free to use the comment box below. You may also contact me in Ravelry as MrsMicawber.
You may do whatever you like with the items you make from this pattern, but you may not sell the pattern. If items made from this pattern are sold, please credit the designer. :)
Thanks for viewing, and happy back loop only crocheting!

~ ~ ~ ~ ~ ~ ~ ~ ~ ~ ~ ~
Thank you for your generous offerings of wonderful tutorials! This one is so detailed, I will be making this hat as soon as I wade through my list of slippers, scarves, and wrist warmers for Christmas presents:) Going off to felt slippers now....
ReplyDeleteThanks, Deborah! You are brave to felt slippers ... I'm always afraid something will go awry when it comes to felting. :)
DeleteGreat detailed tutorial and such a pretty pattern! I'm sure that lots of people will be grateful for this pattern! I love the stitches and the detail. I wish that hats suited me - I look terrible in them all except wide-brimmed straw hats!
ReplyDeleteI used to feel the same, but now I wear beanies and berets - anything to keep the ears warm! :)
DeleteI just LOVE this hat!!! thank you for such a detailed tutorial. Your notebook drawings are so useful. Really...thank you so much.
ReplyDeleteYou're welcome, Ana. :)
DeleteOnce again a great tutorial. My crocheting is coming on apace so I really appreciate these tutorial! I will have a go at these shortly. Joan
ReplyDeleteThanks, Joan! I know you could make a nice job of it. :)
DeleteI have to go get yarn now, like today. I want to try these two hats for my DD. I think with your excellent instructions and photos that I van make these.
ReplyDeleteAnyone who can make the quilts you do can certainly crochet a hat like this. :)
DeleteYou are too talented, my friend! 'Increase the cuteness factor'...too funny! Always good to increase the cuteness factor. :)
ReplyDeleteYes indeedy. And I'd better get that blue hat in the mail. It's a gift, you know....
Delete:)
Quick question about the band. Round 3 is right side and round 7 is wrong side... But if I turn after each round, round 7 is the right side again (rnd 4 - WS, rnd 5 - RS, rnd 6 - WS, rnd 7 - RS). So not sure how I should end up on the wrong side for round 7. Same problem again with turns through rows 8-10 - if I am on the WS on rnd 7 then I should end up on WS again for rnd 11 but your instructions state that it is the RS. What am I missing?
ReplyDeleteI'm so sorry! That was a typo - Round 7 IS worked from the right side. I've fixed it now, and thanks very much for letting me know. :)
DeleteWould you believe I didn't notice the waviness of the bands when you teased us during the first pattern? Now they stand out as clear as day!
ReplyDeleteBoy, what in the world was I focused on during part I!!!
I really like the brim on this one. I hope the recipient snaps a shot of herself in it and shares the photo!
Well, you look at crochet all the time. You were probably thinking about how the pattern could be improved with a snowflake embellishment! :)
DeleteI love this! Thank you so much for sharing! And thank you for all the great visuals! I need them!
ReplyDeleteYou're welcome, and thanks so much for commenting. :)
DeleteSuper adorable! I love it. I will have to try this sometime! :)
ReplyDeleteThanks Cogaroo! :)
DeleteThank you for this lovely pattern! I've used it here, if you'd like to see: http://imaginary-butterflies.blogspot.com/2013/08/it-needs-buttons.html
ReplyDeleteThis comment has been removed by the author.
ReplyDeleteI love this stitch!! And it's one hat that actually looks good on me! I'm making my second now--Thank you!!
ReplyDeleteThis is the cutest hat! However, I have not accomplished crochet yet...I am a loom knitter. Is there anyway this pattern could be converted? Thanks
ReplyDeleteOh gosh - I don't think so! But thank you for commenting. You'll just have to take up crochet.... :)
Delete