
"Congratulations to those ladies! But really, those darned sponsors and their commercials...."
Oops, that's not the bit I wanted. Here it is:
"Dear Mrs. M ... do you think you could post a cupcake recipe like the cute one you did with the button on top???"

By all means, Marigold. Anything to oblige a beautiful tan and black Mini-Nubian (with attractive wattles) who regularly leaves complimentary comments on my blog. Be sure to show this pattern to the Goatmother - I think she'll appreciate the no-calorie aspect.
We interrupt this broadcast for a special bulletin:
Catriona, of Black Daisy Designs, check your e-mail!
You were a winner in the Crochet & Chocolate giveaway
and I'd really like to send you your prize.
I hope to hear from you soon.
And now, back to our scheduled programming.
Mrs. Micawber's Calorie-Free Crochet Cupcake
Take some worsted yarn - any worsted yarn - and an appropriate size hook. (The original cupcake bottom was made with scraps of Caron Simply Soft and and H hook; the top was a DK weight yarn held double. For this tutorial I'm using Lion Brand Vanna's Choice and a J hook.)
Round 1: Chain 3 (does not count as a stitch), then double crochet 11 in the first chain.

Join with slip stitch to the first double crochet (don't join to the chain stitch). The slip stitch will count as a stitch in the next round.
Round 2: Chain 1. Single crochet 2 in the same stitch, and in each stitch around, ending with 2 single crochets in the slip stitch from the previous round. You should now have 24 stitches.

Join with slip stitch to the first single crochet. This is the base of your cupcake. Time to start stitching up the sides.
Round 3: Entire round is worked in the back loop only.
 |
| Round 3: Back loop only! |
Chain 1. In the NEXT stitch, half-double crochet 2 (remember, all these stitches should be in the back loop only). Half-double crochet 11 more; half-double crochet 2 in the next stitch; half-double crochet 10. Your last half-double will be made in the slip stitch from the previous round.
Join with slip stitch to the first half-double crochet. You should now have 26 stitches around, all made in the back loop only, which gives you a little ridge at the base of your cupcake.

Rounds 4 and 5: worked through both top loops.
Chain 1. Starting in the NEXT stitch, half-double crochet around. Last stitch will be made in the slip stitch from the previous round. 26 stitches in each round.
Finish Round 5 with an invisible join:
Cut yarn, leaving a 2" tail. Pull yarn up and out of final stitch. Insert hook in next half-double crochet, from back to front.

Pull yarn end through.

Insert hook, from back to front, in back loop only of final half-double crochet (where the yarn end came from)...

...and gently pull yarn end through.
 |
| Look! An invisible join! |
I like to take the excess yarn and pull it through a random strand on the back of the work, just to keep it secure:

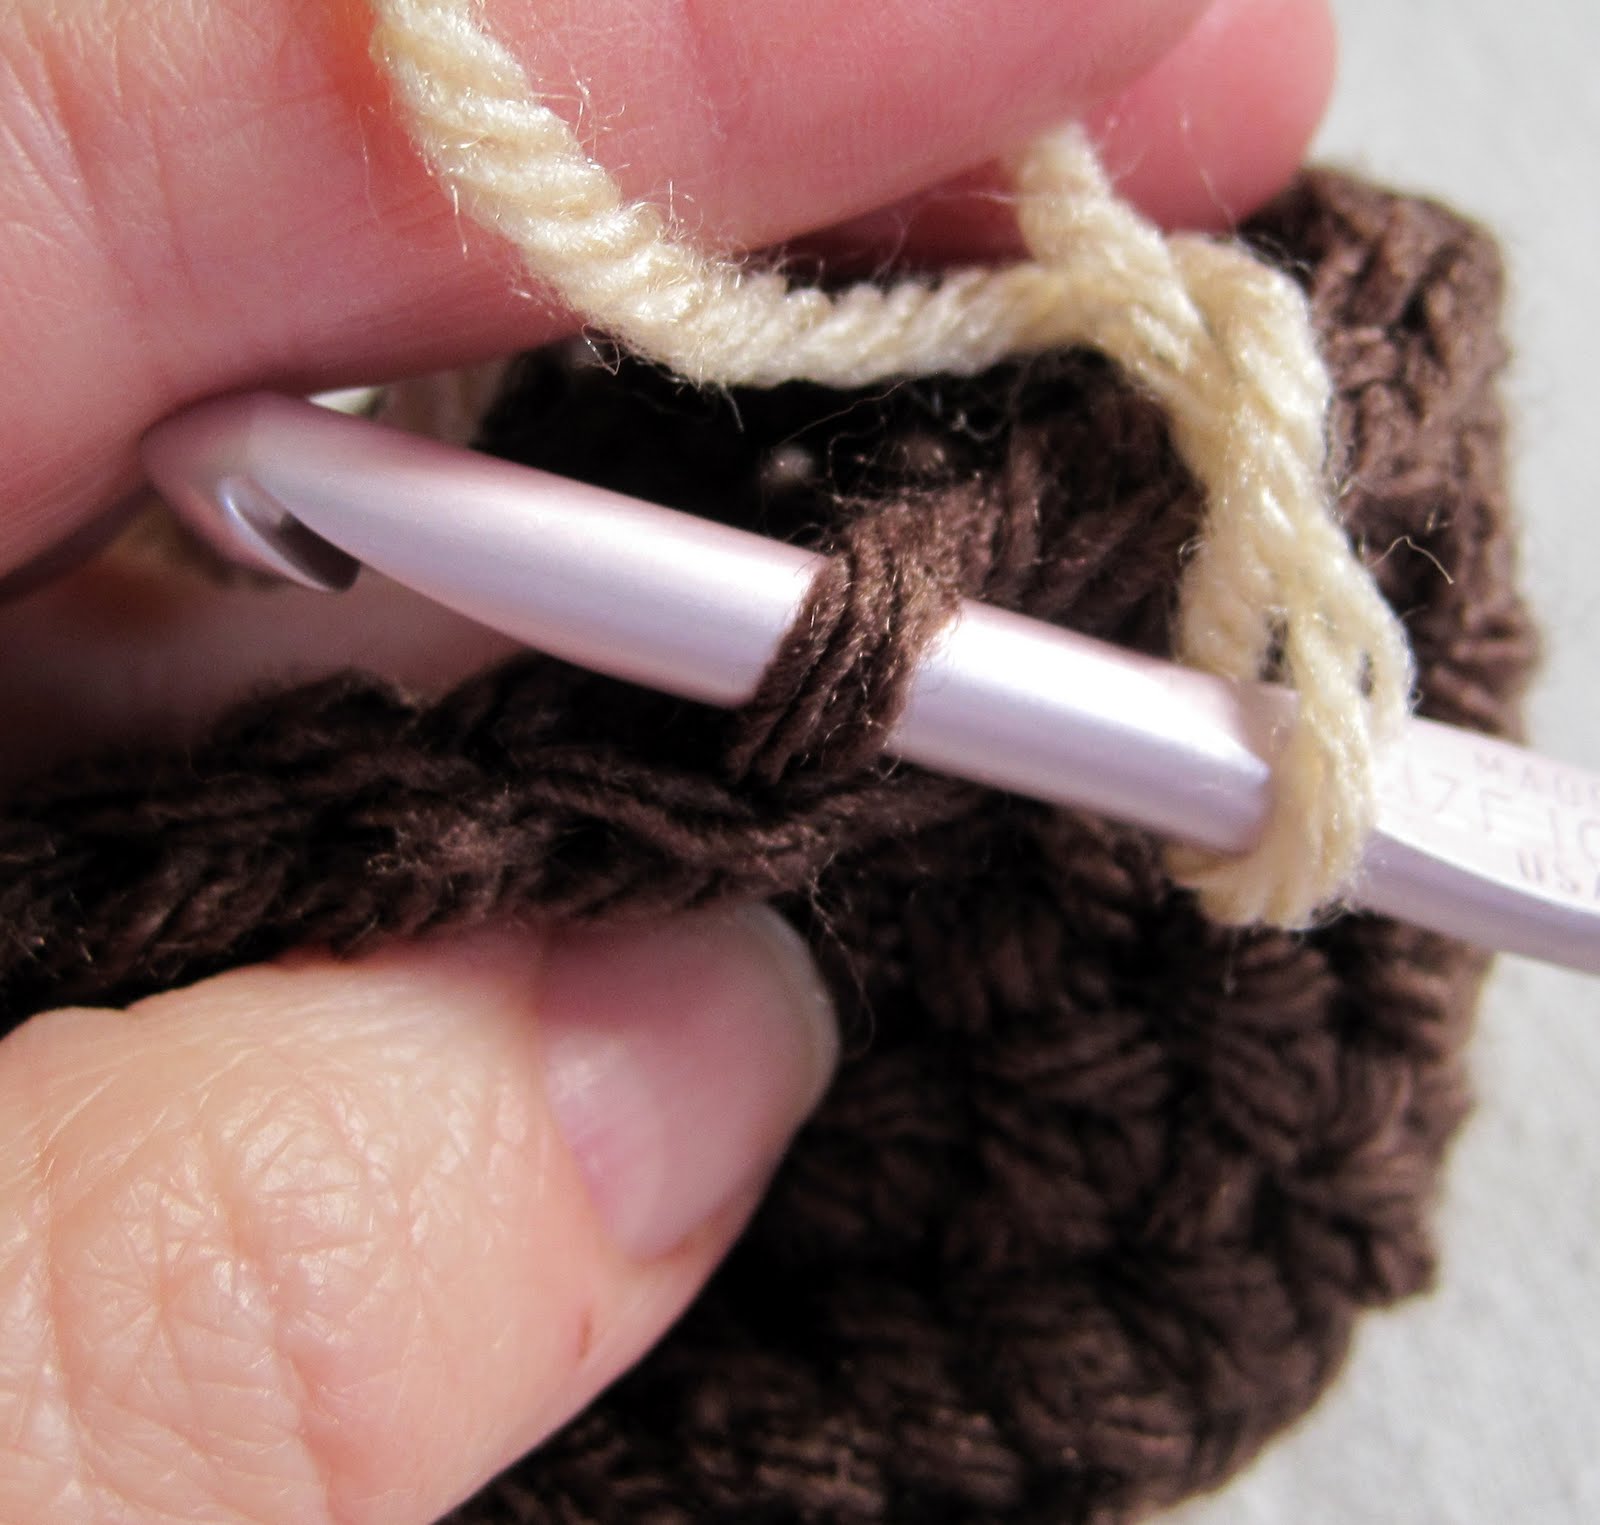
As long as we're looking at the back of the work, take a moment to study the backs of your half-double crochets. There's a horizontal bar of yarn running across each stitch (marked by white dots in the photo above). That's where our next round will be stitched.
Time to put some frosting on our cupcake. (Vanilla for me.)
Round 6: (made in horizontal bars on the back of each stitch)
Attach your frosting yarn with a single crochet to the back bar of any stitch:
 |
| To attach with single crochet, insert hook from front to back and pull up a loop... |
 |
| Then yarn over and pull through both loops to make a single crochet. |
Single crochet around in the horizontal bars, including the slip stitch (which technically doesn't have a horizontal bar, but somehow it worked for me). You should end up with 27 stitches. If you get to the end of the round and only have 26, just make an extra single crochet in the last stitch. (Welcome to Haphazard Crochet with Mrs. Micawber. Missing stitch? No worries! Just throw it in anywhere!)
Join final single crochet to first single crochet with slip stitch.
Round 7: decrease round - watch for abbreviations! (hdc = half-double crochet)
Chain 1. In same stitch, make 3-hdc puff (make 3 partial half-double crochets in the same stitch, then yarn over and pull through all the loops to finish stitch). Your puff stitches will be puffier if you tug on the yarn after pulling through all the loops.
Make 2-hdc decrease over next 2 stitches (partial half-double crochet in one stitch, partial half-double crochet in next stitch, yarn over, pull through all loops on hook).
Continue in this pattern (3-hdc puff, then 2-hdc decrease) around. You should now have 18 stitches around. Join to first puff with slip stitch.

Wow, this cupcake is much bigger than the original! Funny, they're both "worsted weight" yarns, marked #4 - but there's quite a difference in size between them.

Watch out, little guy. I can see the breathless headlines now:
"SHOCKING DISPLAY OF CUPCAKE CANNIBALISM!"

"LION BRAND YARN DEVOURS COMPETITION!"

Okay, enough silliness. After all, crochet is serious business (ahem).
Round 8: still decreasing
Same as Round 7. You should end up with 12 stitches around.
 |
| Round 8 complete |
Round 9: really decreasing now
Chain 1. In same stitch, *make 3-hdc puff, then 3-hdc decrease over next 3 stitches*. Repeat this pattern around, 4 times total. You should end up with 6 stitches.
Now is a good time to stuff your cupcake (before you close the round).
 |
| Filled with delicious, calorie-free whipped polyfill |
When your cupcake is stuffed to your satisfaction, close round with a slip stitch.
Time to finish!
Chain 1, make 3-hdc puff in same stitch...

...then insert hook through opposite stitch (keeping your working yarn to the left of your hook).

Pull yarn through. Cut yarn, tie off, and bury yarn end under the frosting.

Et voilà - one freshly-baked crochet cupcake.

All it needs is a little embellishment...


...and perhaps a cup of tea.
You may do whatever you like with the items you made from this pattern, but you may not sell the pattern.
Thanks for viewing, and happy crocheting!
~ ~ ~ ~ ~ ~ ~ ~ ~ ~ ~ ~
I love your blog and the directions! SO clear and easy to understand. Great pattern.
ReplyDelete-r
Thanks Rachée! I need to hop over and visit you - haven't been for a while. :)
DeleteNow you've gone and made me hungry! Super cute and edible looking!
ReplyDeleteTHANK YOU! THANK YOU! THANK YOU!!!! I am so excited! I think the Goatmother might actually make one of these for me to look at in the barn. It is so cute and I just know it will help to keep my mind off the Peanuts. You don't know how to crochet a Peanut do you? Just asking ....
ReplyDeleteHi. Really enjoyed the crochet recipe. My next challenge this year is to learn to crochet so, hopefully, one day I, too will be able to make some lovely things like you!! Joan
ReplyDeletePurrrrrrrfect! Precious!!! And the no-calorie aspect is simply the icing on the cake. :-)
ReplyDelete“Hath the pearl less whiteness Because of its birth?
Hath the violet less brightness For growing near earth?”
~Thomas Moore
Looks good enough to eat, will give this a go this week.
ReplyDeleteI have that yarn. I have hooks. I am going to try that adorable little cupcake. Thanks for the wonderful tutorial. You do such a great job of explaining things.
ReplyDeleteYour killin'; me with your broadcast interruptions and crochet CANNIBALISM! You always make me smile!
ReplyDeleteHow did I possibly miss this one?!? Must have been in Moab...
ReplyDeleteI love these cupcakes, but I, too, was blown away by the cannibalism!! Thanks for the incredible laugh!!!
What a cute pattern! and you really kept it interesting as I was crocheting along the way, with stuff like cannibalism :) I love love love this pattern, as the frosting looks fluffy with the puff stitch, and how I don't have to sew anything by crocheting the frosting directly onto the cake part!!
ReplyDeleteThanks! I think it looks better in a slightly finer yarn - a bit smaller and tidier. :)
DeleteSo sweet! I love the fluffy frosting...I put a little crochet cherry on top. Thanks for the pattern with very clear instructions and the laughs!
ReplyDeleteThat sounds delicious. :) Thanks for commenting!
Delete